
on-prem only
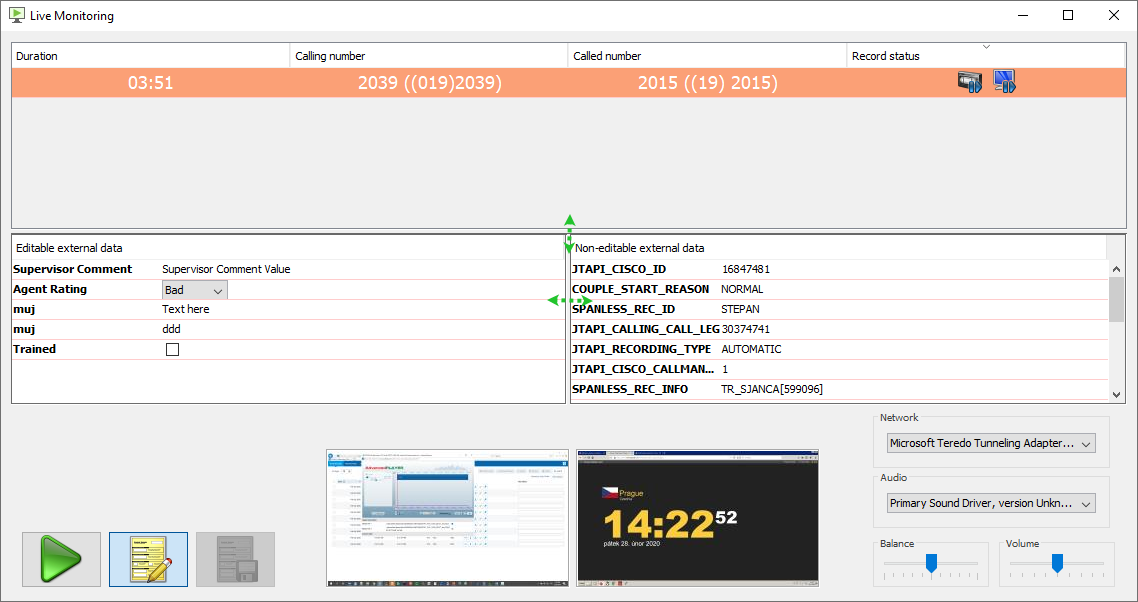
Live Monitoring is a key assessment tool that enables users to monitor agents' calls and desktop screens in real time. It enables the management team to silently listen in on a call or watch a screen with the option of recording the call on demand and then saving the data. While the Conversations screen is devoted to the assessment of saved calls, Live Monitoring is specifically designed to monitor live calls and screens as they occur.
Once downloaded, Live Monitoring is a Java application that is launched by clicking on the Live Monitoring tab in Quality Management.
The use of Live Monitoring functionality is not compatible with the Saved Filters functionality available in Quality Management. Saved Filters are only used for data already fully processed by the Eleveo Server.
Executing Live Monitoring
Log into the Quality Management User Interface and select the Live Monitoring option in the navigation tree. Then click Launch.
Live Monitoring runs as a standalone JAVA application separately from the Internet browser.
Oracle has a subscription-based pricing model for Java SE (Standard Edition). Java SE commercial users must buy a license in order to receive updates.
Prerequisites:
Live Monitoring requires that you have Java Version 21 installed on the desktop.
It also requires OpenWebStart to launch the application from the browser.
Supported Java Versions:
Live Monitoring is a commercial application. The following options are available (as of April 2025) for our customers:
Supported Options:
-
Free / Open Source: OpenJDK 21 + OpenWebStart
-
Commercial (paid): Oracle JDK + OpenWebStart
Unsupported Options:
-
JDK 9 (Oracle or OpenJDK) - Not supported Java Version
-
JDK 10 (Oracle or OpenJDK) - Not supported Java Version
Trusted Certificate imported to Windows Keystore
Import your certificate into your Windows Keystore before launching the Live Monitoring Client application.
Executing Live Monitoring
To run Live Monitoring: (if Oracle JDK 21 is already installed, skip Step 1)
Step 1 - Install OpenJDK 21
-
Download and install OpenJDK 21.(JRE version is sufficient)
An easy solution is to utilize a prebuilt version provided by the Adoptium Working Group project: https://adoptium.net/temurin/releases/
Select your OS and JRE Version 21.
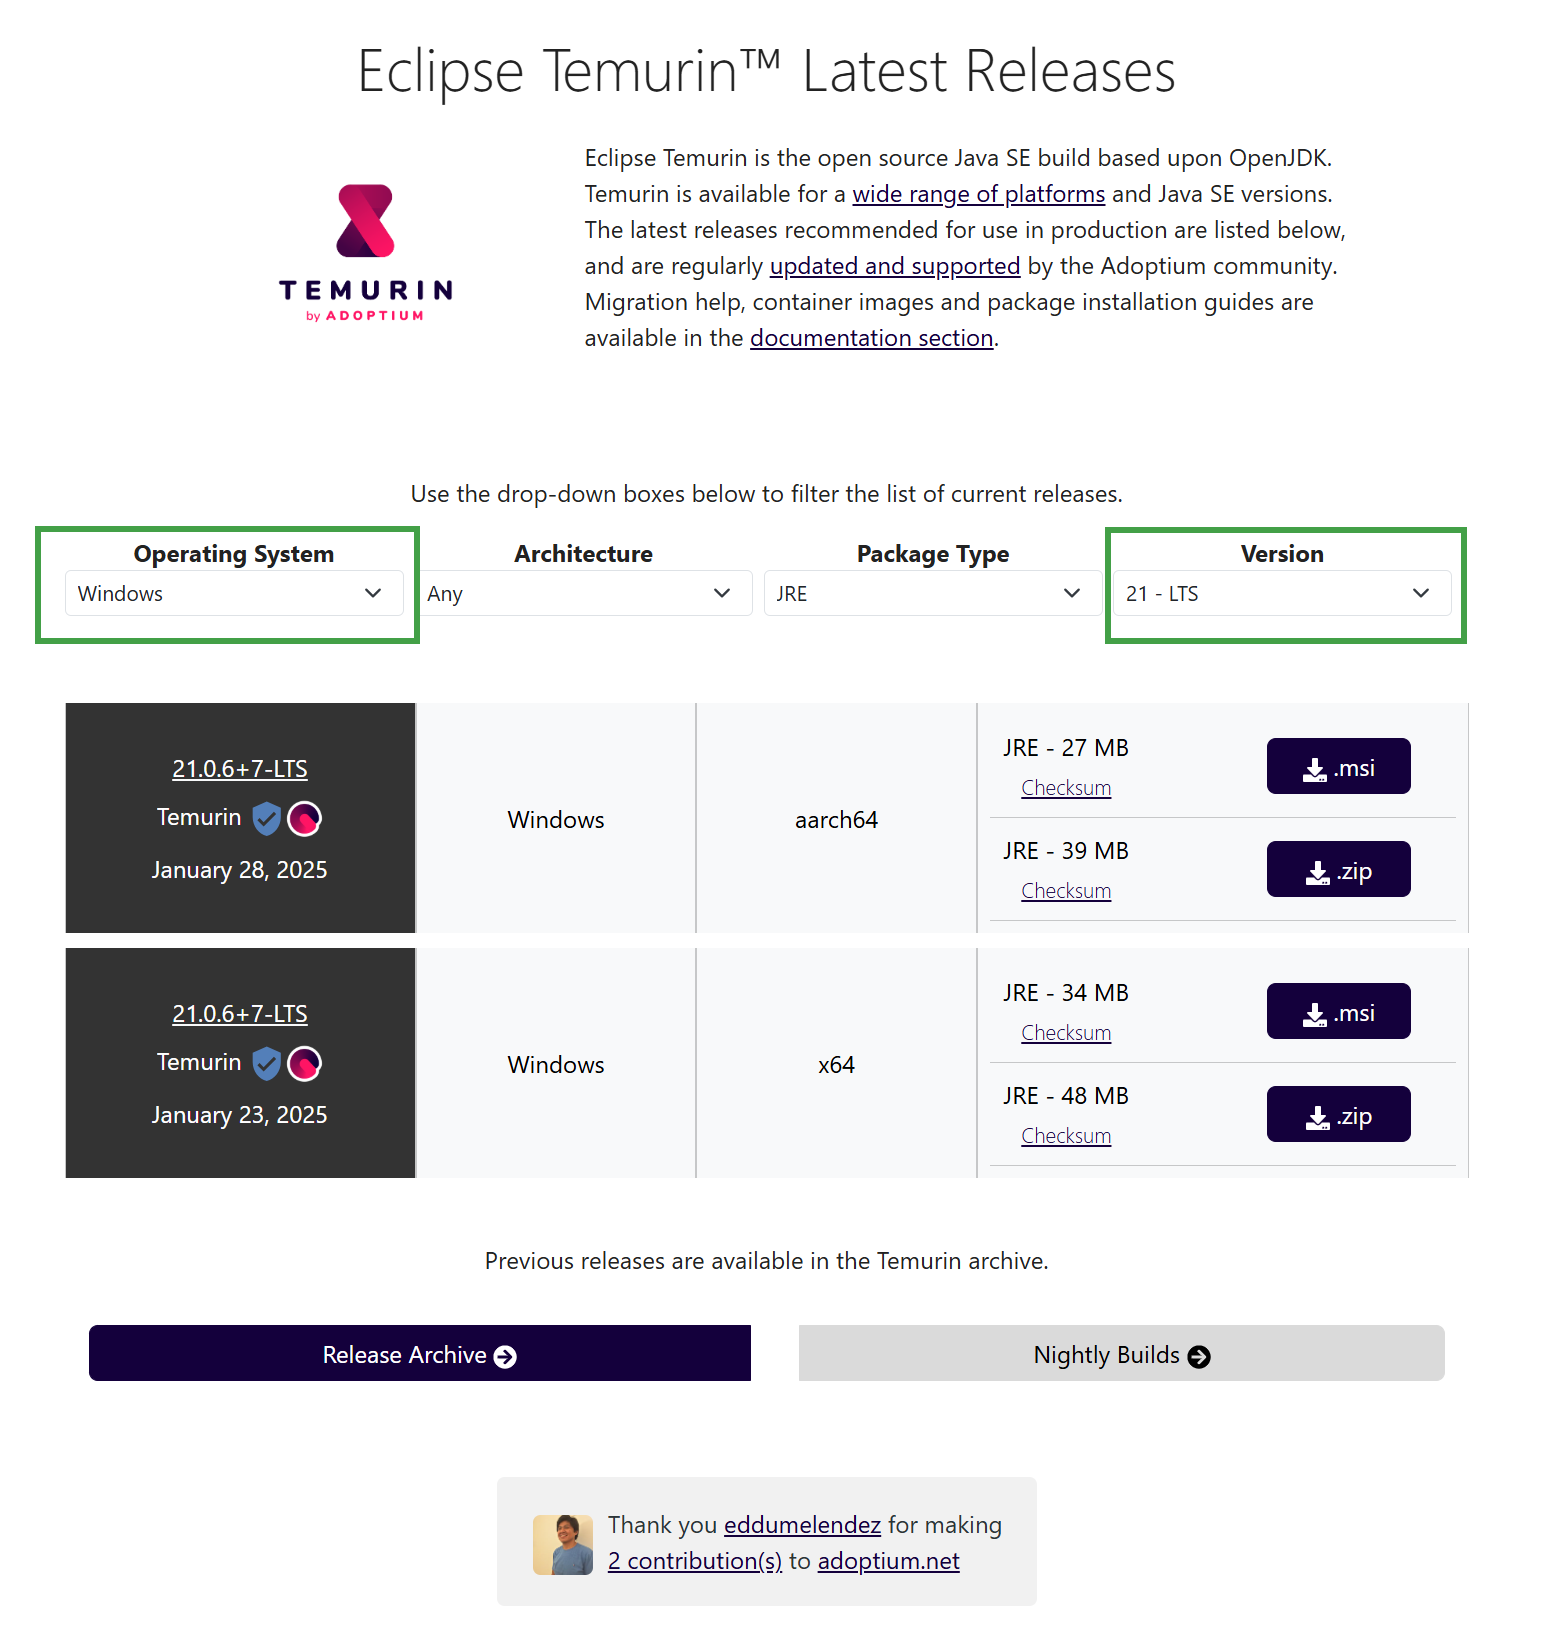
Make sure you are downloading Open JRE Version 21* with the correct build for your platform - in most cases, it is going to be Windows x64.
Run the installer and follow the required steps.
Step 2 Install OpenWebStart
Download the Windows installer from: https://openwebstart.com/download/
Run the installer and follow the required steps.
Step 3 - Run Live Monitoring
Click on Live Monitoring Launch button in the Eleveo interface. A prompt appears to download and open the application.
This will download the JNLP file. If the browser asks what program should be used to run the extension, pick OpenWebStart.
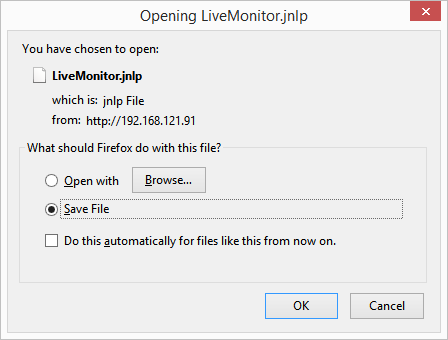
Click OK. A security warning displays.

If the user does not have sufficient permission, they may have to contact the system administrator.
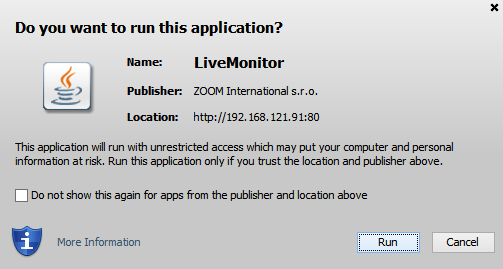
Click Run.
The Live Monitoring User interface opens.
Depending on system settings, it may take a few moments before Live Monitoring launches.
Note – You may encounter a security warning (or more) The website's HTTPS certificate cannot be verified. Do you want to continue? This message is dependent on how your administrator has configured the server. Click accept or run to proceed.
Adjusting Network Settings (Both JDK Versions)
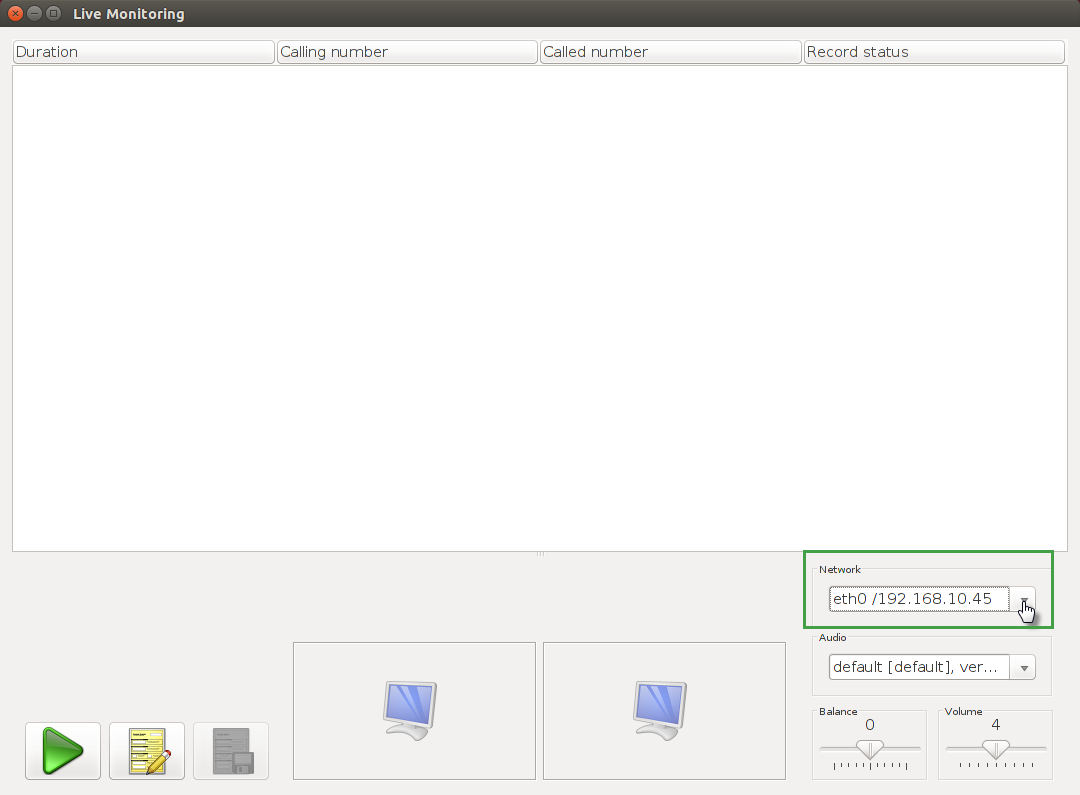
If there is more then one network interface on the workstation, define the network interface to which the streams will be sent to. This configuration must be done after the first launch of the Live Monitoring client, but can be changed at any time in the future.
-
Launch the Live Monitoring client.
-
Go to the Network drop-down box.
-
Select the network interface of your choice.
Listening to Live Calls
Supervisors require the following permissions in order to view calls of Agents who are members of their Teams LIVE_MONITOR_VIEW and INTERACTIONS_FULL_VIEW. The range of calls is identical to the scope of calls the supervisor is entitled to see within the Conversation Explorer except for their own calls which aren't displayed in Live Monitoring.

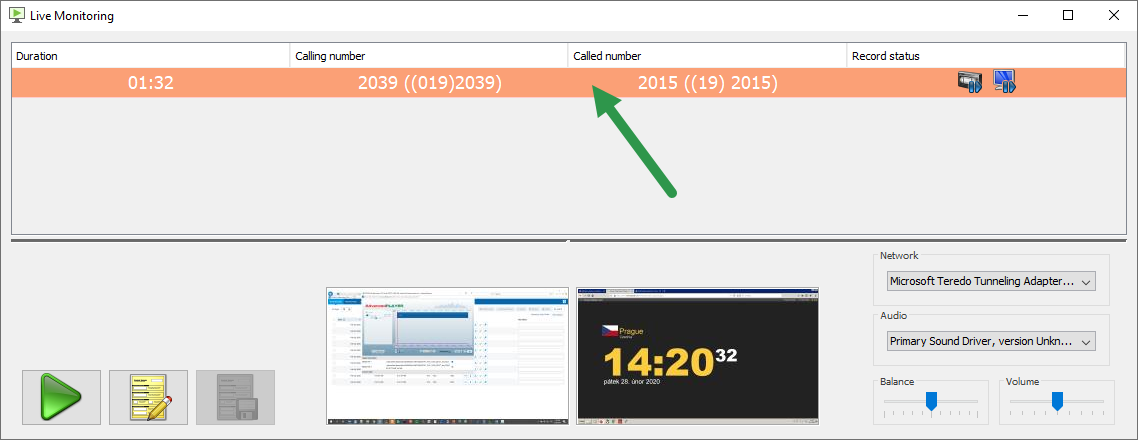
After Live Monitoring is launched, a list of all live calls of Agents that the Supervisor is entitled to monitor is displayed. As new calls, within the monitored extension range are initiated, they are added to the list. Terminated calls disappear from the list within ten seconds, unless they are selected by the user. Each recorded or prerecorded segment within the monitored extension range in a conference call displays as a separate row. The list of displayed calls can also be narrowed down by using the Record status filter or by applying other filters.
To listen to a call:
-
Click a row in the list to select a call to monitor. The row for the selected call turns orange.
-
Click on the user interface to play the call. Alternatively, double-click the row with the call.
In both cases, Live Monitoring plays the conversation. -
When playing the call, play icon is replaced by stop icon. To stop listening to the call click on stop icon or select another call.

Adjust the call Balance and Volume as appropriate.
Once a call is selected, it stays selected even if the call terminates. This allows the supervisor the time needed to view any external data or to add a comment. However, the call is not available in the Conversation Explorer list until it is deselected.
-
To deselect the call press Ctrl + click the call row and select any other call, or click below the list in the empty space immediately above play icon, notes icon and save notes buttons.
Please note, that the Live Monitoring / Screen Capture applications depend on actual call recording status. A call isn't available for Live Monitoring / Screen Capture while the call recording is being paused either manually or automatically.
Viewing Screen Captures
If there are screen captures available then the row associated with the call displays. ![]()
-
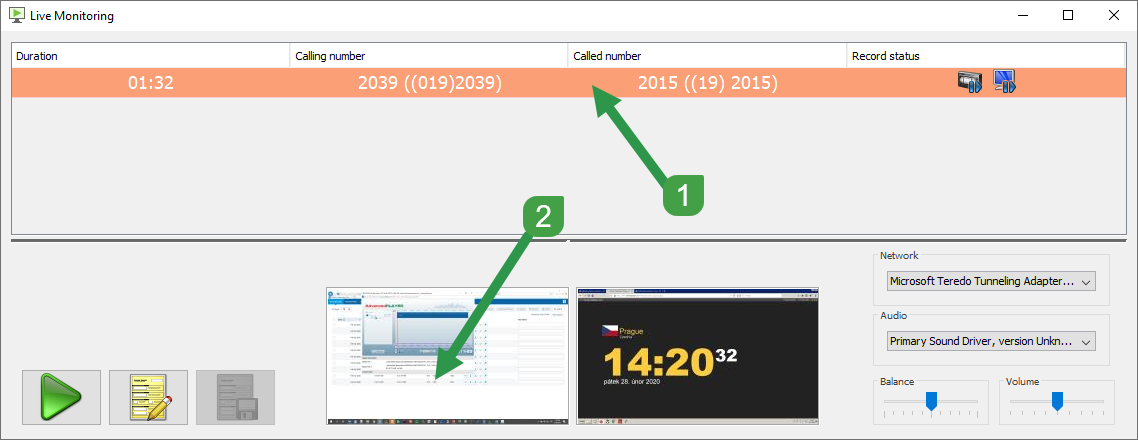
Click the row in the list to select the call to which you would like to monitor. The row for the selected call turns orange. The thumbnails for the screen capture display below the call list. If thumbnails are disabled in order to reduce bandwidth, but there are screen captures available, then the Captures Available icon displays where the thumbnails normally display. If an agent is talking to a customer or another agent's screen is not captured the Not Capturing Screen icon displays in place of the thumbnail for that side.
-
Double-click the thumbnail or on the user interface to play the call and view the screen captures. The video player displays a larger view of the screen capture chosen by the user.

When viewing the images in the video player the following options are available:-
Re-size the viewer by dragging the edges.
-
Double click the viewer to see the open the video in full size. The dimensions displayed depend on the shape and size of the monitor from which it originated.
-
Double-clicking the other thumbnail, if available, stops displaying the first agent's desktop and starts displaying the other agent's desktop.
-
-
To close the player click exit. When closing the video player, the position, aspect ratio, and size are stored so that when the player is reopened, the image position, aspect ratio, and size remain the same.
-
To deselect the call press Ctrl + click the call row, select any other call, or click below the list in the space immediately above the play icon, notes icon and save notes buttons.
Saving Live Call Recordings and Prerecording
Live Monitoring provides a feature of on demand recording. This section describes the usage of it.
Live Monitoring Recording Statuses
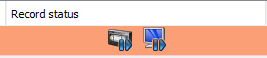
Live Monitoring displays the current call recording statuses for each call within the call monitoring GUI. The status shown depends on the recording rules configured on your Eleveo server.
-
The saved recording icon indicates that the voice part of the call is being recorded and will be permanently stored on your server for later playback.
-
The prerecording call or Screen icon indicates that a call is being prerecorded and can be permanently saved on the server for later playback.
-
The capturing screen icon indicates that the screen is being captured.
-
The not recording call icon header indicates that the call is not being recorded and so cannot be saved.
-
The not capturing screen icon indicates that the screen is not being captured and so cannot be saved.
Saving Prerecorded Calls
Click the prerecording icon to save the call. ![]()
The icon changes to the saved recording icon indicating that the recording will be permanently stored on your Eleveo server for later playback. ![]()
If you select a call, the call will be locked by Live Monitoring so you can work on it without worrying that it will disappear from the Live Monitoring window after call is finished. The call will stay locked and will not be saved to the database and visible in Eleveo until you deselect it.
To deselect the call press Ctrl + click the call or select any other call.
Please note that as soon as the call disappears from Live Monitoring you will not be able to change the recording status for it using the Live Monitoring. There is another similar feature called On Demand Prerecording that provides changing the record status of the calls directly from the phone. In this feature you have a configurable timeout during which you can still decide to change the record status of your calls. For more information refer to the (10.0) On Demand Prerecording page.
Viewing External Data in Live Monitoring
To view the external data related to the call:
-
Select a call from the list.
-
Click the notes icon to display the external data. This displays both editable and non-editable external data information panes.
If necessary drag the dividers between the external data types and the call to view more data.
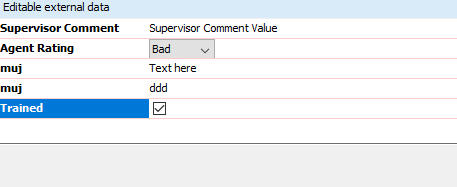
Adding Editable External Data to Live Calls
Additional data added to a call stays with the call and can be used to evaluate agents or add notes about the conversation.
Custom data fields can be added to Live Monitoring by the system administrator. The administrator must enable External Data Customization in order for these fields to be editable.
-
Select a call from the list by clicking the row with the call. The row turns orange.
-
Click the notes icon to display the external data.
-
Add Supervisor comments, select from the available drop-down lists, or select the appropriate check boxes.
-
To save the changes, click the save notes button.
When the call is recorded this data is available in both Call Recording and Quality Management and can be used for filtering and searching for calls.
Once a call is selected it stays selected even if the call terminates. This allows the supervisor time to view the external data or to add a supervisor comment. However, the call is not available in the Conversation Explorer until it is deselected.
To deselect the call press Ctrl + click the call row, select any other call, or click below the list in the space immediately above the play icon, notes icon and save notes buttons.
Play icon ![]()
Notes icon ![]()
Save notes icon ![]()
Filtering Live Calls
Change the display of Live Monitoring by right-clicking a column heading. Enter a filter, such as a phone number or an agent name, and display only the matching calls in the list.
As an example – by entering 56* in the header section "Calling number" the system will display all calls where the calling number starts with 56
The filter will return a range or an exact match to its entry. So you can filter out a range or an exact number or a group of numbers by using the so-called wildcards.
To clear column display settings and return to viewing all available calls right-click a column heading and then press Enter on the keyboard.
Setting duration thresholds:
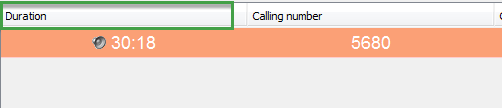
The Duration column displays calls by how long they have remained connected. To screen out longer or shorter calls the user can change the Duration threshold. Right-click on the Duration column heading.
Select Less than < or Greater than > and enter the number of minutes. Click … to apply the Duration threshold.
Only calls under or over the threshold display in the Live Monitoring call list.
Should the call duration not be displayed at all, it's primarily due to time desynchronization between the server and the workstation running the Screen Capture client. In such a case, make sure that the Windows time is synchronized against the same NTP service as the Recording Server.
Displaying Calls by Record Status
By default Live Monitoring displays all calls according to the "Filter displayed calls" drop-down value set in General Configuration. By default "Show all" is set.
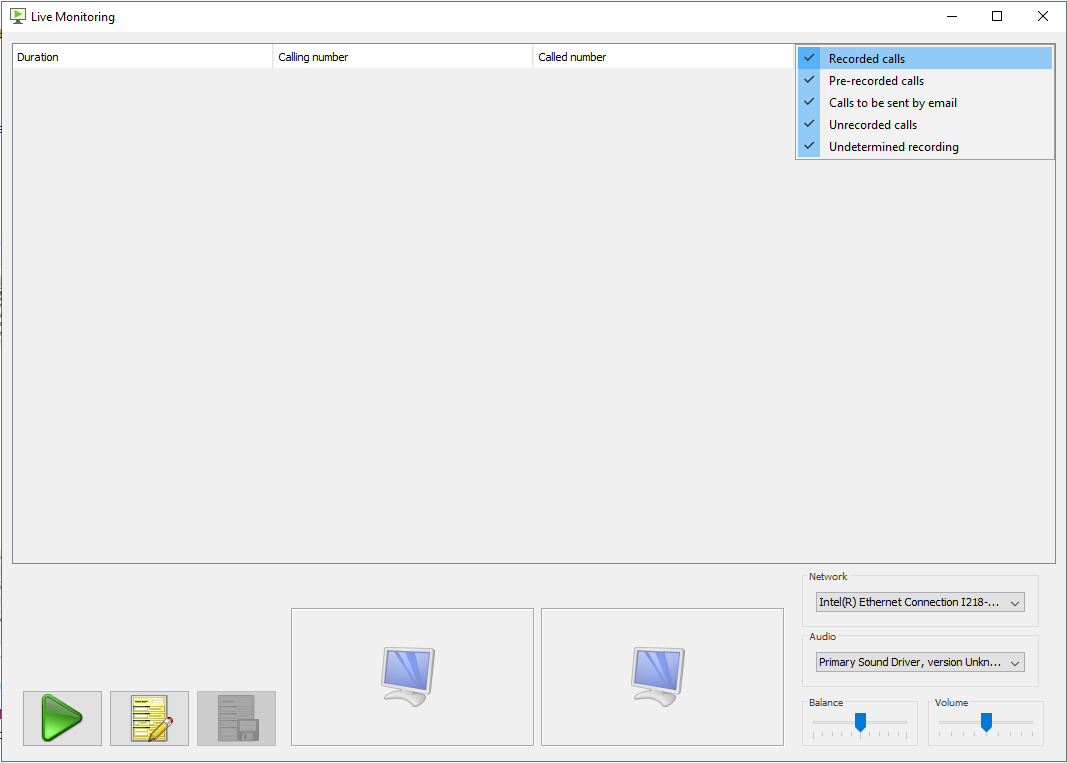
To change the display to only show calls with a specific recording status right click on Record status. A drop-down list appears with the following options:
-
Recorded calls All recorded and saved prerecorded calls will be displayed.
-
Pre-recorded calls All prerecorded calls will be displayed.
-
Calls to be sent by email
-
Unrecorded calls All unrecorded calls will be displayed.
-
Undetermined recording All undetermined and all Queued to determine recording calls will be displayed.