
-
Purpose of this guide: In order to integrate with Eleveo it is necessary to be able to use the Cisco Webex Contact Center (WebexCC) API, enable Webex Contact Center SSO and configure Webex CC Integration for User and Data Import. This document guides you through the whole process for all three purposes.
-
Audience: Customer, partner, or other professional responsible for the Cisco WebexCC platform.
-
Previous steps: Before starting, please get in touch with Eleveo Support in order to understand the Eleveo Cisco WebexCC Integration for Media Capture.
-
When: These steps are required when you want to configure the Cisco WebexCC platform to integrate with the Eleveo solution.
-
Next steps: It is necessary to follow the steps Configuring ETL Management for User Import From Cisco Webex Contact Center, Configuring ETL Management for Data Import From Cisco Webex Contact Center and Configuring Webex Contact Center as Identity Provider on the Eleveo server. The Eleveo Support Team will configure the Cisco Webex Contact Center Integration for Media Import in case of Installation Project.
In order to be able to retrieve the recordings from the Webex server at all, the feature flag wxcc_rtms_split_recordings must be activated so that the recordings can be downloaded via the admin access token. As this configuration is not accessible to Cisco tenants, you are asked to request the activation of this flag from your CSM/Account Manager.
Prerequisites
Before proceeding, ensure that you have the following information available
-
FQDN of the Eleveo Replay server (for On-Prem Installation) or the Eleveo Tenant ID (for Cloud or Hybrid installations).
Dont know your tenant name?
-
To find your tenant name(also known as Realm), ccmanagers or administrators with the role
manage-settingscan log into User Management. Go to:
1. User Management
2. Tenant
3. Tenant Settings
4. Copy the TenantID (this is equivalent to Realm name).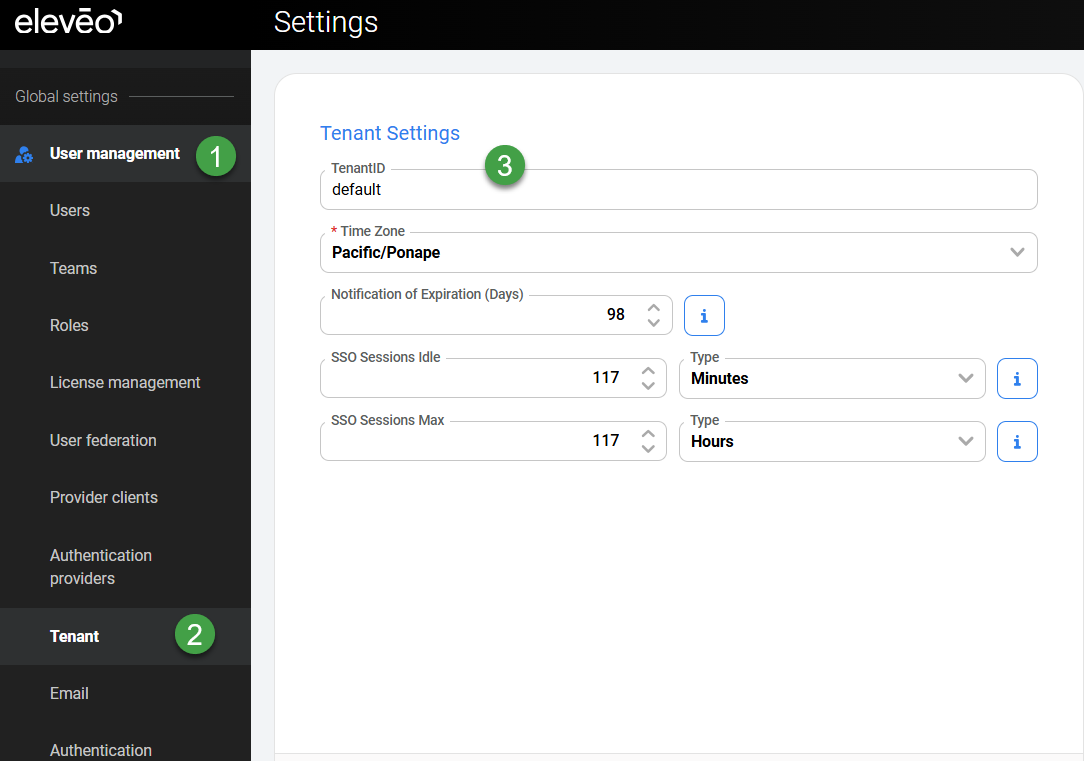
-
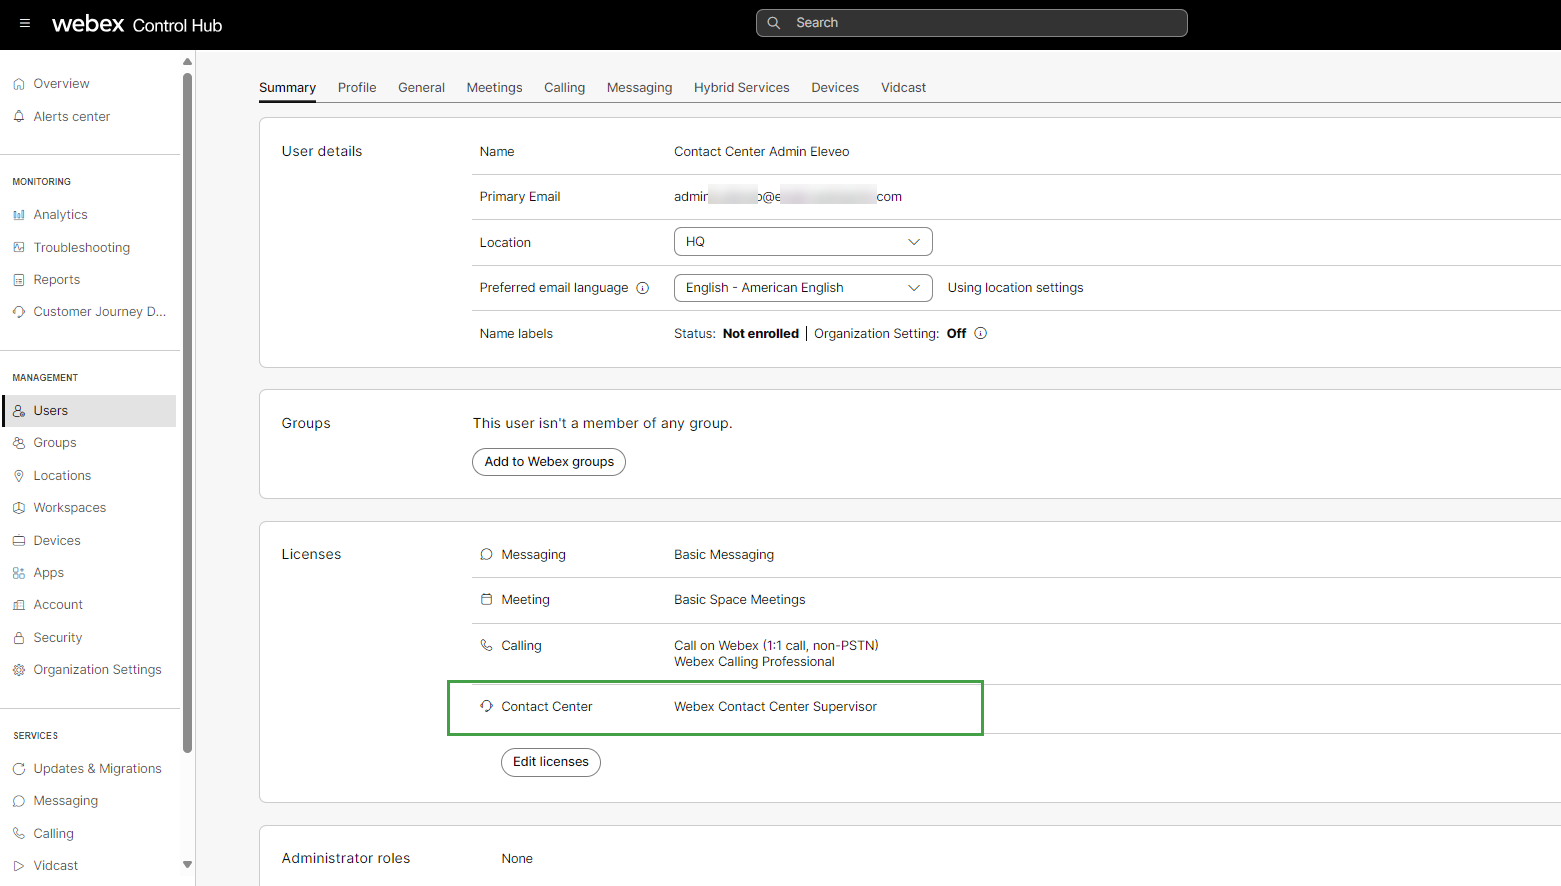
Rights to modify/create users within the Webex Control Hub.
Registering a New Client in Webex Contact Center
To register an integration with the Webex platform, several steps are required. We need to request permissions on behalf of the other CX user, which is done securely via the OAuth standard. Please note that you will need the cooperation of an IT employee on the customer side for this step. The procedure described below is carried out by a customer representative. The customer representative will also be required later to authorize access. This step only needs to be carried out once during installation.
Further information can be found on the Cisco website: https://developer.webex.com/webex-contact-center/docs/authentication-cc
Create a user in the Webex Control Hub and assign them the role Contact Center Administrator. This will be a dedicated user for this integration.
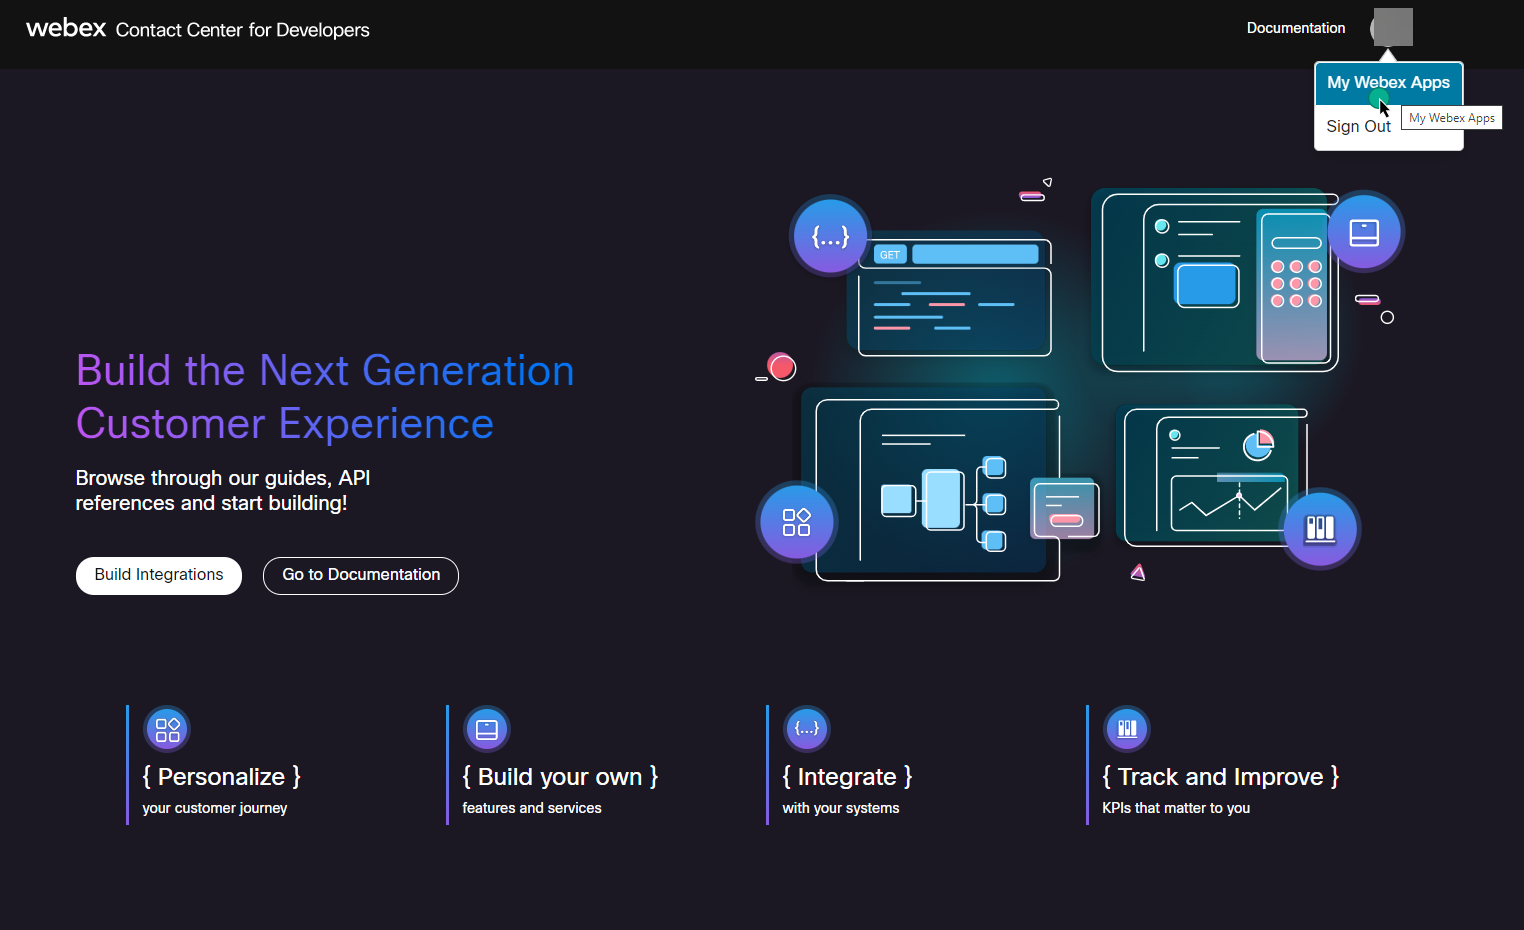
Log in to the Webex Developer Portal at the URL https://developer.webex.com/ with this user account.
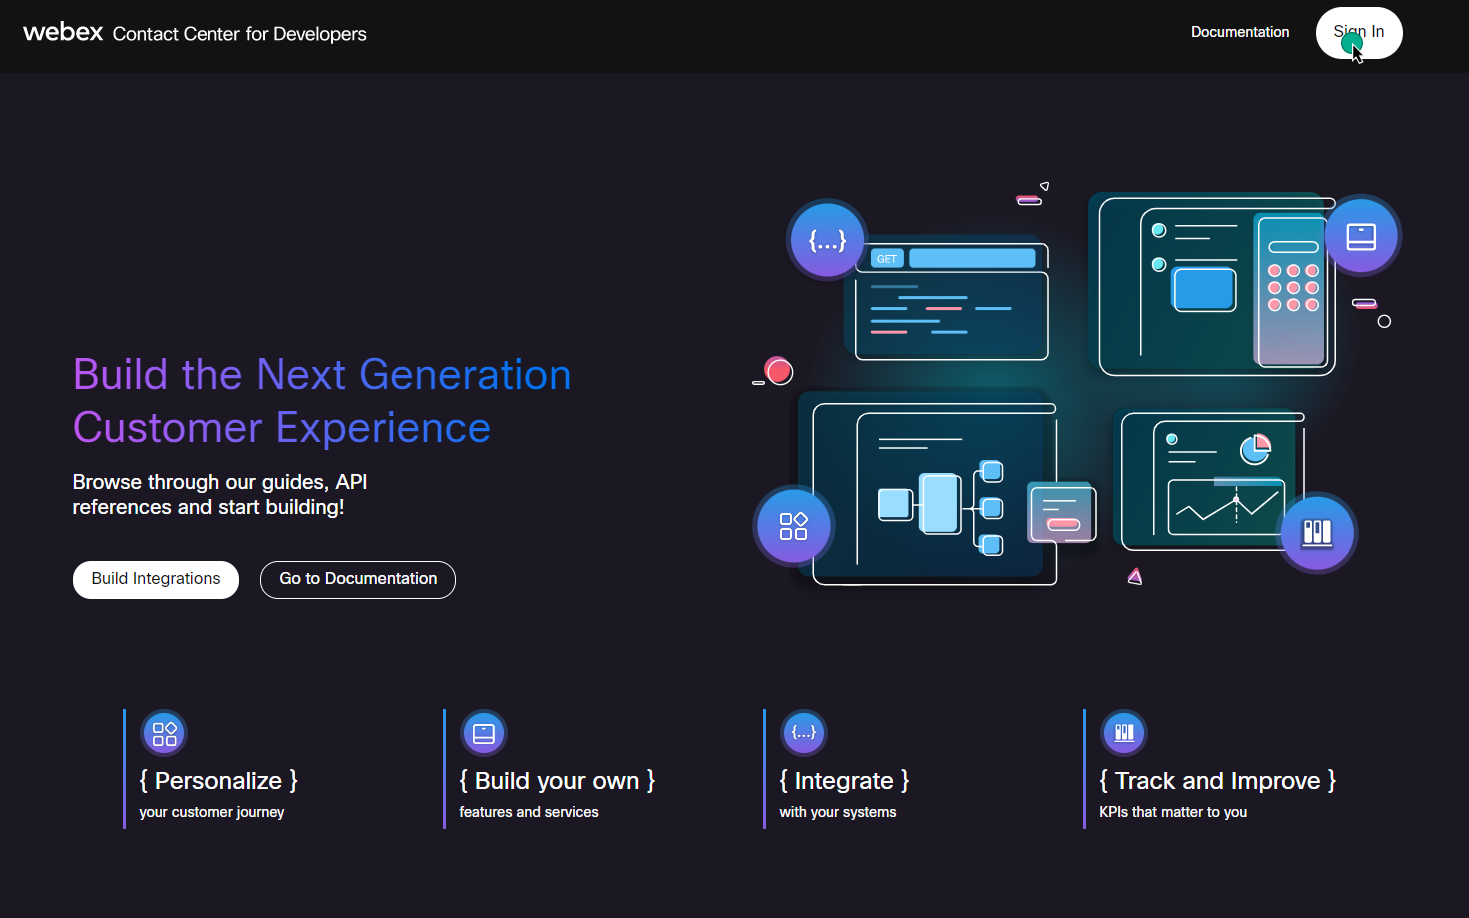
Go to your account and select My Webex Apps.
On the next page click the Create a New App button.

Usage Specific Configuration
Fill in all required fields based on your use case.
|
Purpose |
Configuring Webex Contact Center for Single Sign-On
|
Configuring Webex Contact Center for ETL Management
|
|---|---|---|
|
Create New App |
select |
select |
|
Integration/Service App name |
|
|
|
Description |
Provide details about this integration/application |
|
|
Contact Email |
Provide the email address of the contact person |
|
|
Redirect URI(s) |
Where:
The Redirect URL is used when Adding Webex Contact Center as Identity Provider. |
N/A |
|
Scopes |
|
|
|
Accept |
Read the Terms of Service and Privacy Policy and check the box for accepting them. After submitting the form by clicking the Add Service App button. |
|
|
Next steps |
Copy the Client ID and Client Secret for this integration. Proceed to Configuring Identity Provider for Webex Contact Center or contact Eleveo Support to provide the Client ID and Client Secret in the User Management settings. Do not proceed with the next sections below. |
Proceed with the next sections below. |
It is recommended that you copy the values and immediately proceed with the next step! Note that if the Webex console window is closed and reopened, the secret will not be displayed anymore and will need to be regenerated. Regenerating the secret will result in the integration not working (only the newest, most recently generated secret should be added in User Management or ETL Management).
Next Steps for Preparing Cisco Webex Service Apps for ETL Management
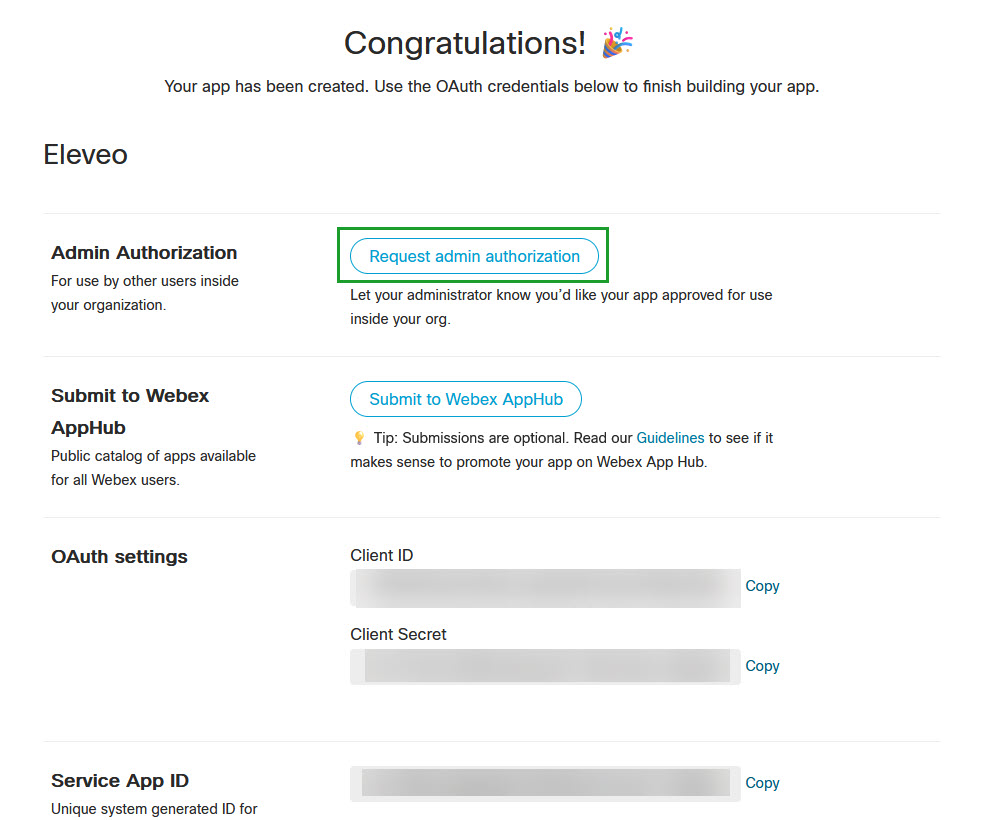
Requesting Admin Authorization
After the Service Apps is created, click the Request admin authorization button.
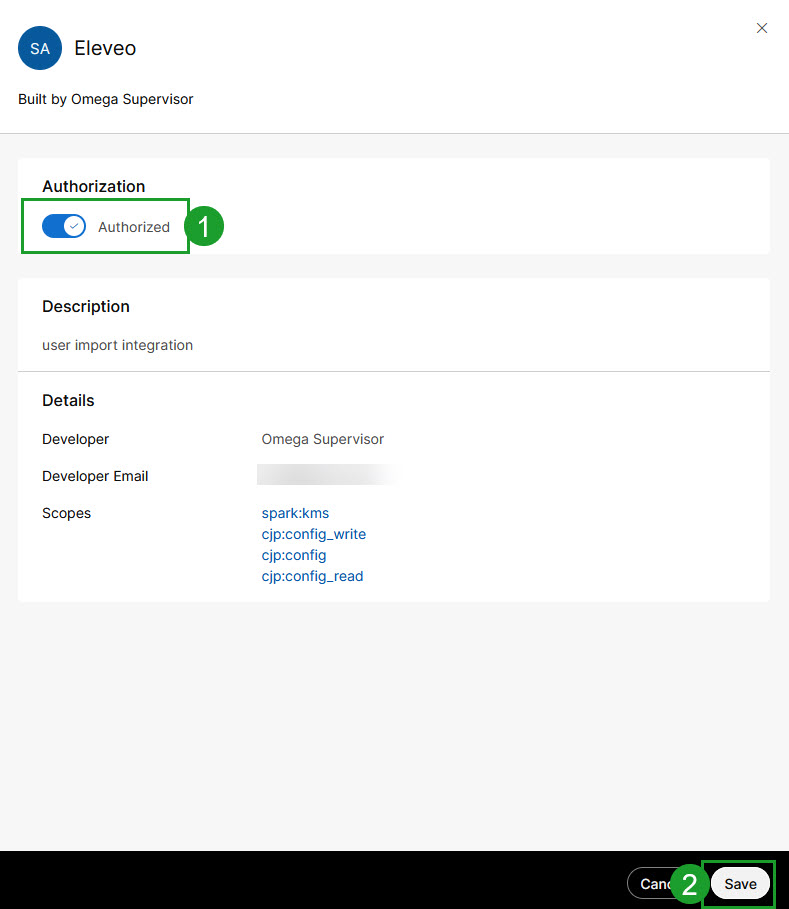
Authorizing
Proceed to the Webex Portal (https://admin.webex.com/) and log in as an admin user(must be a Full Admin). If you don’t have these privileges, ask your administrator for help with this step.
Go to: Management > Apps > Service Apps > select newly created Service App.
Switch the Authorization switch and click Save.
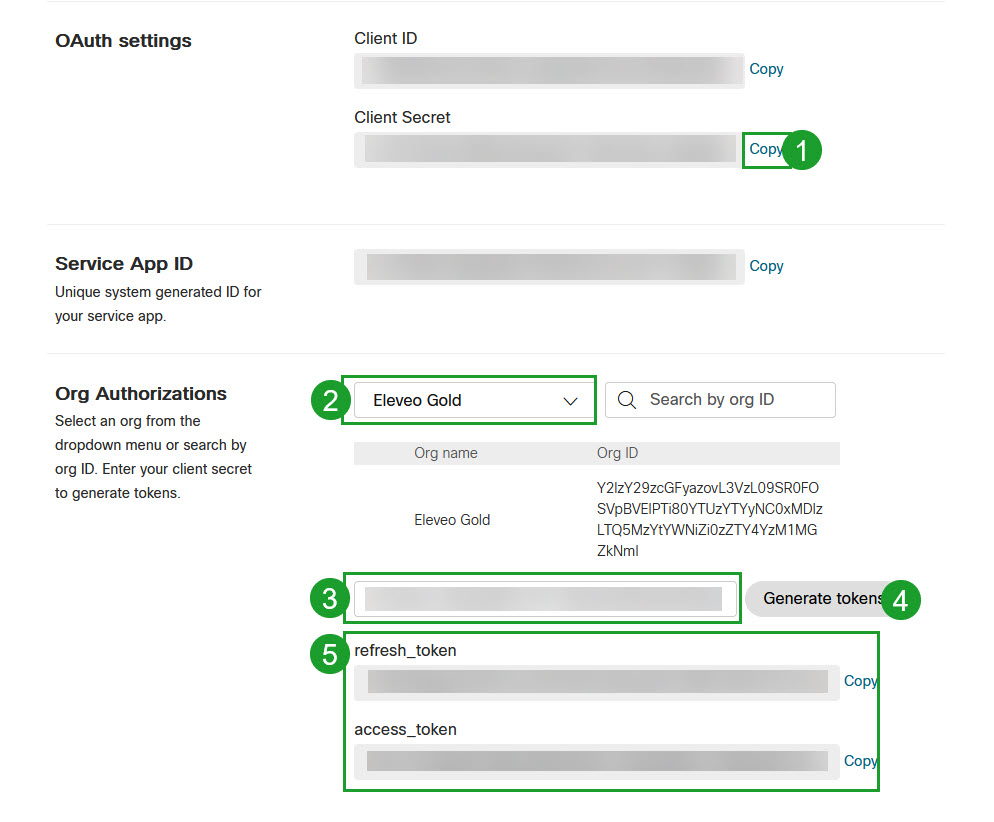
Generating Tokens
Go back to your Service App and follow the steps:
-
In the OAuth settings section, copy the Client Secret
-
In the Org Authorization section, select your organization name
-
Paste the previously copied secret
-
Click Generate tokens.
-
The tokens will appear below.
Further Steps
Copy the Client ID, Client Secret, refresh_token and access_token for this integration.
Go to the Configuring ETL Management for User Import From Cisco Webex Contact Center page and proceed with the configuration.
For media import:
-
Set the Media import switch to On in the ETL configuration mentioned above.
-
Contact Eleveo Support Team to Configure Webex Contact Center Integration on Eleveo.
-
Proceed with Configuring Cisco Webex Contact Center Integration for Media Import to complete the integration process.