Plan your training with targeted objectives, such as informing staff of a new product range or offer or of specific areas for improvement. Targeted objectives allow your staff to receive training and take a Training Questionnaire in the shortest possible time so that they can focus on their primary functions. Link the training to relevant training material and interactions.
Prerequisites
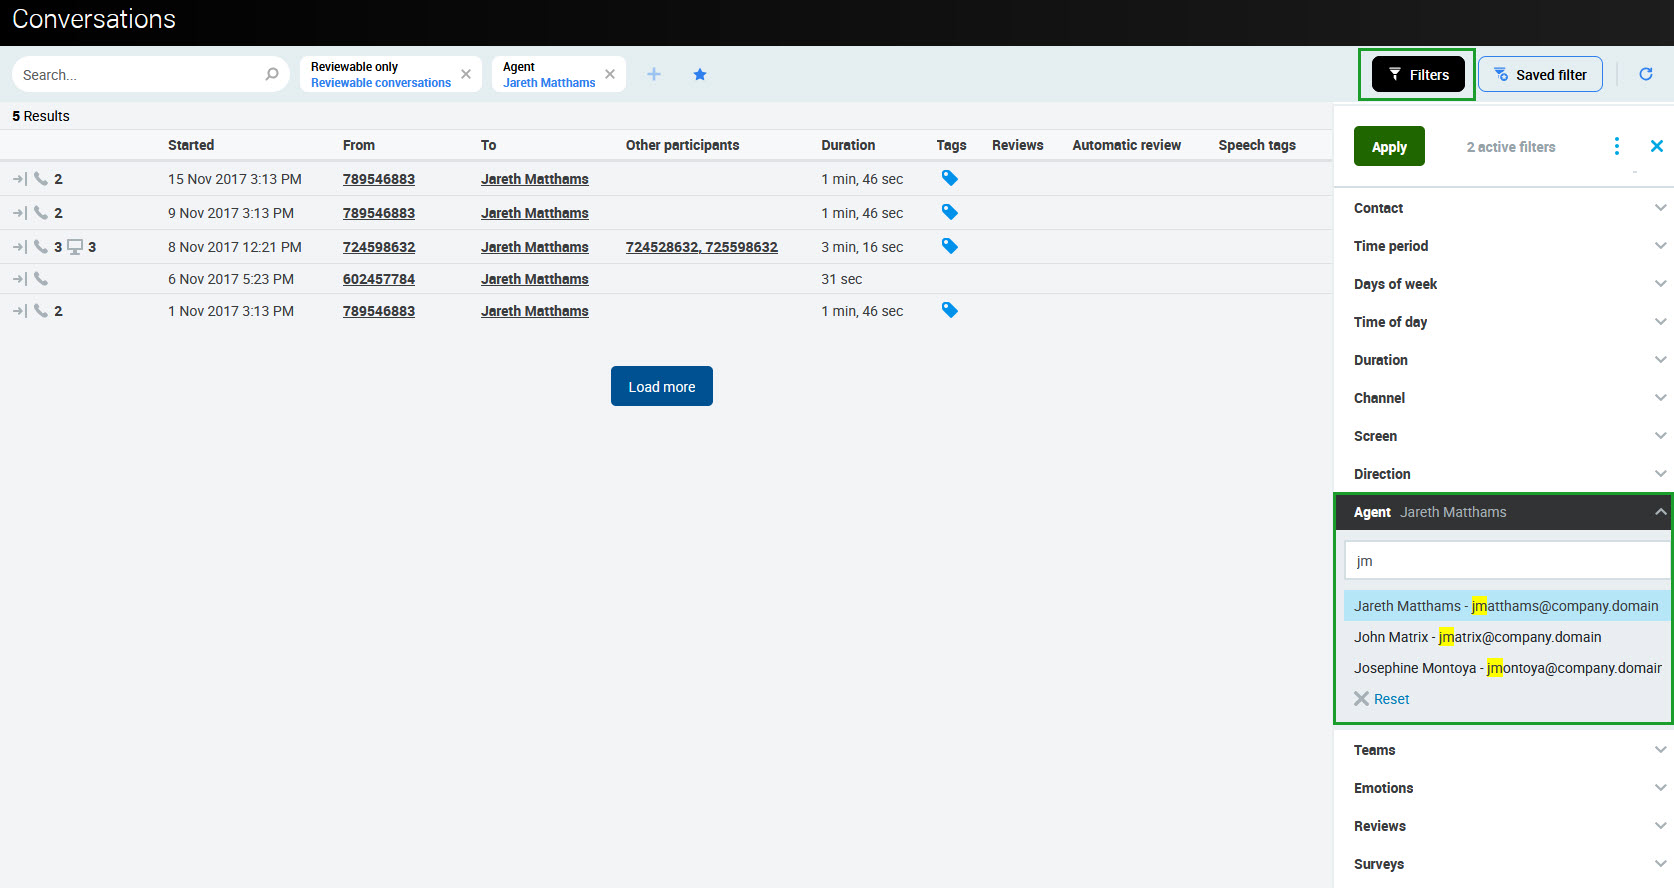
Please note that to be able to play a conversation during the training, the trainee needs to be assigned to the Saved filter that includes this conversation. Before creating new trainings, ensure that trainees can play all the conversations that will be included in them. To do that:
-
Go to the Conversations screen. Click the Filters button. Select criteria to filter the conversation (for example, agents participating in conversations).
-
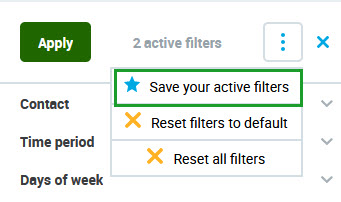
Click the More options button (three dots) and select Save your active filters.
-
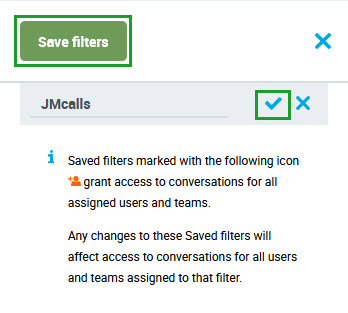
Name the filter and click Save filters.
-
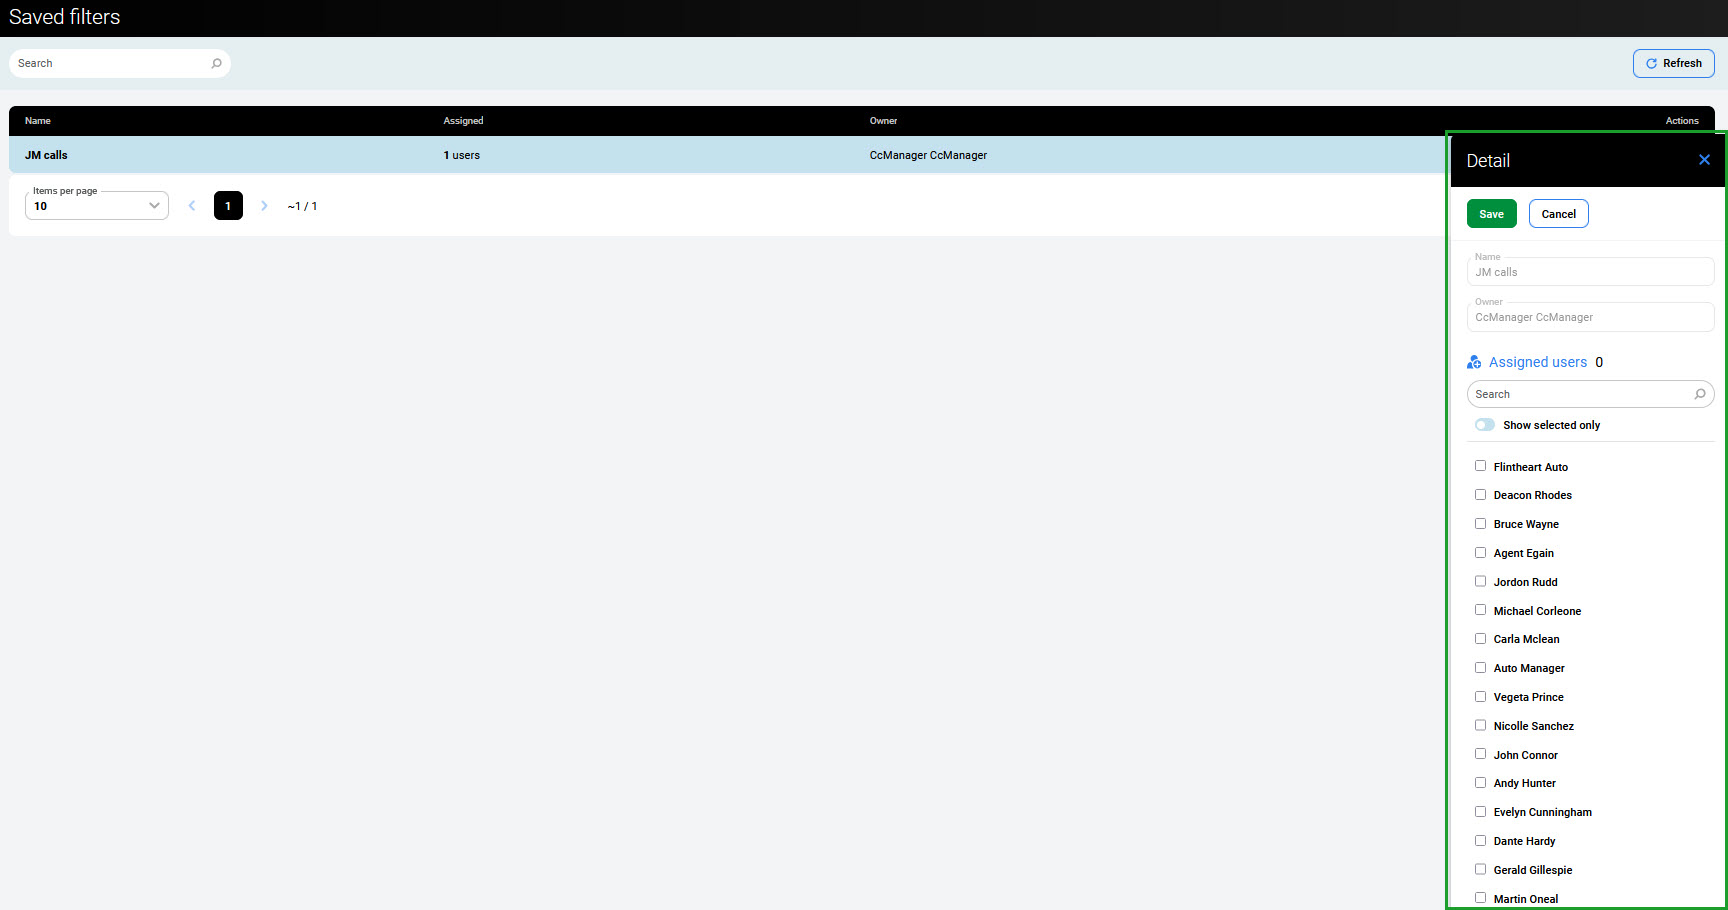
Go to the Administration > Saved filters. Click on the newly created filter. The Detail pane will open.
-
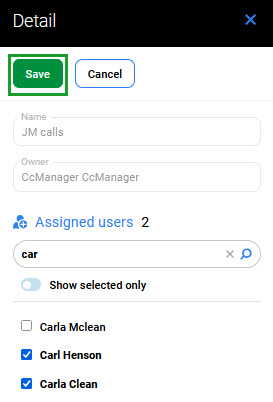
Search for users that need to be assigned and check their boxes. Then click Save.
Planning Training
Select Trainings within the navigation tree on the left. Then click the Create new button to open the Training planner pane.
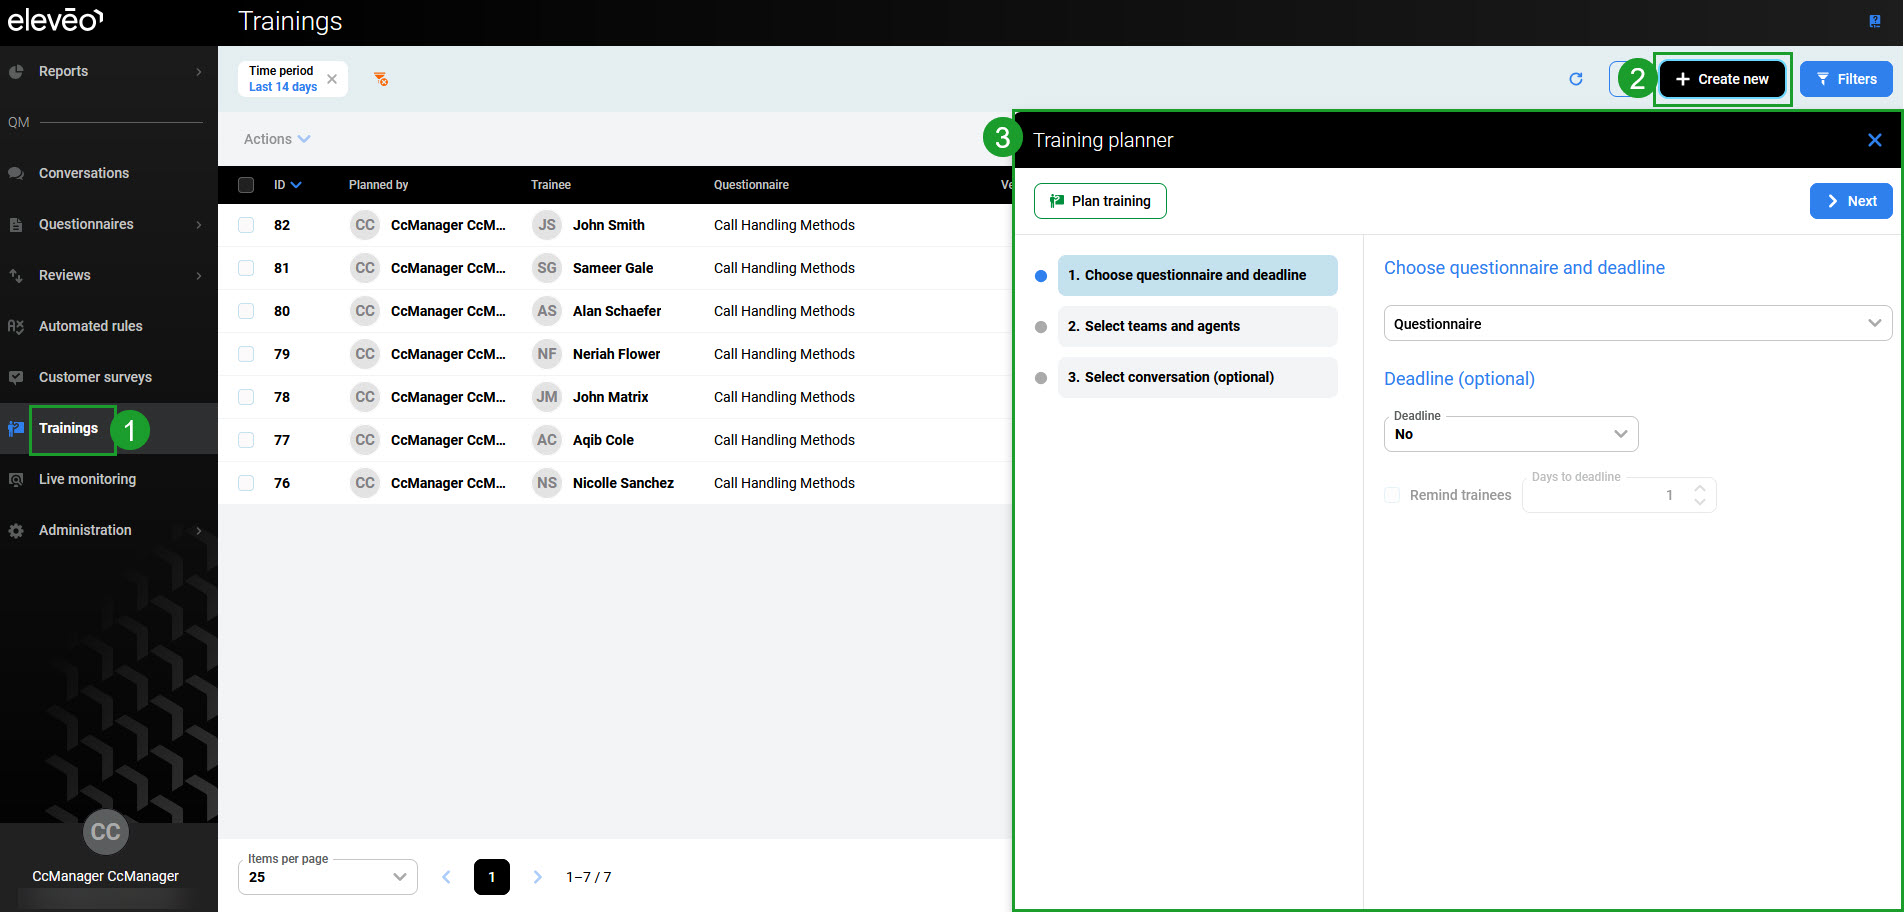
The Training planner contains three steps:
-
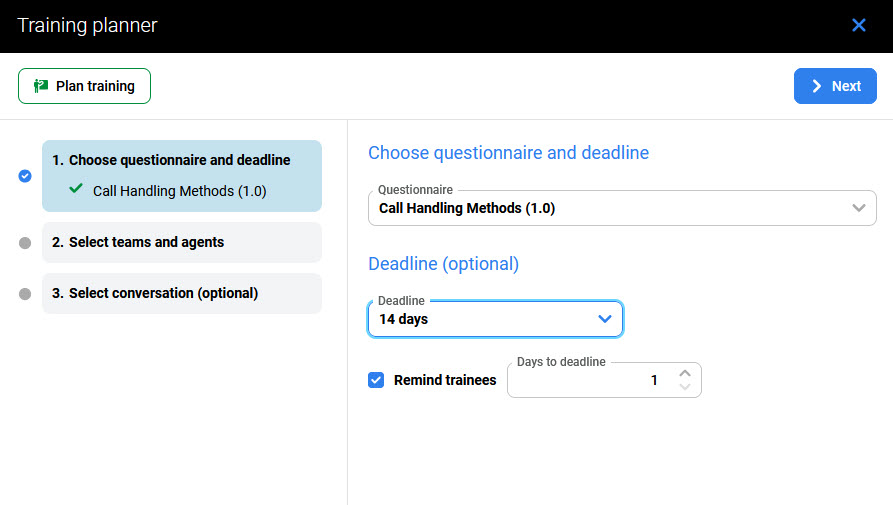
In the Choose questionnaire and deadline screen, select the following and click Next to proceed:
-
Questionnaire – the questionnaire that will be used in the training (questionnaires can be added to modified from within the Questionnaires screen),
-
Deadline (optional) – the time frame for the training to be completed,
-
Remind trainees (only available if the deadline was set) – a number of days before the deadline when trainees should be reminded by email.
-
-
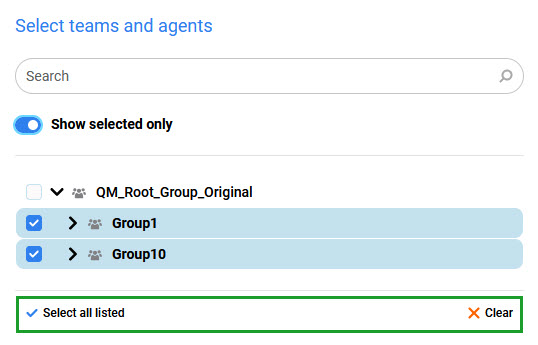
In the Select teams and agents screen, select teams and/or agents that should complete the training and click Next to proceed.
The tree structure of teams can be expanded. Check the box to select a team or a user.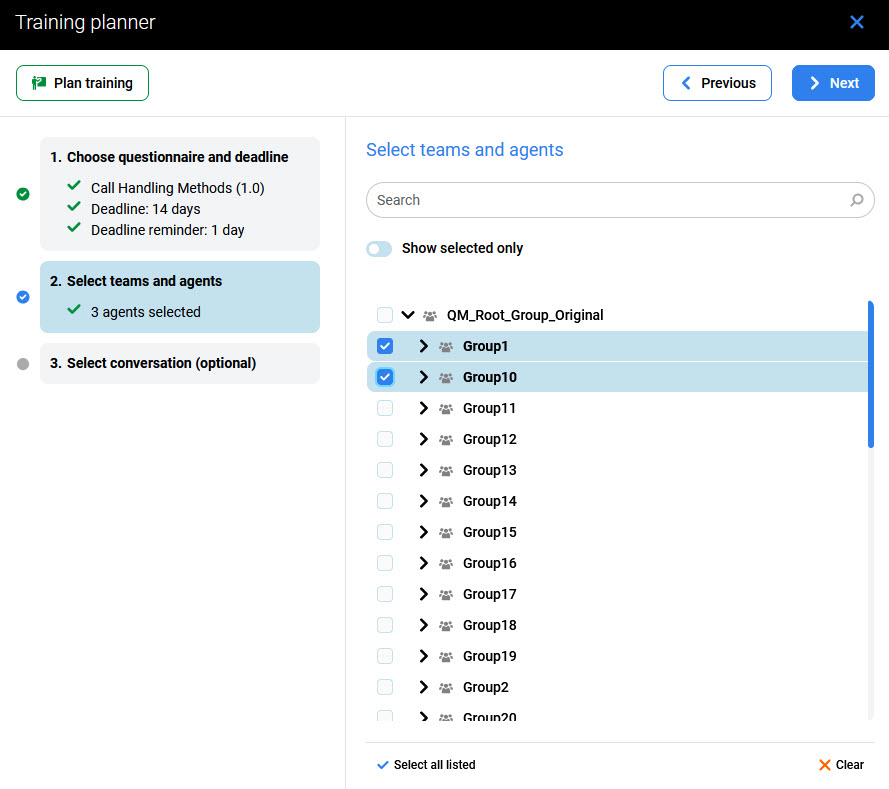
-
Use the Show selected only switch to display only the selected teams/agents. You can also select all agents at once by clicking the Select all listed option. Use the Clear button to clear the selection.
-
-
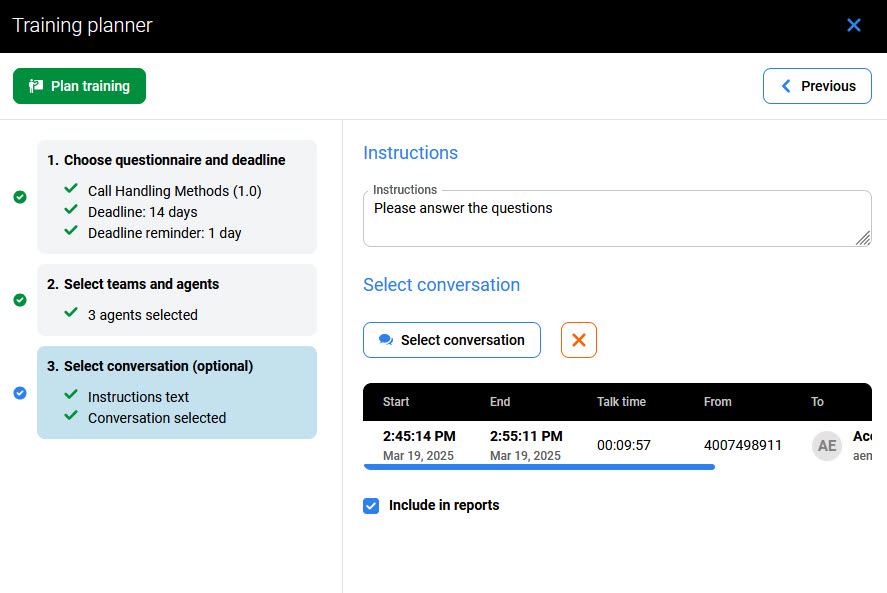
In the Selection conversation screen (optional), configure the following:
-
Instructions – type the instructions for the trainee, for example, a short introduction to a questionnaire
-
Select conversation – if listening to a conversation is required in this training, select one by clicking this button. The Conversations screen will open in a new tab, offering the conversations available for selection.
-
Include in reports – if selected, the training will be included in reports.
-
At the end, click the Plan training button to create a new training.
Group Membership
The Quality Management application recognizes membership in one group only. This group should be marked as a 'main' group in User Management. If users were imported from external systems, like UCCX or UCCE, consider carefully if their group membership and/or the main group selection should be manually modified from within User Management.
A reviewer must have the agents' main group assigned to them (more details: Adding Users to Teams if they wish to perform reviews on these agents.
The following rules apply to setting the main group in User Management:
-
If a user is a member of one group only, this group is set as main.
-
If a user is a member of more than one group, only one group can be set as main.
-
If a user is removed from the main group, the first group from available groups sorted alphabetically will be set as the new main group.
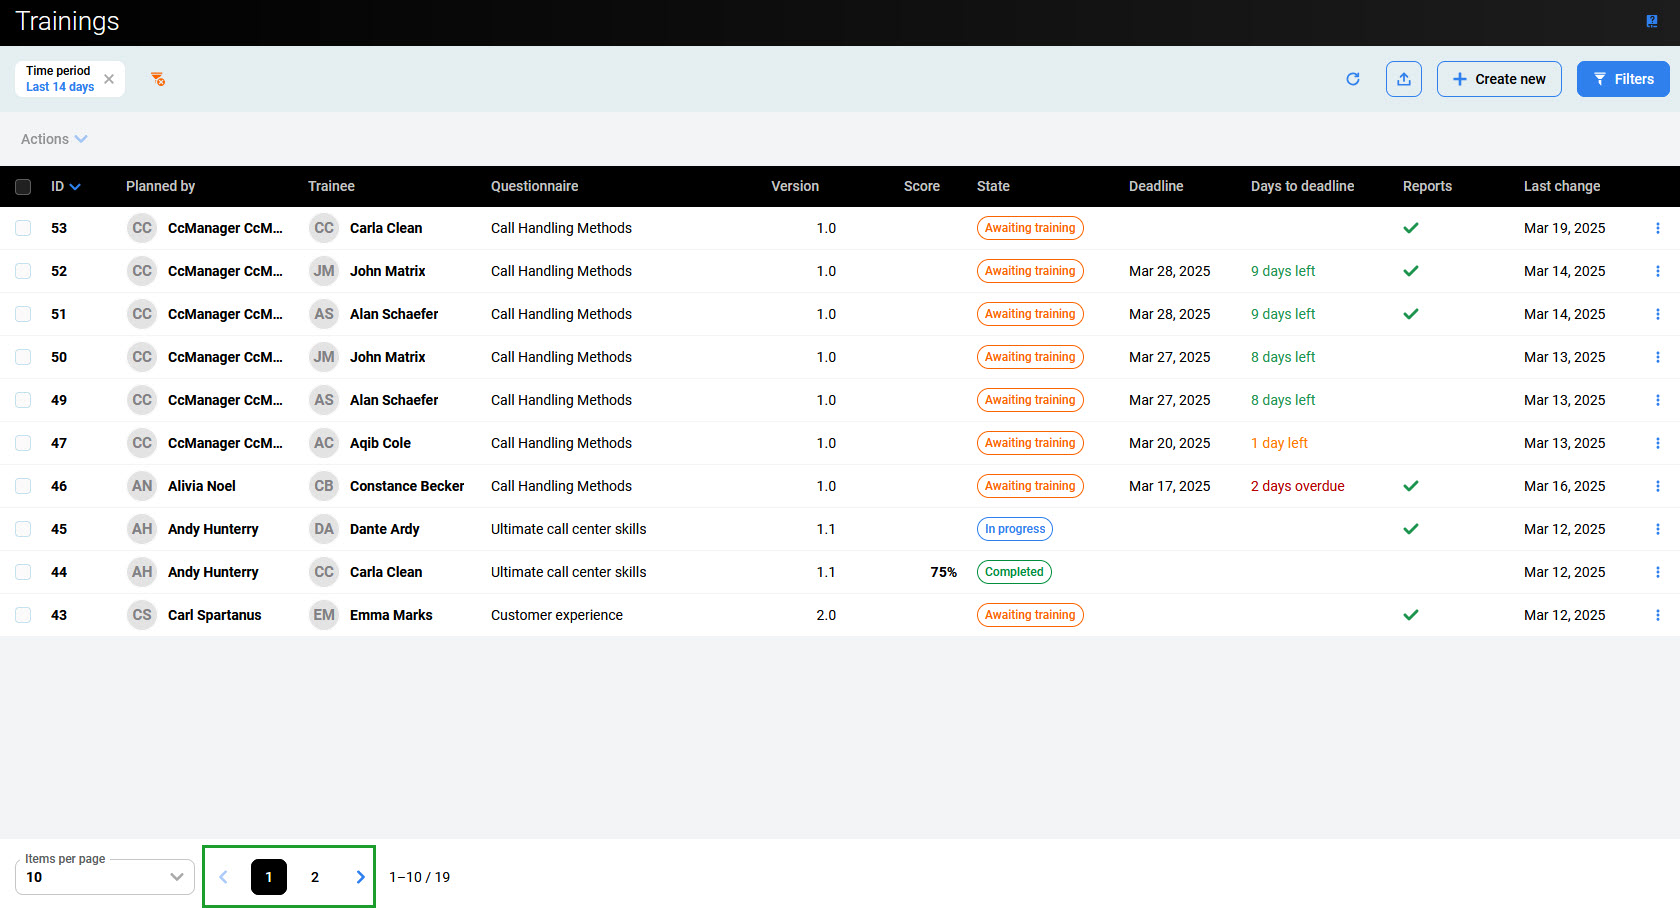
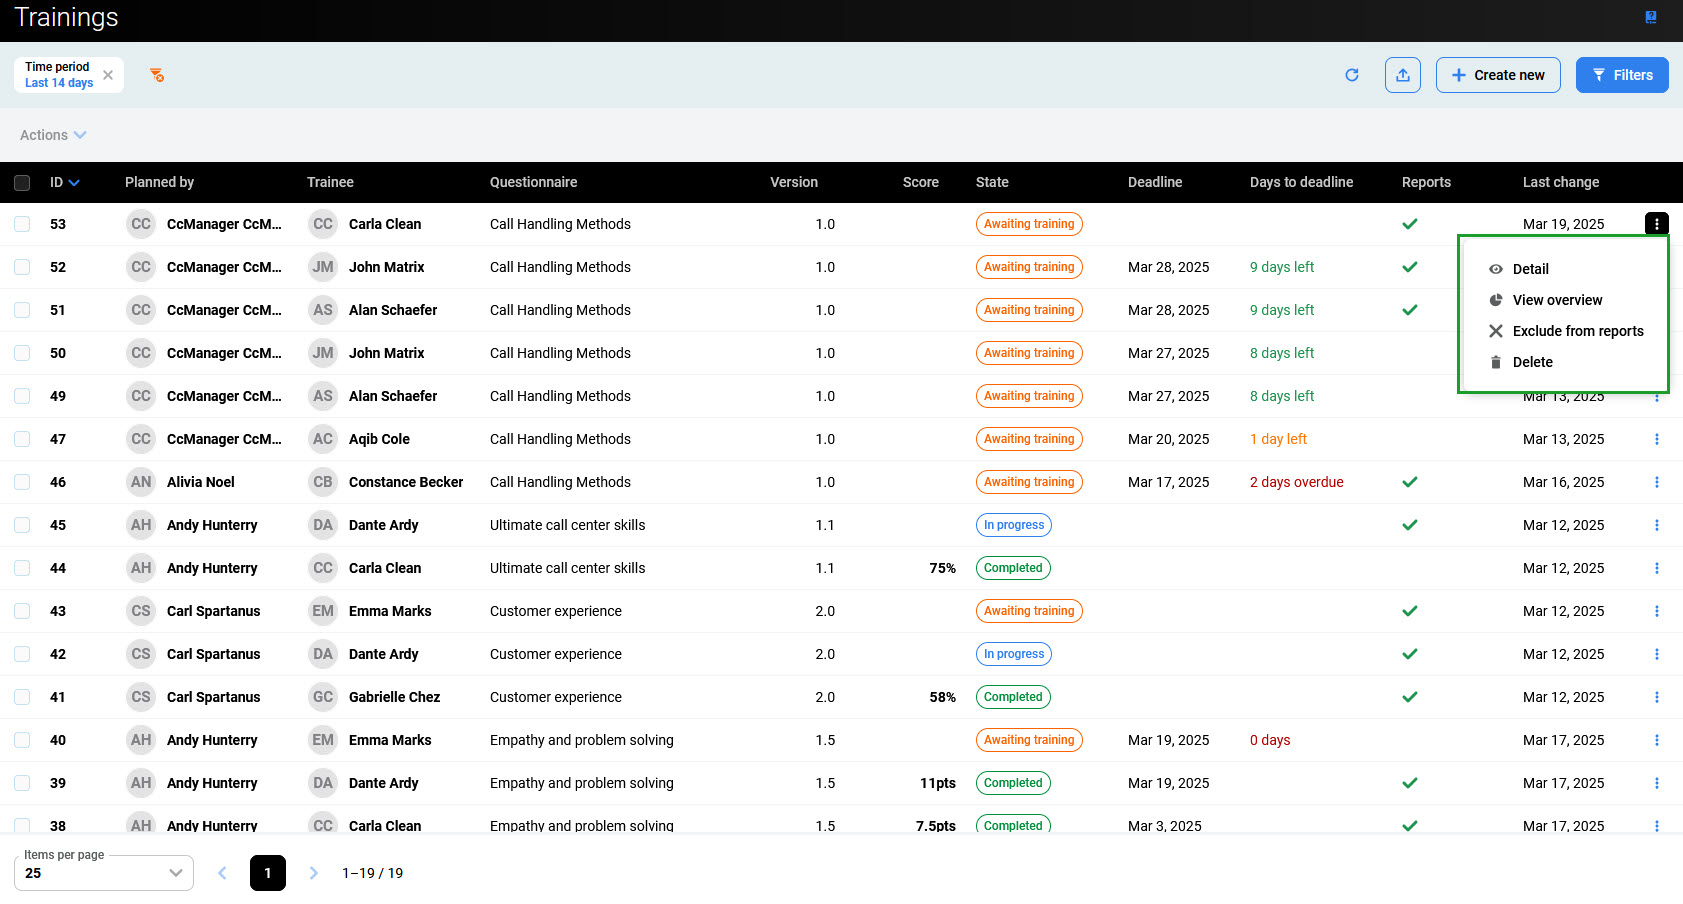
Viewing the Planned Trainings
To display planned trainings, click Trainings within the navigation tree on the left. The Trainings screen will appear. By default, the trainings created during the last 14 days are displayed.
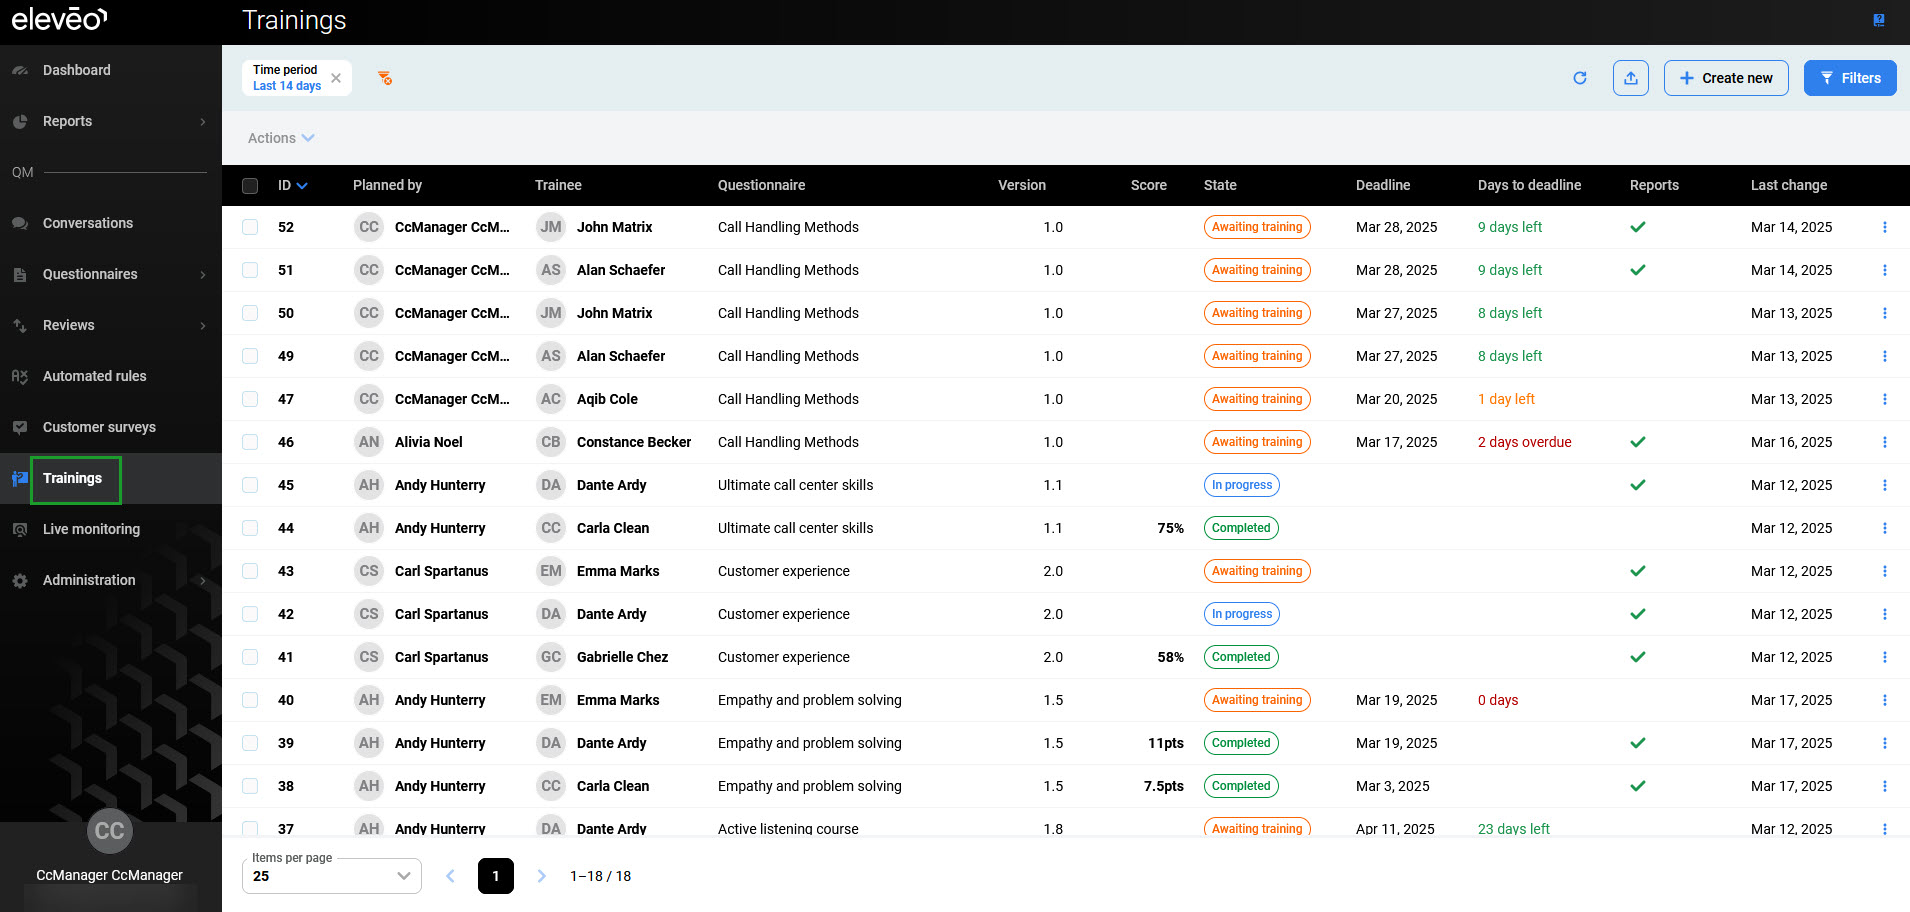
Basic information about each training is displayed in the following columns:
-
ID – ID of the training
-
Planned by – name of a user who planned the training
-
Trainee – trainee assigned to the training
-
Questionnaire – selected questionnaire
-
Version – version of the training
-
Score – received score (if the training was already completed)
-
State – state of the training:
-
Awaiting training – assigned trainee hasn’t started the training yet
-
In progress – assigned trainee started the training but didn’t complete it yet
-
Completed – assigned trainee has completed the training
-
-
Deadline – deadline for the training to be completed
-
Days to deadline – number of days left to deadline or overdue
-
Reports – if the training will be included in reports
-
Last change – date of the last change to the training.
At the bottom of the page, it is possible to adjust how many items are displayed on each page.
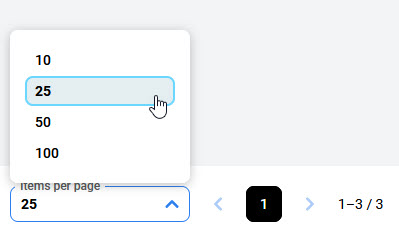
Use the arrows or page numbers to switch between the pages.
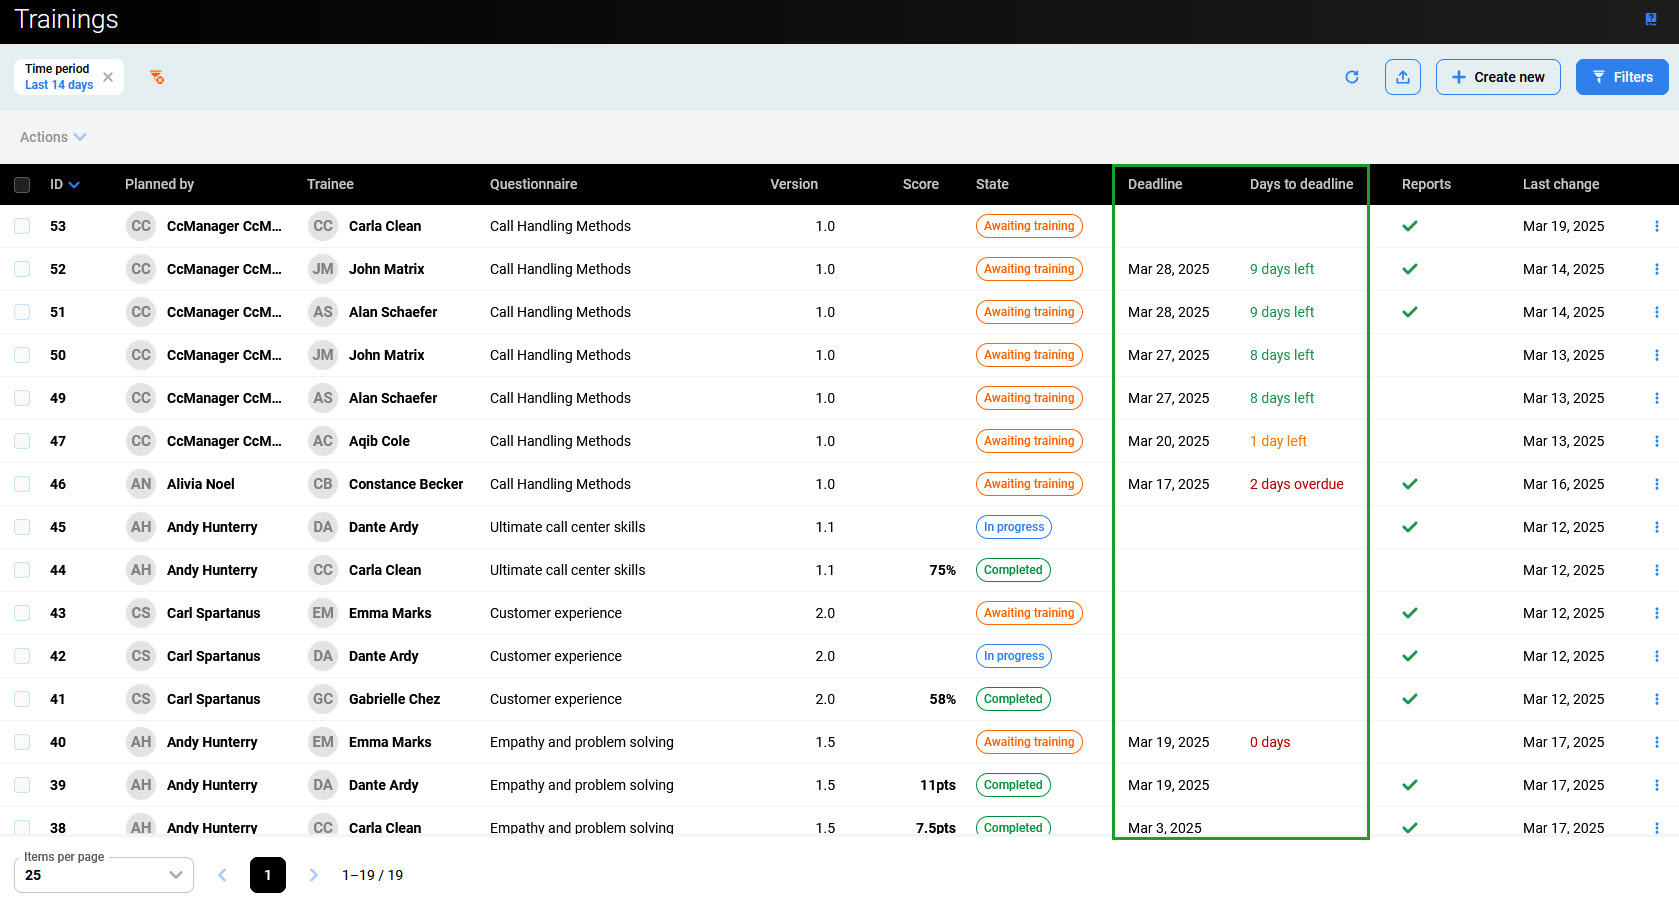
Reviewing Deadlines
If you have scheduled a deadline for the training, you can view it in the Deadline column on the Trainings screen. If a deadline is not set, this field will be empty. You can sort deadlines by date by clicking on the column name.
Additionally, the Days to deadline column states if training is past its due date (the number of days is displayed in red) or if there is still time left to complete it. The number is displayed in orange if there are 1-4 days left to the deadline. Otherwise, the number is displayed in green.
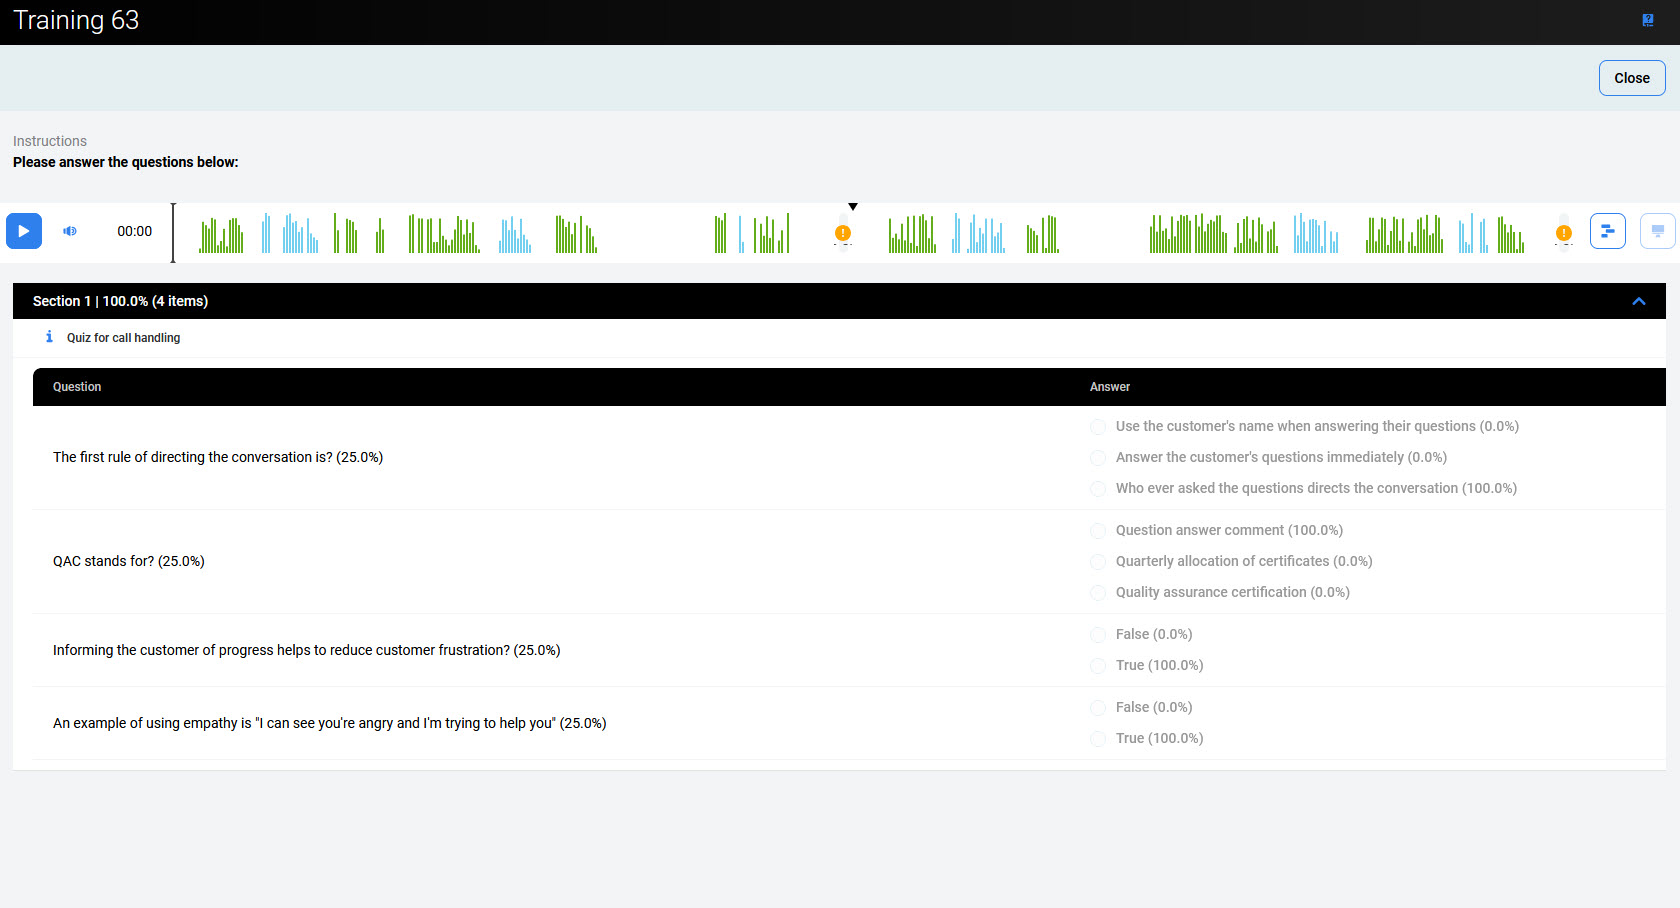
Displaying Training Details
To see the training, click on its row. The training can be edited only by the assigned trainee. For CCManager or Supervisor, it is read-only (and it doesn’t matter if the user planned the training).
Alternatively, use the More options (three dots) drop-down menu at the right end of the training row. The following options are available:
-
Detail – display the training
-
View overview – display the training in the printable version
-
Exclude from reports/Include in reports – (do not) include the training in reports
-
Delete – delete the training (this option is available only to users with the
TRAININGS_REMOVErole, usuallyCCManager).
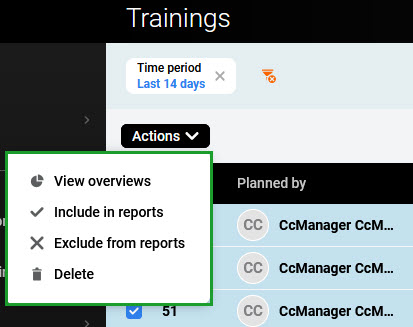
It is possible to perform some actions for more than one training simultaneously. To do that, use the checkboxes on the left of the screen and select all trainings that need to be modified.
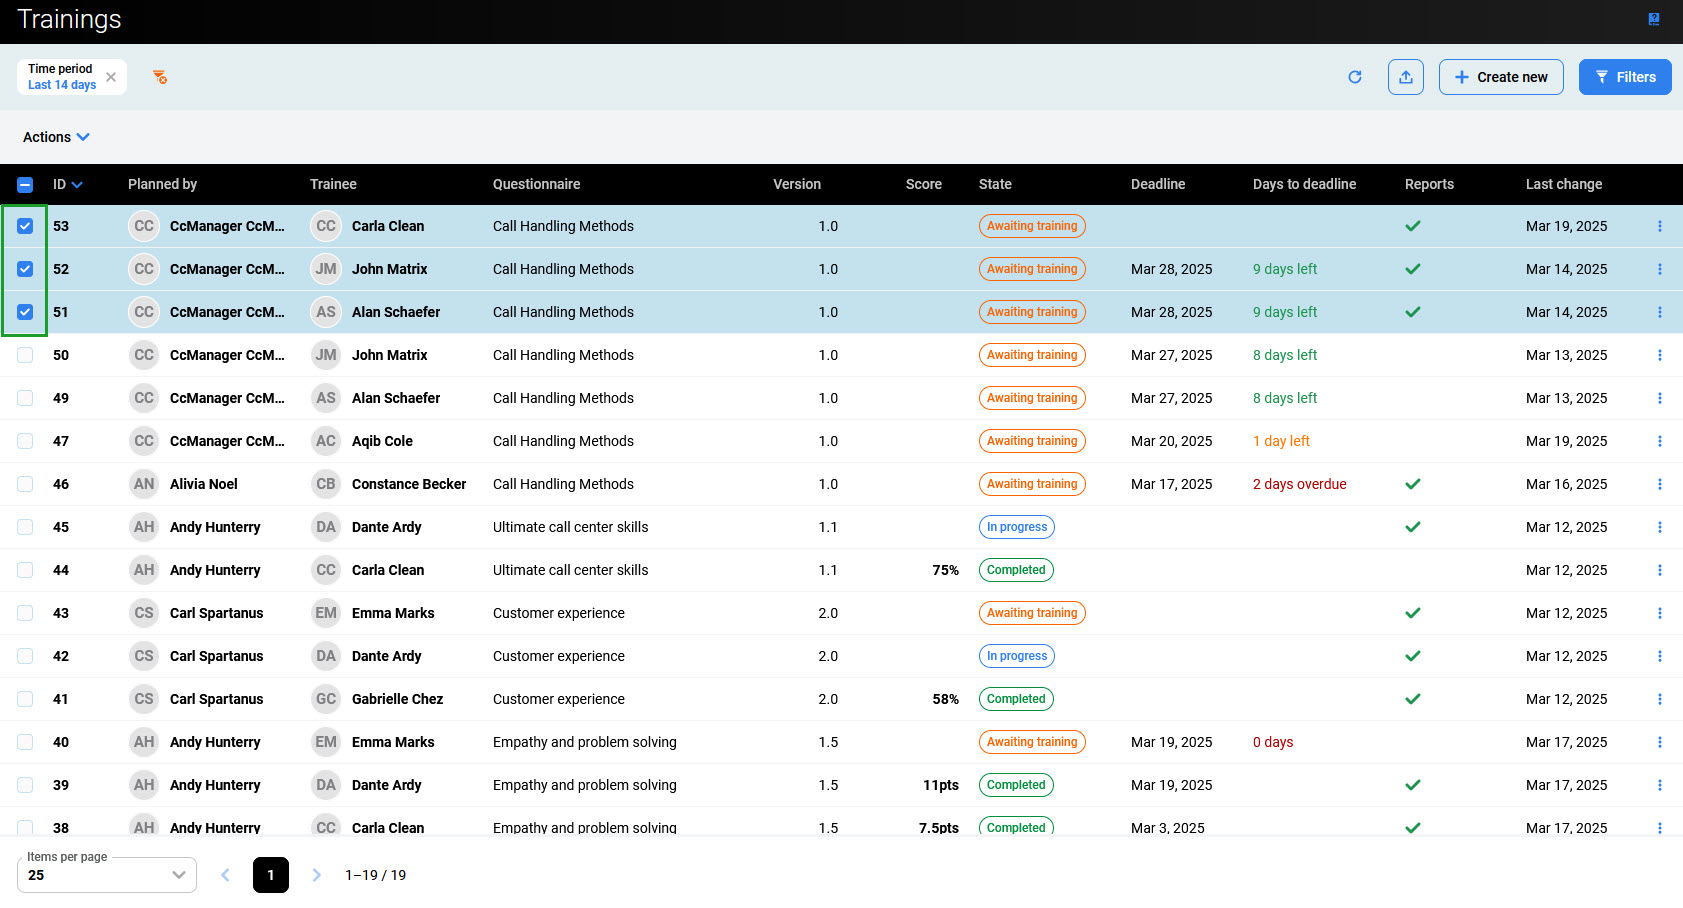
Then, click the Actions button in the top left corner. The menu will display:
-
View overview – display all the trainings in the printable version
-
Include in reports – include in reports the trainings that are not included yet
-
Exclude from reports – excluded the trainings that are already included
-
Delete – delete the trainings (this option is available only to users with the
TRAININGS_REMOVErole, usuallyCCManager).