Overview
The studio environment allows for the creation, modification and deletion of draft schedules. Users can create multiple draft schedules, based on the production forecast. Schedules may cover different time periods and these periods may even overlap. Each draft schedule can be selected from within the studio environment to be a production schedule.
Note that only users with the WFM_SCHEDULER role assigned are able to add, modify or remove schedules! Read more about Workforce Management Roles.
Displaying Draft Schedules
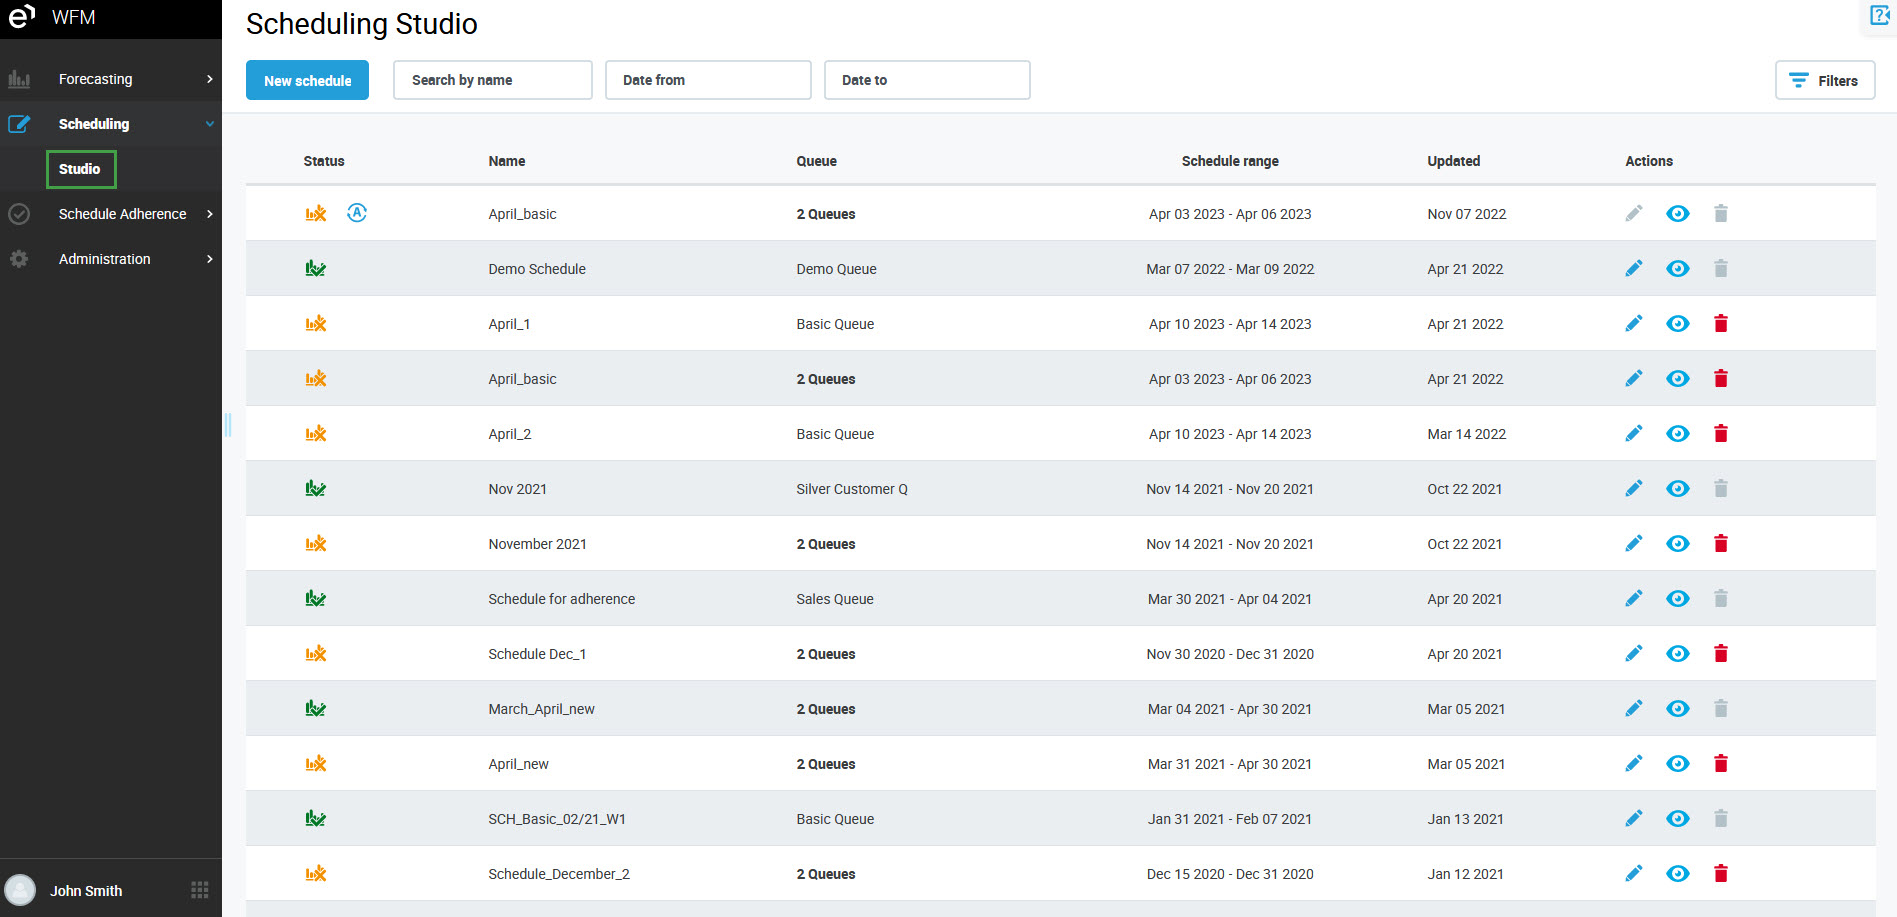
To display existing draft schedules expand the Scheduling module within the navigation tree and click Studio. The Scheduling Studio screen will display.

Basic information about existing schedules are displayed under the following columns:
-
Status – the status of the schedule (In Draft, In Production or Auto Scheduling in progress)
-
Name – name of the forecast
-
Queue – name of the work queue for which the schedule is created
-
Schedule range – time range of the schedule
-
Updated – date this schedule was last modified
The menu on the right allows further actions related to the schedule:
-
the View button allows the schedule to be viewed, but not modified – this option is available to a user with the
WFM_ANALYSTrole assigned and to a user with theWFM_SCHEDULERrole assigned -
the Edit button permits the modification of the schedule – this option is available only to a user with the
WFM_SCHEDULERrole assigned -
the Delete button allows for the removal of the schedule – this option is available only to a user with the
WFM_SCHEDULERrole assigned
The table below shows which icons allow particular users for specific actions:
|
|
VIEW |
EDIT |
REMOVE |
|---|---|---|---|
|
|
YES |
NO |
NO |
|
|
YES |
YES |
YES |
|
|
NO |
NO |
NO |
Available Actions
For more scheduling functionality, go to:
