The following roles and permissions enable various functionality required to share and manage saved filters:
SAVED_FILTER_SHARE– Share own filters with other users as read-only. Assigned by defualt to CC_MANAGER.
SAVED_FILTER_ADMIN – View filters and edit the ownership of saved filters in Quality Management. Assigned by defualt to CC_MANAGER.
SAVED_FILTER_ASSIGNMENT– Assign saved filters to specific users. Assigned by defualt to CC_MANAGER.
Saved Filters
Filters used to filter conversations on the Conversations screen can be saved for repeated use. Additionally, Saved Filters can be assigned to specific users. This functionality expands the number of conversations an end user can view. After being assigned a Saved Filter, users can view and review conversations that they would not normally be able to access. They can also utilize a saved filter when creating Automated Rules.
The menu item Saved Filters and the ability to create or modify Saved Filters is visible to users with the role SAVED_FILTER_ASSIGNMENT. The required permission is assigned to the CC_MANAGER as part of the Default Composite Application Roles. More information is available on the dedicated page called Roles and Permissions.
Use Case
There are several reasons that users can benefit from the use of Saved Filters:
-
Backoffice users or unassigned phone numbers (elevator, phone in emergency vehicles, ambulance, etc.) may not be identified for various reasons. By assigning a back-office worker to a Saved Filter the user will immediately gain access to any conversation included in that filter.
-
A user needs to see conversations sourced from across the whole organization (but not all of them) For example a debt collection specialist may need to view all conversations flagged as related to debt collection.
-
Agents in need of training can be assigned to a Saved Filter that contains example calls or emails, as part of a training or coaching session.
How Saved Filters Work
Normally users are able to view and review conversations based on their assigned roles and groups (this is called Role-Based Access Control), typically agents can see their own conversations, and supervisors/teamleaders can see conversations of their own team(s), while Contact Center Managers can see all conversations.
Saved Filters allow for additional conversations to be shown to a user based on certain attributes (Attribute Based Access Control), typically this means that Supervisors and Team Leaders will be able to view conversations that they would not normally be able to view.
Additive permission logic is applied between Role-Based Access Control and Attribute Based Access Control, and also among all assigned filters. In practice the more filters assigned to a user, the more conversations they can view.
Available Attributes for Saved Filters
Any of the search criteria that your installation normally supports. Additional custom attributes that are installation-specific can be enabled for use on the Conversation Explorer from within the Conversation Settings.
Sharing Saved Filters Between Users
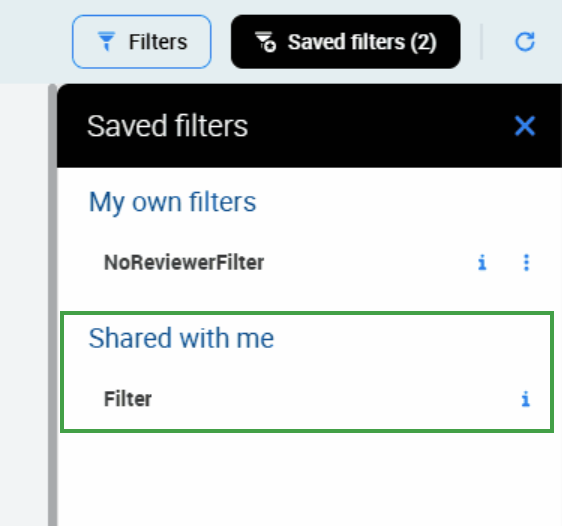
Saved Filters can be shared from the Conversation Explorer or from the Saved Filters menu by users with the correct permission (SAVED_FILTER_SHARE). Users can view any filter’s details, if it is used in reviews or assigned to anybody (without details and names), and if it is used in AQM (even the name of the rule is visible).
Transfer Ownership of Saved Filters Between Managers
Users with the roleSAVED_FILTER_ADMINcan view all filters in the Administration > Saved filters, they can edit the name and the users assigned to the filter, they can also transfer ownership of any visible filter. The new owner gains full control over the filter. The previous owner lost access to the filter.
Note that visiibilty of filters depends on which screen the user is using
-
On the Conversation Explorer, all of a user's own Saved Filters, as well as any shared with them, are visible.
-
Under Administration > Saved Filters, users with the
SAVED_FILTER_ADMINrole can view all Saved Filters.
Checking if a Saved Filter is in Use
There is a visual indicator in the User Interface that indicates that the saved filter is in use or assigned to another user.
From the Saved filters list, click on the i icon to view a tooltip that indicates where the saved filter is used, and if additional users have been assigned to it.
To view the tooltip
-
Click on the i icon.
-
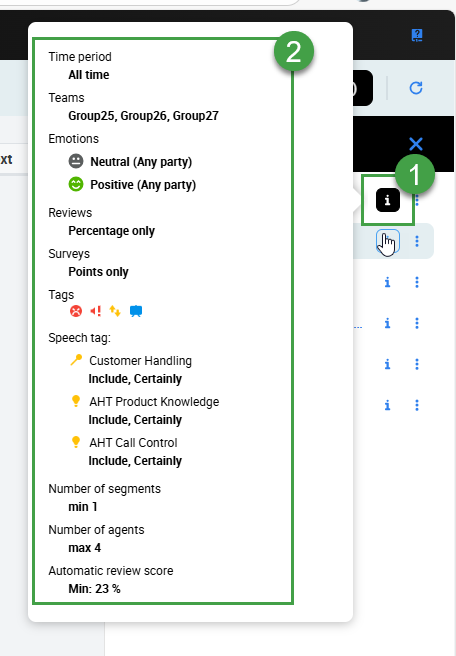
A tooltip displays. The tooltip indicates what filters are included and how/where the saved filter is used.
If the Saved filter is assigned to other users or is used by another process, it is noted as well.
Example of the view from the Saved filters list in the Conversation Explorer: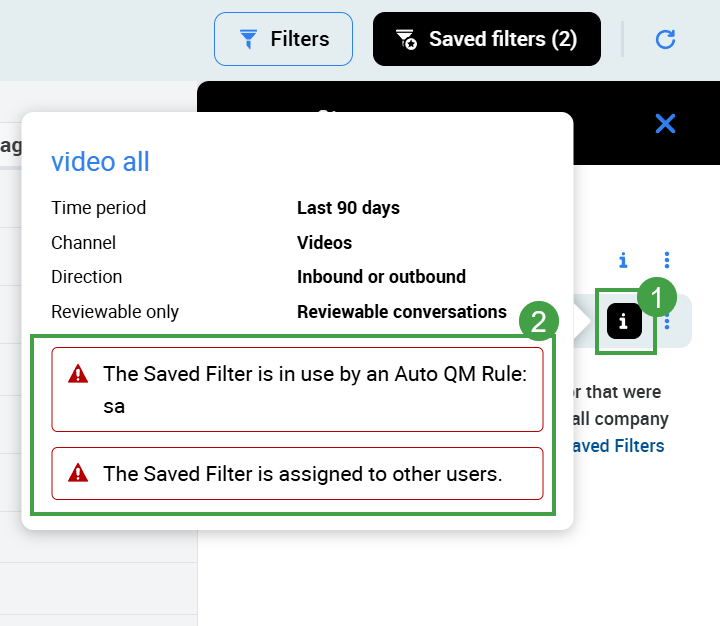
Example 2 - The view of a complex filter.
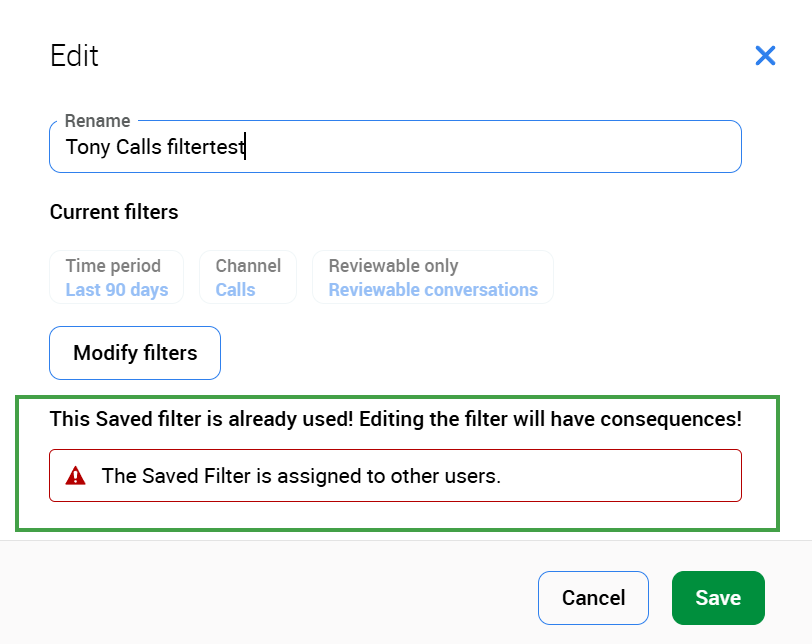
Example 3 - Edit a Saved filter
Note
Saved Filters grant access to conversations for all assigned users and teams.
Any changes to these Saved Filters will affect access to conversations for all users and teams assigned to that Filter.
Creating a Filter
Before proceeding, ensure that several functional filters have been created.
As an example:
-
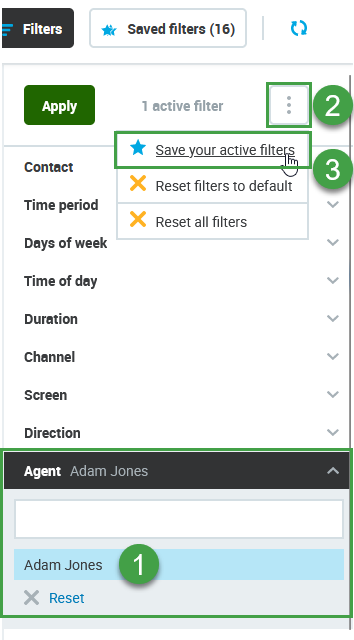
Create a filter and test that it works.
-
Click the More Options button.
-
Click Save your active filters.
-
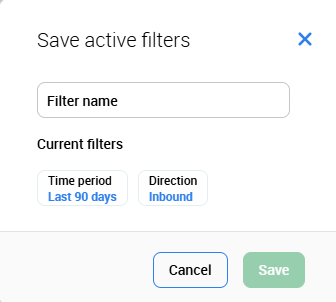
Name the new filter.
-
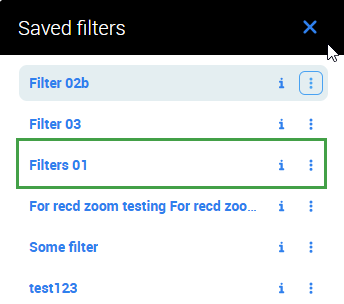
Click on the Save to confirm. (A dialogue confirms the change, and the new filter is visible in the list of saved filters.)
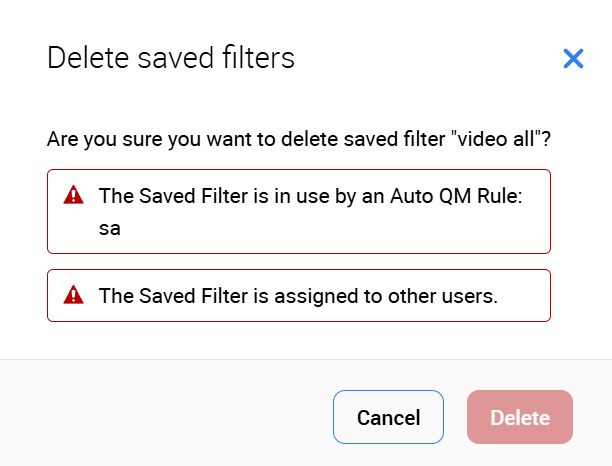
When Saved Filters Cannot Be Deleted
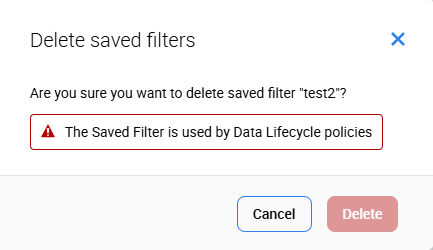
Filters can not be deleted if they are in use by Automated Rules, in the Review Scheduler, or Data Lifecycle Management.
Viewing Saved Filters
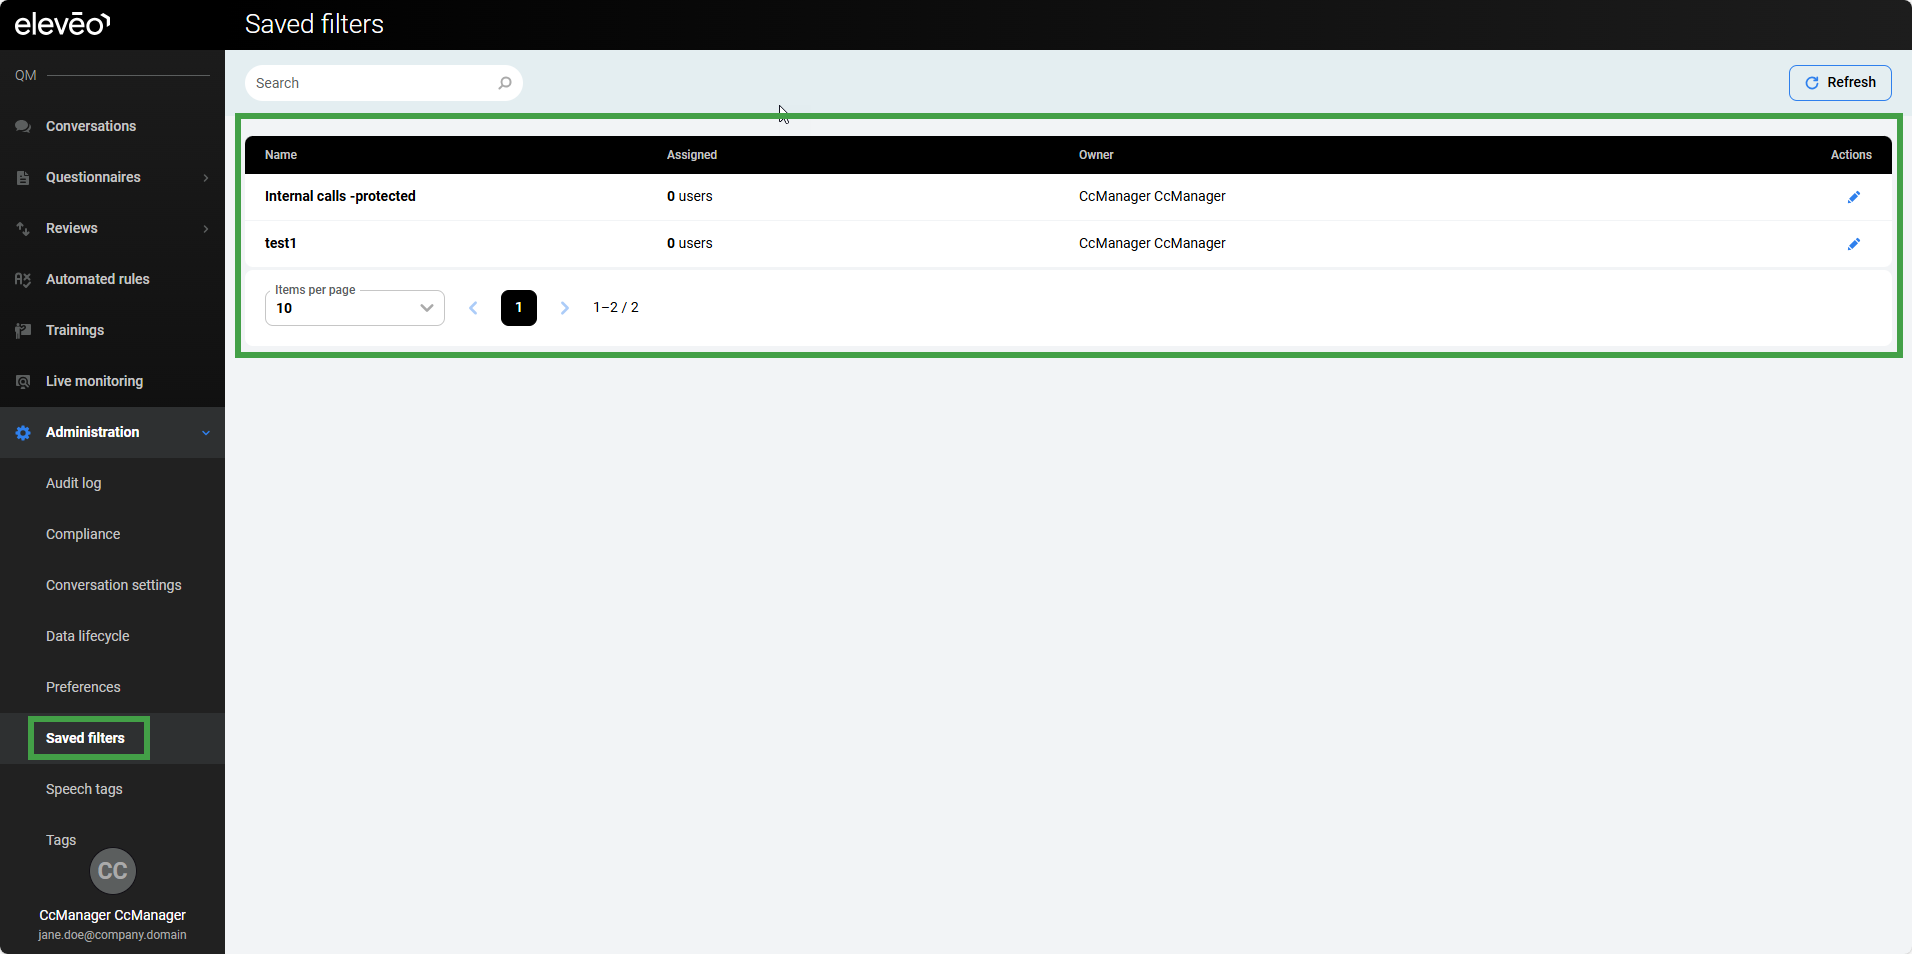
Users with the role SAVED_FILTER_ADMIN have access to all filters created and saved from within the Conversation Explorer in the Quality Management interface, Administration > Saved Filters:
Editing Saved Filters
Go to the Conversation Explorer and select your saved filter from the menu.
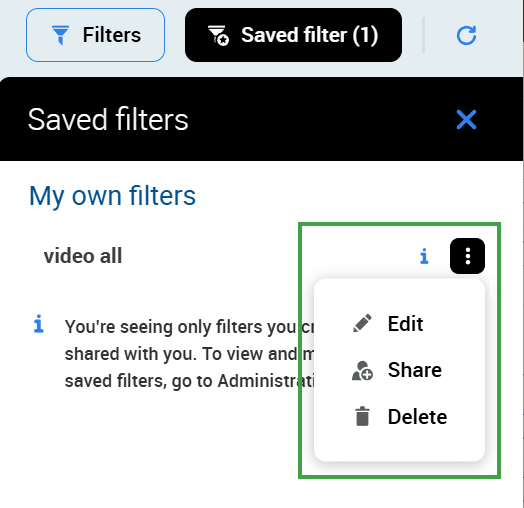
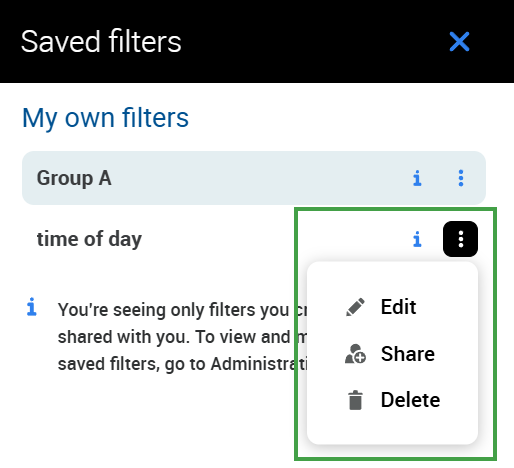
Saved filters can be edited directly from the saved filters sidebar.
-
Expand the Saved filters menu.
-
Click on the three dots icon.
-
Click Edit on the saved filter.
-
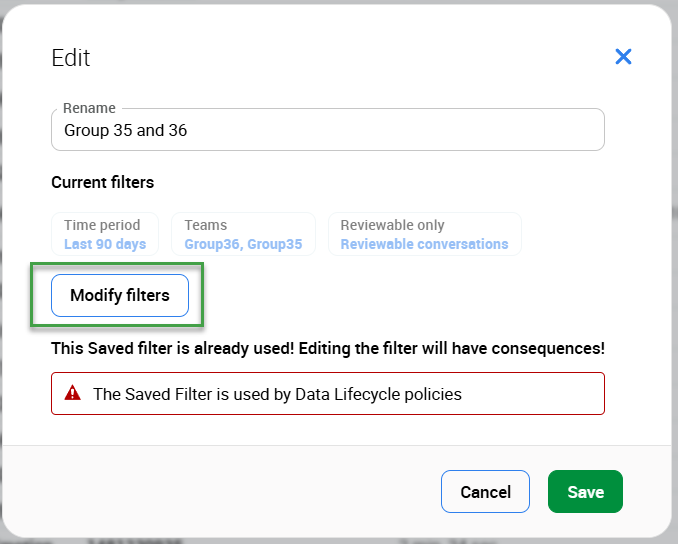
Update the filter name, or click Modify Parameters to change the filter criteria.
-
Click Save to apply the changes, or click Cancel to discard them.
-
When Modify Parameters is selected, the current filter criteria are pre-applied, and changes to filter values are reflected immediately.
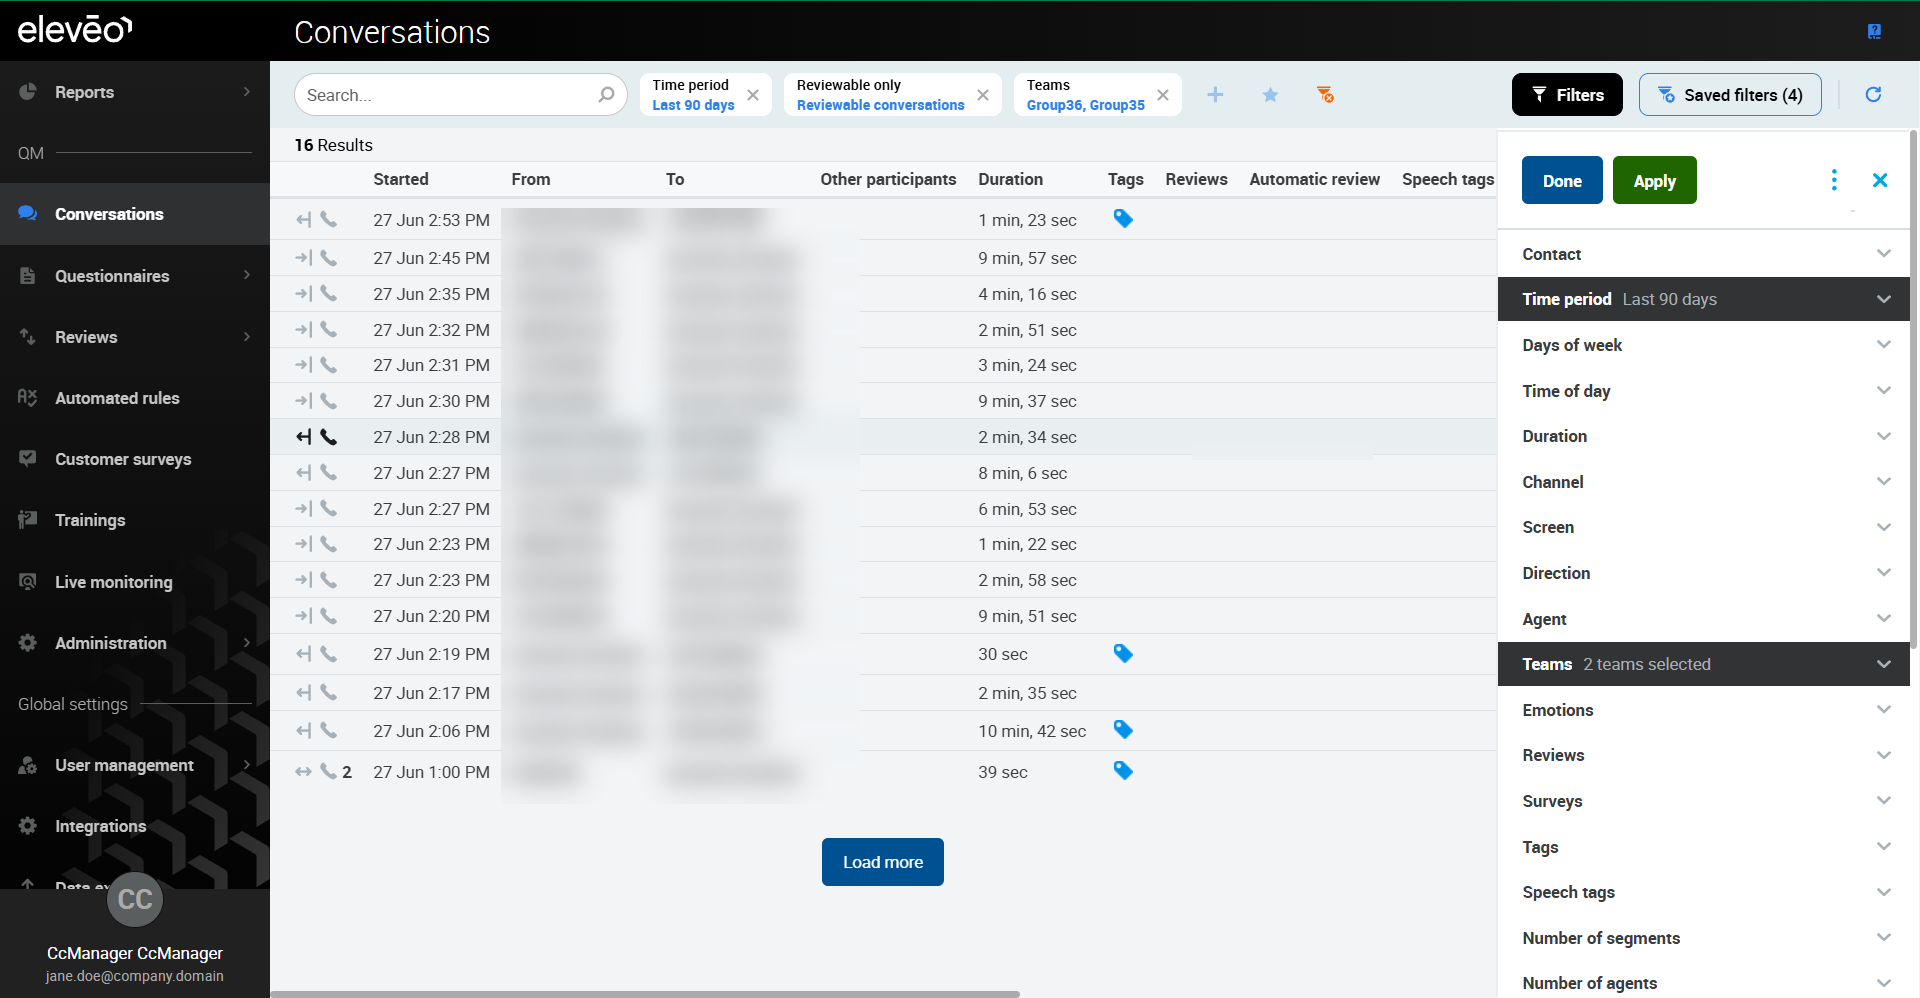
-
Clicking Done opens a pop-up window where the changes can be saved or canceled.
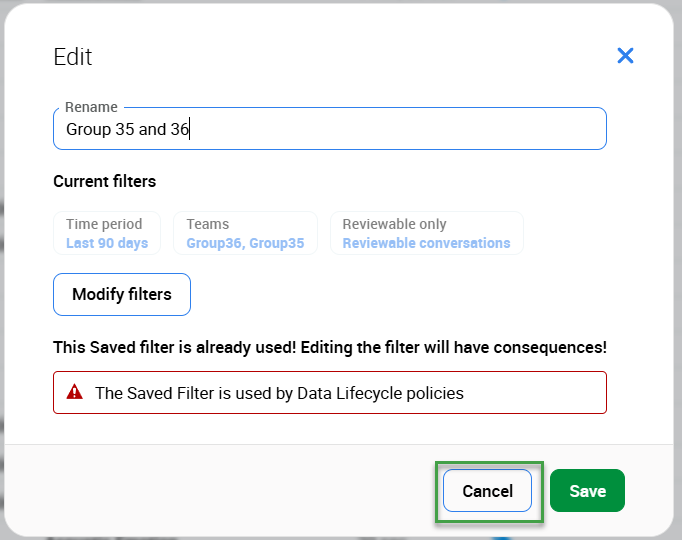
Clicking Cancel reverts the filter to the criteria that were active before editing.
Click Save to save all changes. -
If a saved filter is used by another process, such as a Review Plan, an Automated Rule, Data Lifecycle Management, or for assigning permissions, this usage is displayed on the screen.
Sharing a Saved Filter
Go to the Conversation Explorer and select your saved filter from the menu.
Saved filters can be shared directly from the saved filters sidebar.
-
Expand the Saved filters menu.
-
Click on the three dots icon.
-
Click Share.
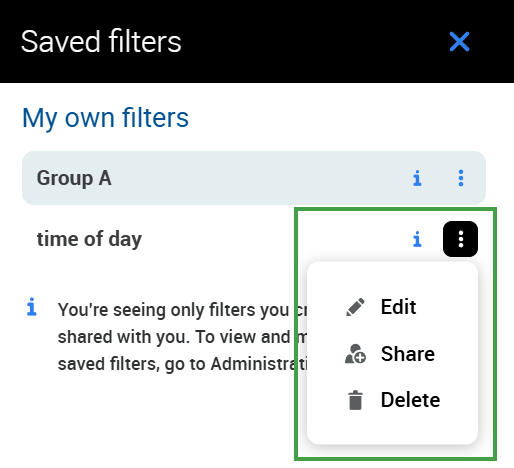
-
Select the user to share the filter with.
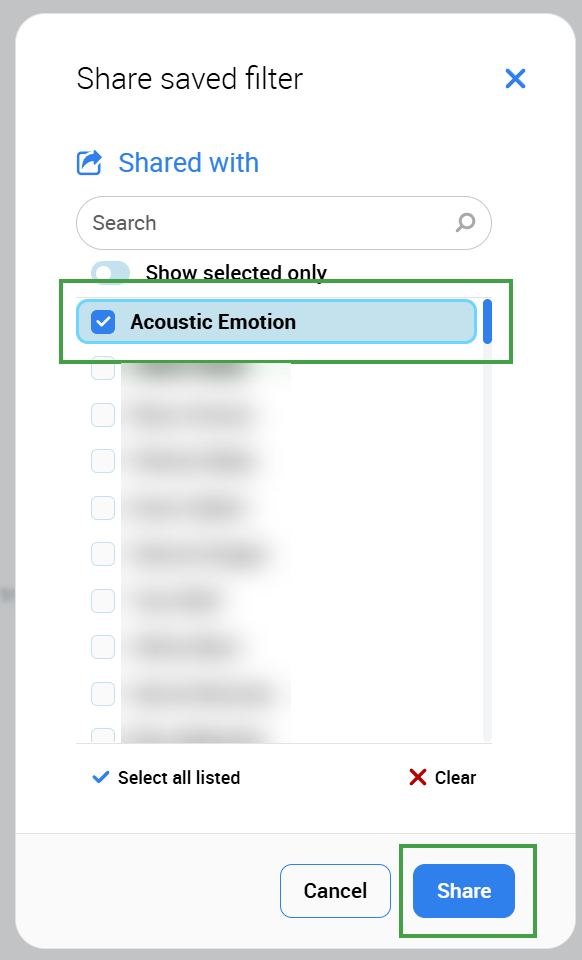
-
A confirmation message will display.

-
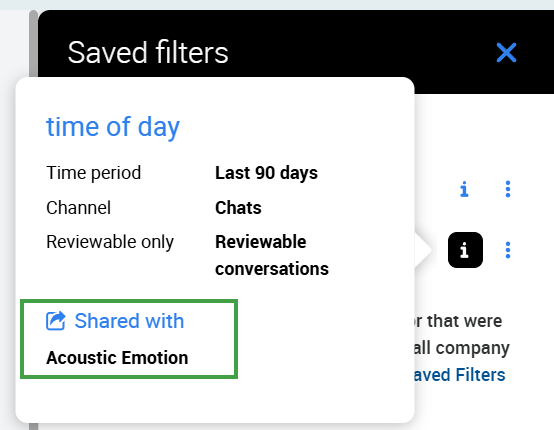
Information about who the filter is shared with will be visible by clicking on the i icon.
Deleting a Saved Filter
Go to the Conversation Explorer and select your saved filter from the menu.
-
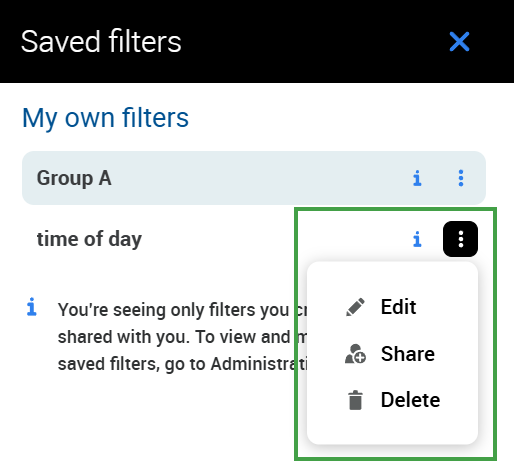
Expand the Saved filters menu.
-
Click on the three dots icon.
-
Click Delete.
-
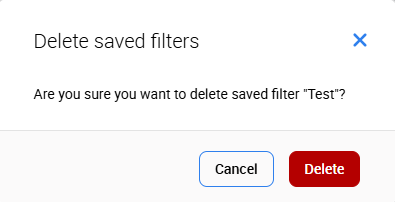
A dialogue asks for confirmation.
If the filter is used by another process, deletion is not possible, and a warning displays:
Assigning Saved Filters
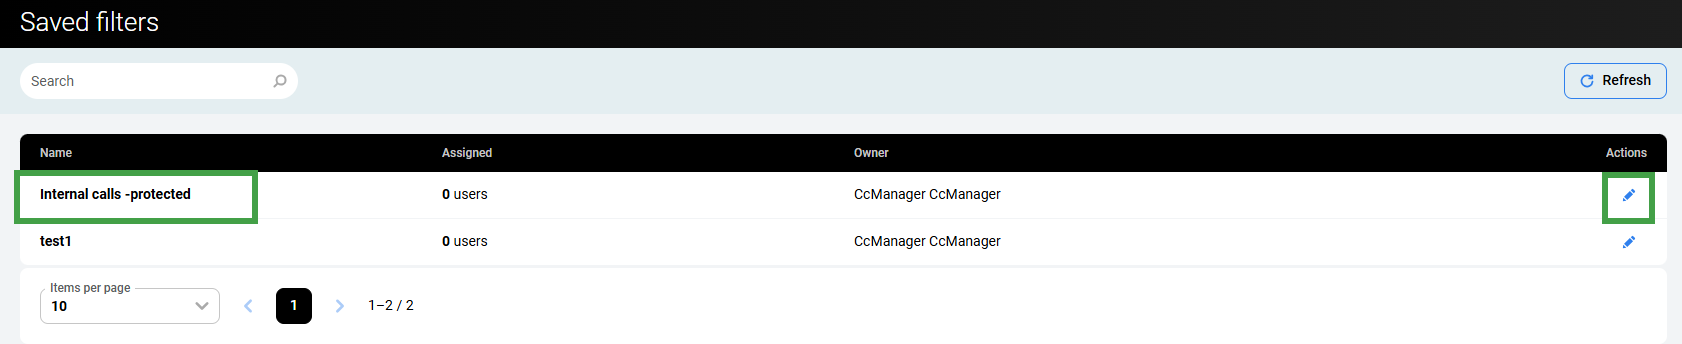
From the Saved Filters pane(Administration > Saved Filters). Click one of the visible filters or the Edit icon.
Viewing and Assigning Users
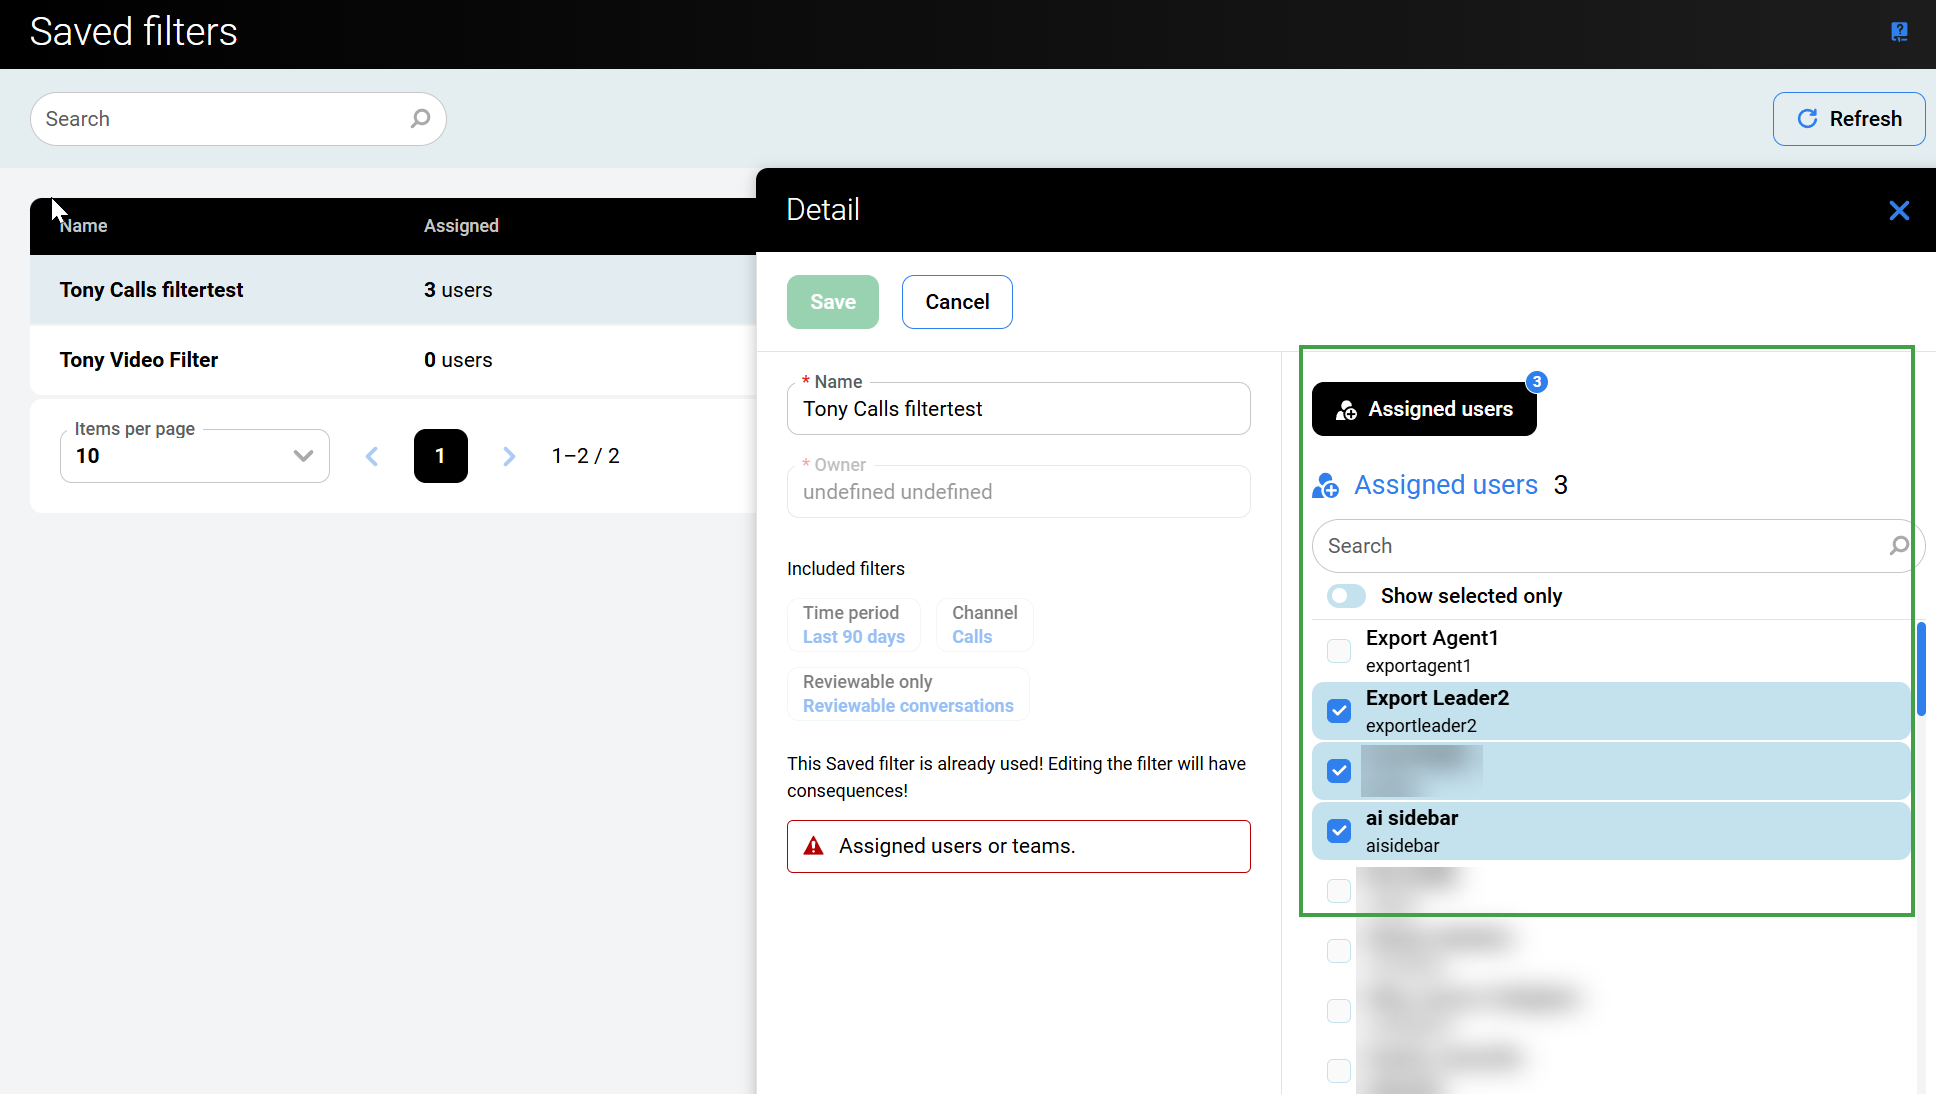
The Saved Filter Detail pane opens and displays a list of available and assigned Users.
If many users are assigned, it is possible to search directly from this pane to confirm that they are already assigned to this filter (or scroll down to view more). Alternatively, select the toggle to Show selected only to view only currently assigned users.
To assign a Saved Filter to a user:
-
Click the box beside the individual users to select them. A checkmark highlights the change.
-
Click Save to save the changes, or Cancel to discard the changes.
Confirmation of the save displays.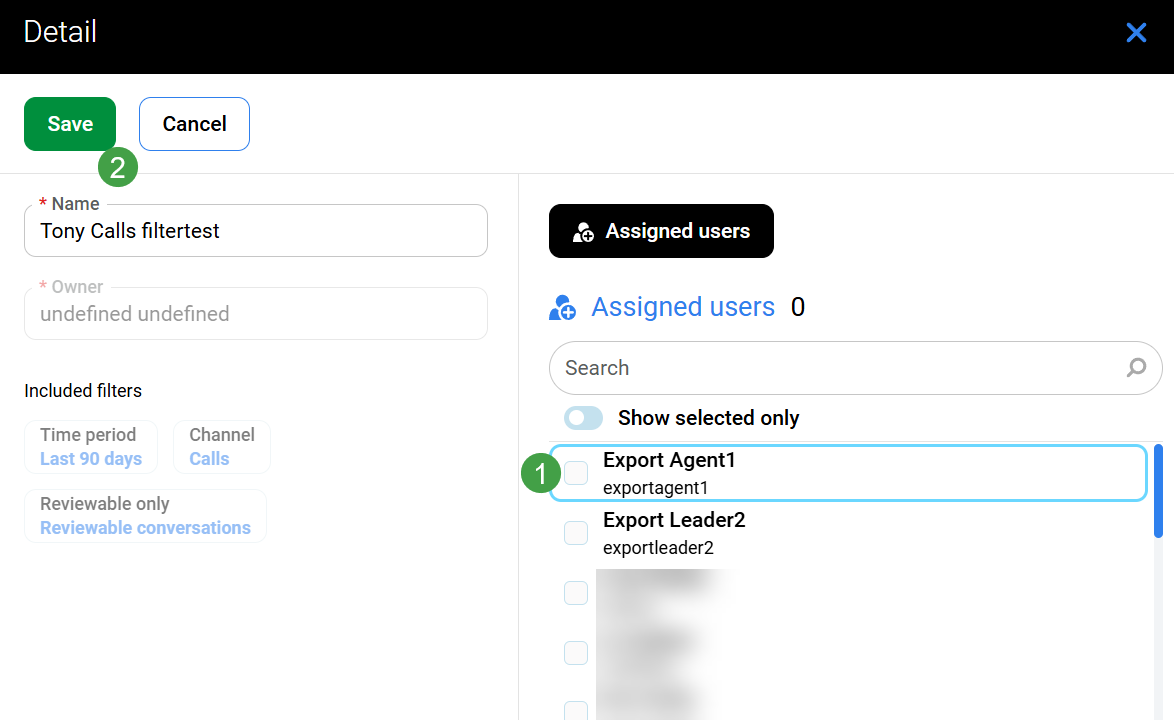
Confirmation of the save displays.

Additional Options
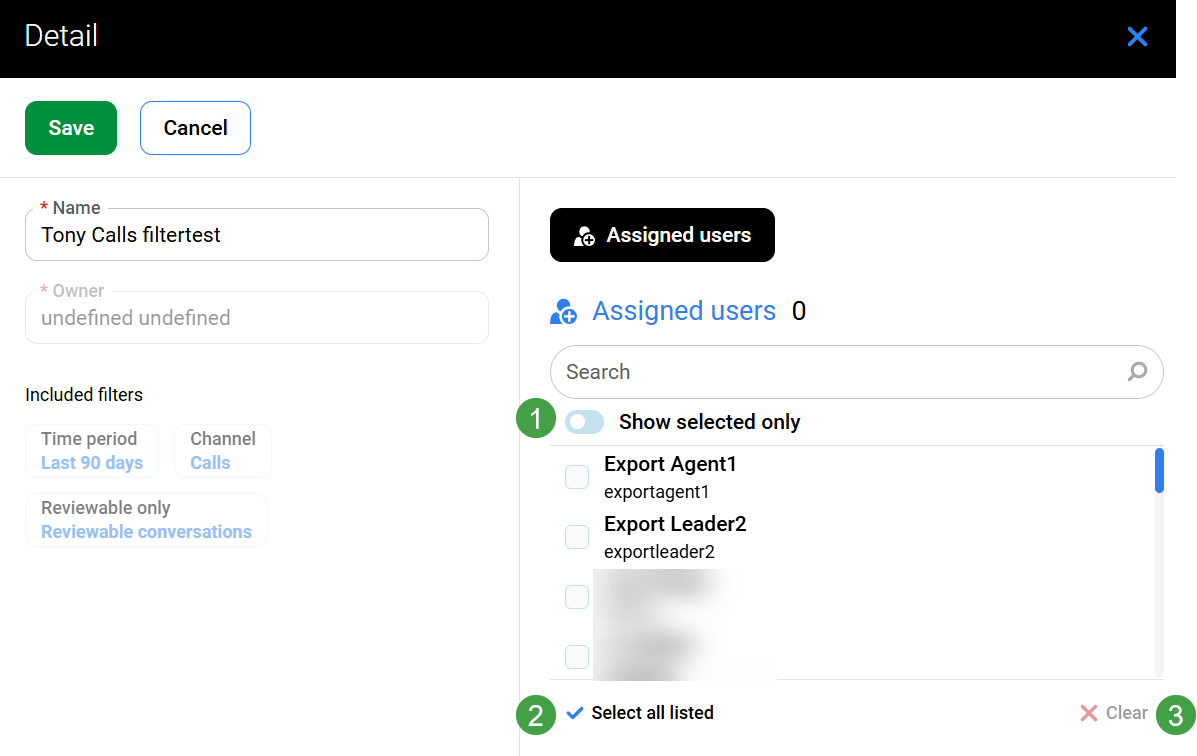
In addition to searching for users, you can quickly view only those currently assigned to the saved filter. Available options include:
-
Show selected only – Display only the currently assigned users.
-
Select all listed – Quickly select all visible users.
-
Clear – Unselect all users.
Viewing the Number of Assigned Users
The total number of users assigned to a filter is updated in the list of filters visible on the Saved Filters pane.
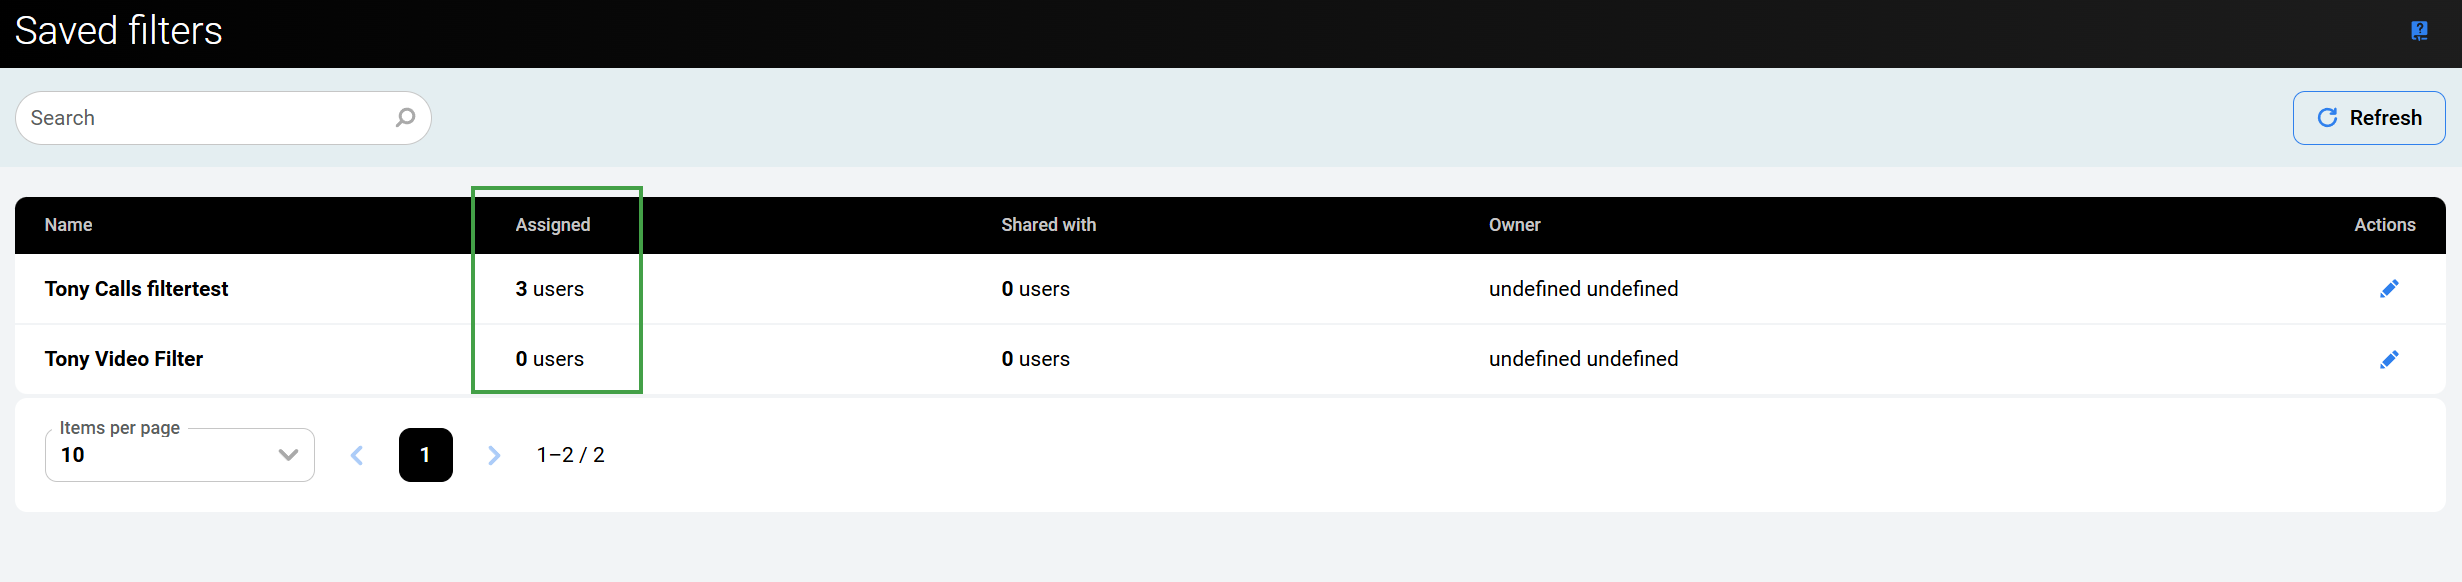
Users assigned can access the conversations included in this filter.
Searching for a Saved Filter
If the required filter is not visible on the main page of the Saved Filters tab, click on the arrow to view the next page.

By default, 10 filters are displayed on the page. This can be changed by selecting from the dropdown list.
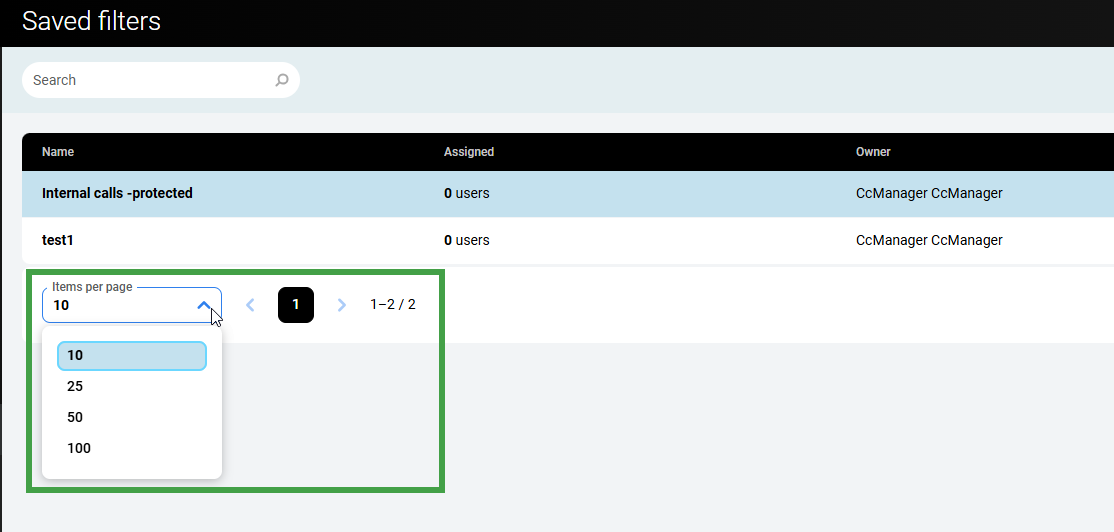
To quickly find a Saved Filter available to be assigned to another user, use the search field. Clear the search field to view all filters.

Transfer Ownership of a Saved Filter
Any user with the SAVED_FILTER_ADMIN permission can view all saved filters in the system. Even if the original owner has been deactivated.
In the example below a user with the role SAVED_FILTER_ADMIN can:
-
View all available saved filters.
-
Modify the filter name.
-
Change the owner of any filter they can view.
-
Change the assigned users.
-
View additional details about where and how the saved filter is used.
It is not possible to modify the filter criteria.
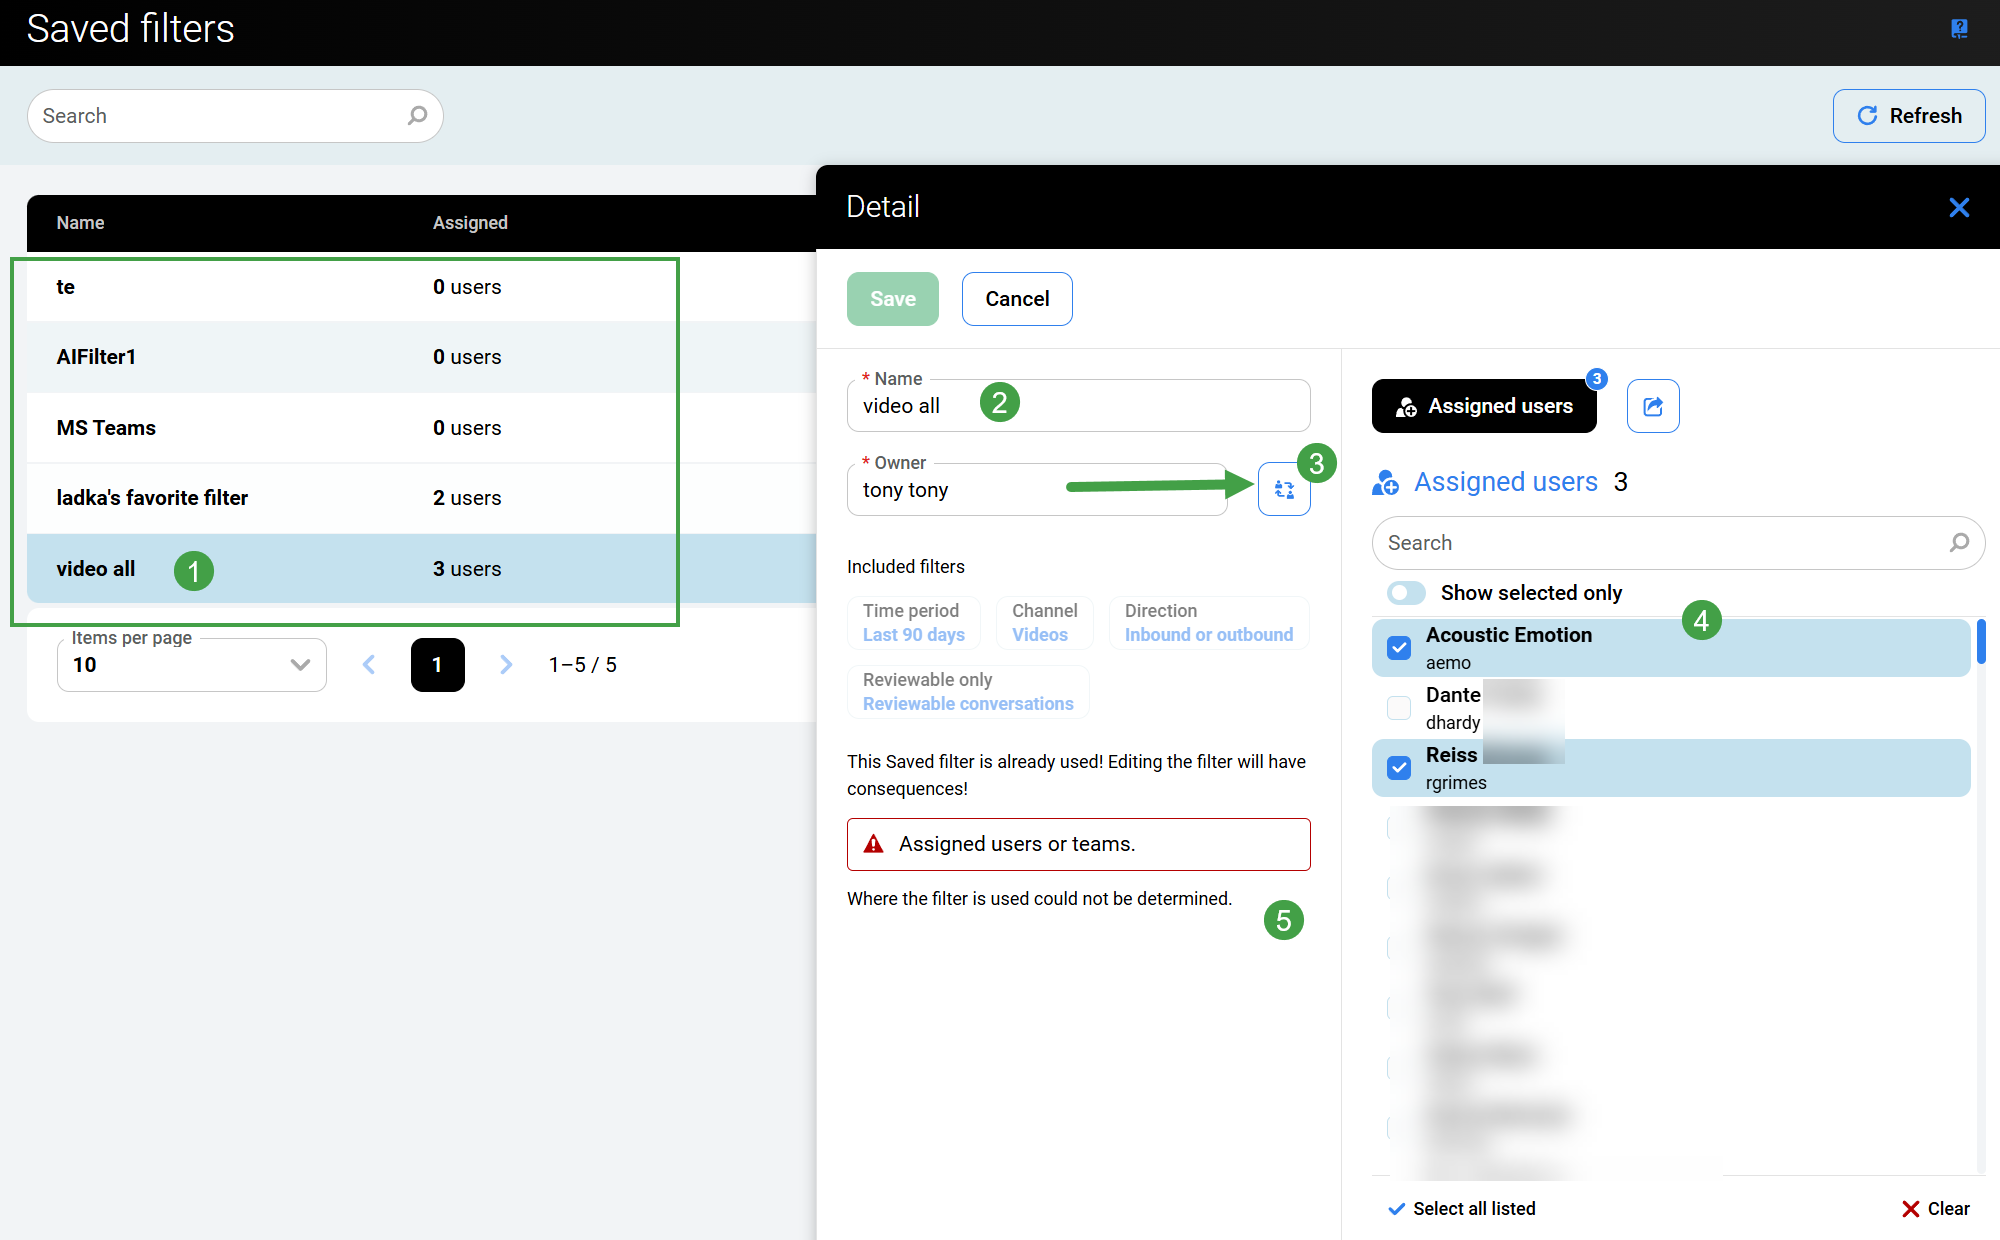
Change the Owner of a Saved filter
To transfer ownership of a saved filter, click on the dedicated icon.
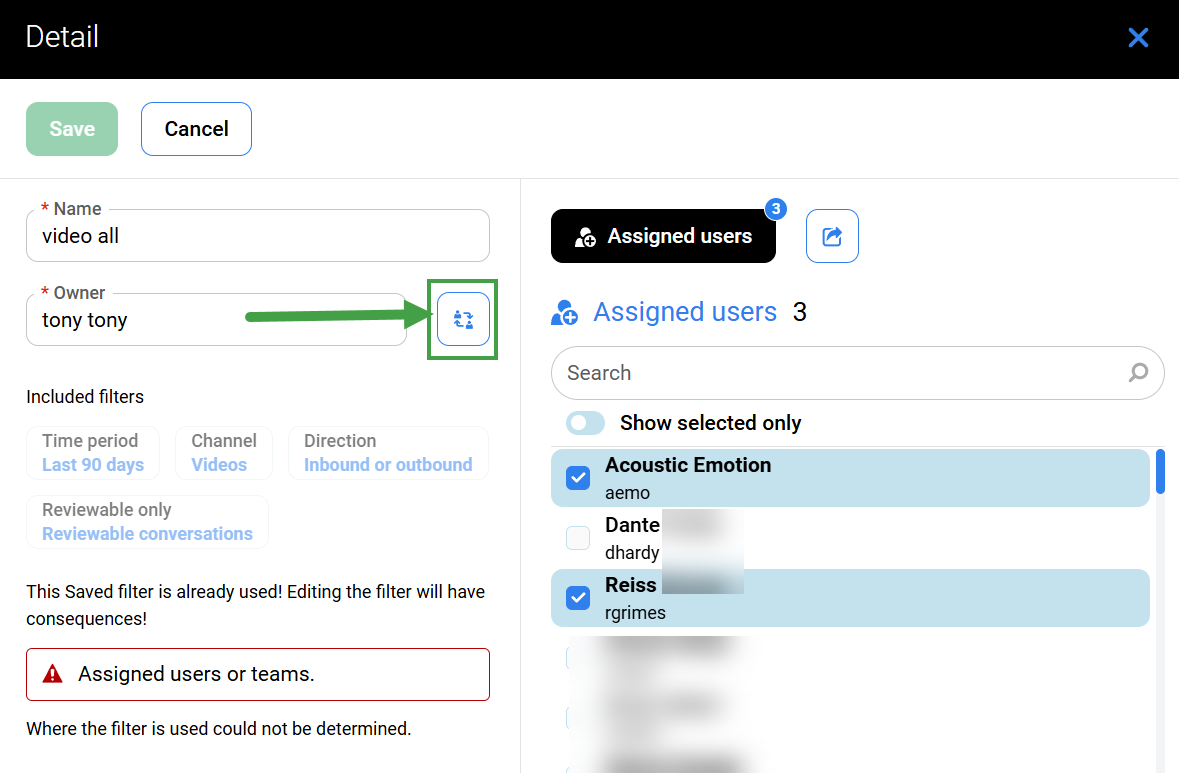
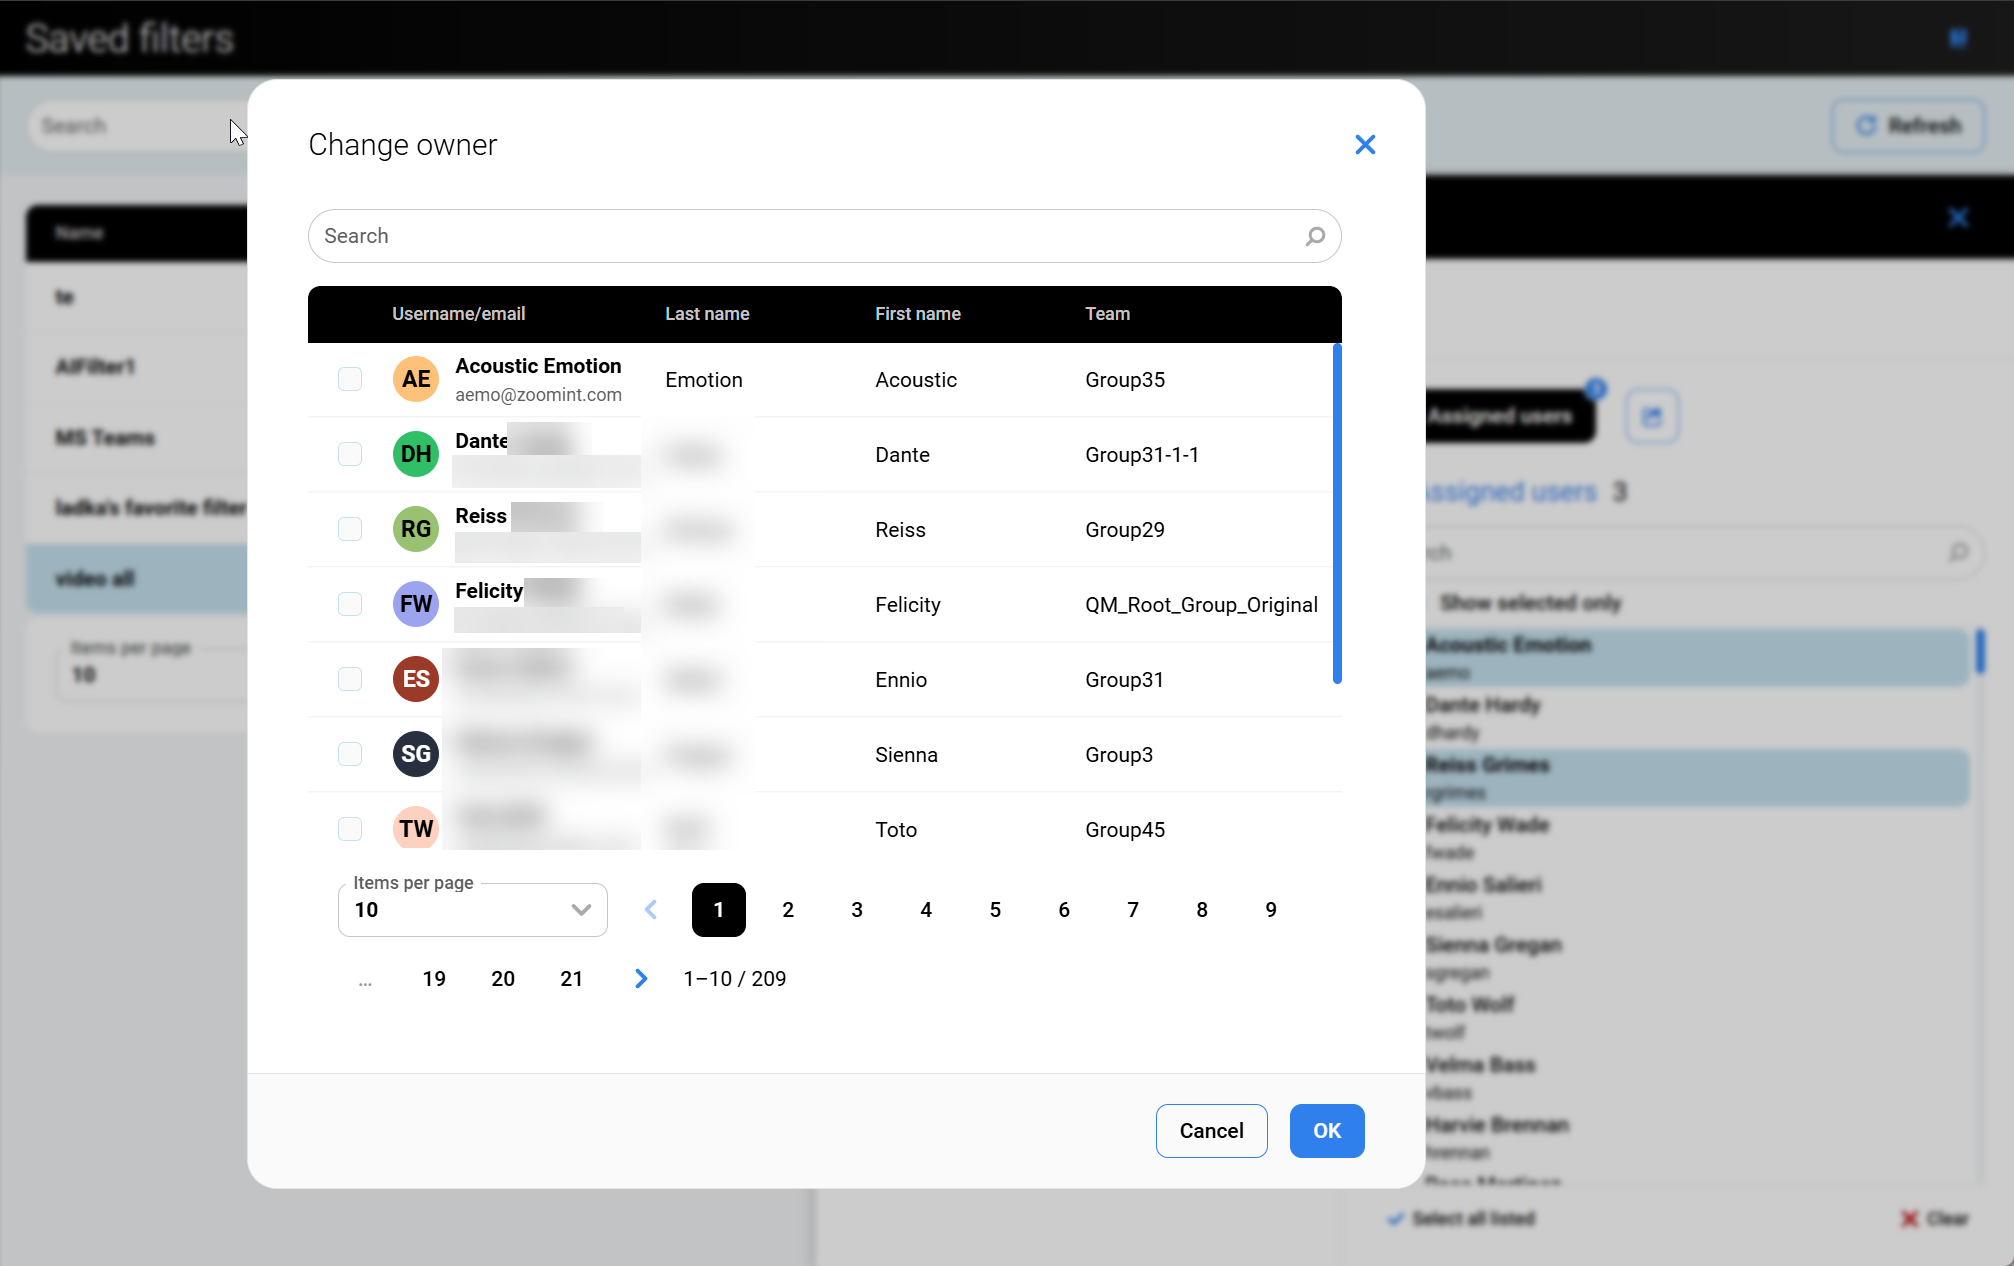
A new screen appears, listing available users.
Select from the available users (or search by name) and click OK. Then Save changes.
-
Only a single user can be selected.
-
The user with the role
SAVED_FILTER_ASSIGNMENTcan assign the filter to other users:
In this example, the new owner is CcManager:
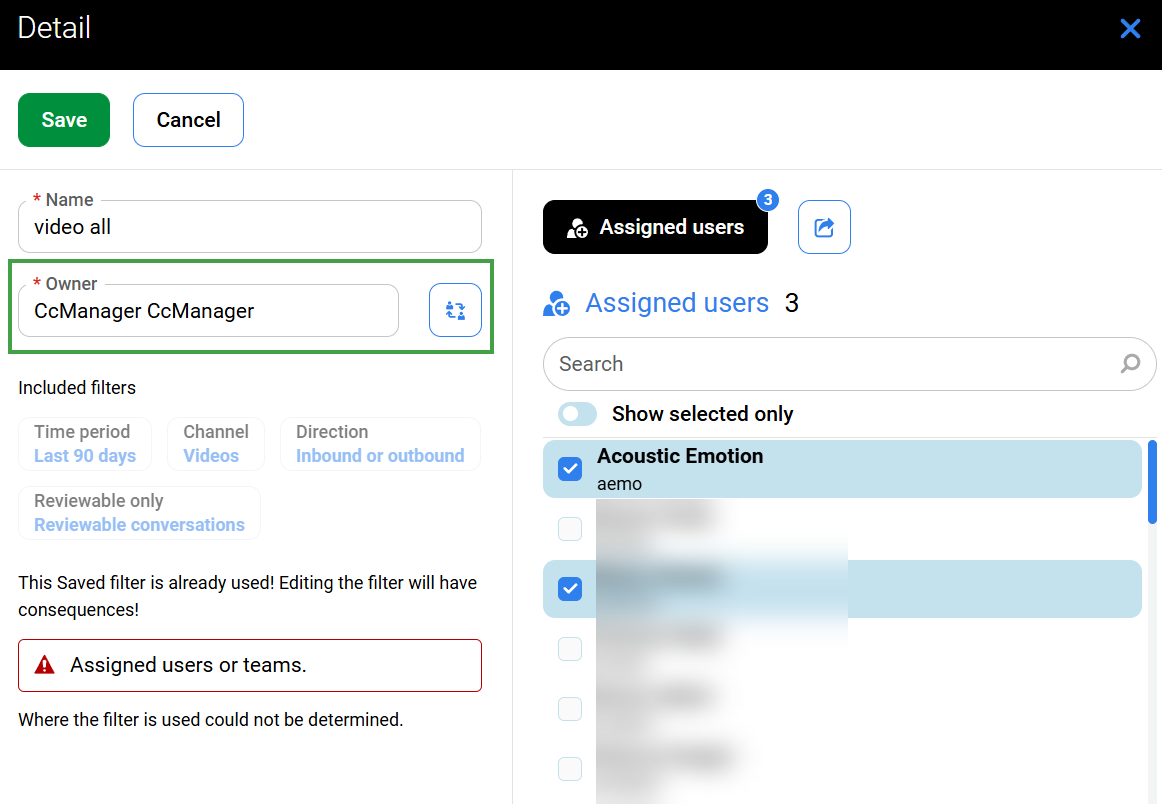
After clicking Save, a confirmation will appear that indicates that the specific filter has been reassigned. The previous owner will lose access to the filter unless it is assigned to that user manually.

The new owner has full access to and control over the saved filter: share/assign it to other users, or edit it as if it were their own, from the Conversation Explorer.