
Overview
A schedule can be created in two ways:
-
Automatically, using the scheduling engine, as described below. This page provides technical details on how to automatically create a schedule. The process for understanding the requirements and taking the initial steps is described on the Adding a New Schedule page.
-
Manually, by assigning schedule elements to people based on the provided forecast or your own judgment, as described on the Manual Scheduling page.
The auto scheduling feature uses the scheduling engine to automatically assign schedule elements to people. Only people who have a Work plan assigned are included in auto scheduling. People without a Work plan assigned are skipped. Their schedule elements can still be assigned manually, and those assignments are not overwritten during the auto scheduling process. The schedule is automatically created for the selected time range, meaning all shifts with a start time that falls within that range are scheduled automatically.
All agents who belong to the teams that the current user has assigned in User Management > Can Review section are available. Details can be found in the Can Review section of the Editing Users page.
Limitations and Requirements
The auto scheduling feature has the following limitations and requirements:
-
The schedule date range should be no more than 12 weeks. Otherwise, the Generate Schedule button won’t be active.
-
Auto scheduling is performed only for queues that have a forecast assigned. In the absence of forecasts for the single-queue schedule, the auto scheduling process will result in an error. In multi-queue schedules, work contribution during the auto scheduling process is distributed only among queues with available forecasts.
Schedule Elements
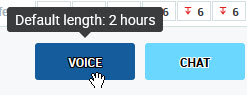
The schedule elements represent work, other activities, or non-working times, for example: lunch, break, training, meeting, or sick. Each element has a default length assigned (for example: Voice - 2 hours, Lunch - 30 minutes, etc.).
Hover the mouse cursor over elements to see their default duration.
More information about schedule elements and their configuration can be found on the page Managing Schedule Elements.
Initial Tasks
Before starting the auto scheduling process, it is recommended that you consider the following:
-
Assign the Sick, Meeting, Vacation, Holiday, Training, One on One elements to people manually. Pin the elements where they are needed to prevent them from being moved during auto-scheduling.
-
Do not create more than one schedule for the same date range. If it is necessary to change the schedule, it is recommended that you correct the existing one (even in production) rather than create another draft schedule for the same (or overlapping) date range. This will help to avoid conflicts.
-
An additional day automatically added at the end of the schedule should be used only to display the night shift that ends on that day. Do not add any shifts on that day manually.
-
Ensure the forecast covers the entire schedule period, plus one additional day to account for overflow shifts. For example, if the schedule covers the date range from 1.04 to 10.04, the forecast should cover the range from 1.04 to 11.04.
-
Pinning and Unpinning Elements
To ensure that the Training, Meeting, or One on One elements that were manually added to the schedule will not be moved or overwritten by the auto scheduling process, pin them to the schedule.
To pin the element(s):
-
Optionally: select the element (if only one element needs to be pinned).
-
Right-click the person's name. A tooltip will display.
-
Expand Pin Activities.
-
Click Pin Selected Activity.
Alternatively, click Pin all Activities (Given Day) to pin all schedule elements during the current day, or click Pin all Activities (Whole Schedule) to pin all schedule elements during the whole schedule range.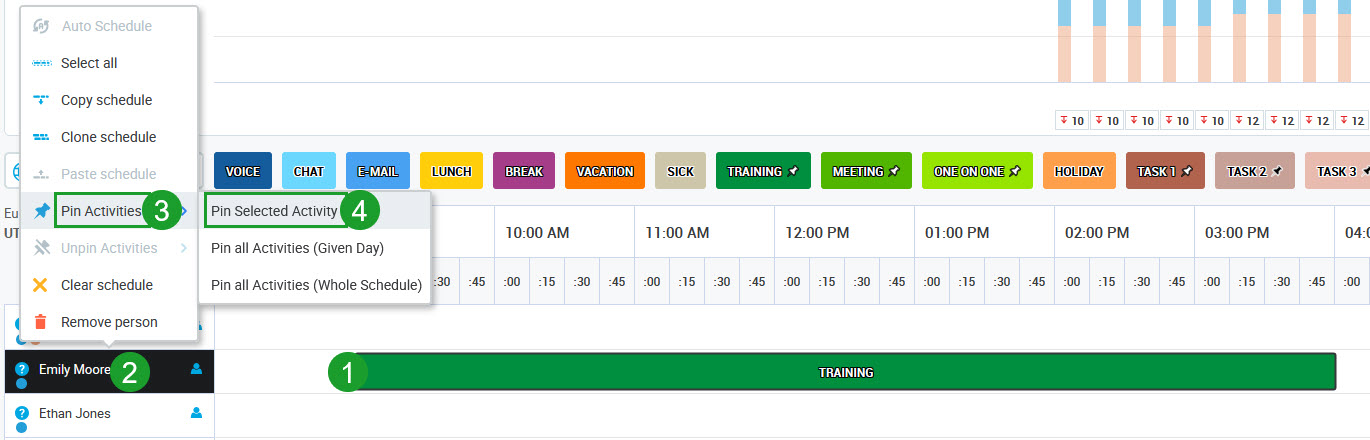
Any element that is already pinned is marked with the Pin icon:

To unpin the element(s):
-
Optionally: select the element (if only one element needs to be unpinned).
-
Right-click the person's name. A tooltip will display.
-
Expand Unpin Activities.
-
Click the option you want to use: Unpin selected activity, Unpin all Activities (Given Day) or Unpin all Activities (Whole Schedule).
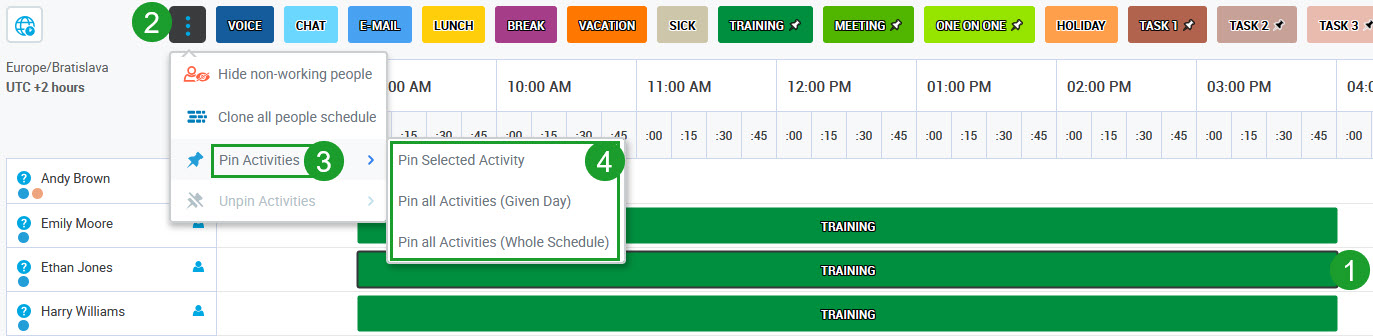
To pin the elements for all people assigned to the schedule:
-
Optionally: select the element(s) (if the particular element(s) need to be pinned).
-
Click the Settings button on the left side of the table. A tooltip will display.
-
Expand Pin Activities.
-
Click the option you want to use: Pin selected activities, Pin all Activities (Given Day) to pin all schedule elements during the current day, or click Pin all Activities (Whole Schedule) to pin all schedule elements during the whole schedule range.
To unpin the elements for all people assigned to the schedule:
-
Optionally: select the element (if the particular element(s) need to be unpinned).
-
Click the Settings button on the left side of the table. A tooltip will display.
-
Expand Unpin Activities.
-
Click the option you want to use: Unpin selected activity, Unpin all Activities (Given Day) or Unpin all Activities (Whole Schedule).
If the Training, Meeting or One on One elements are added to a schedule but are not pinned, the auto scheduling process will remove them.
There is no need to pin the Vacation, Holiday and Sick elements. They will not be moved or overwritten by the auto scheduling process anyway.
Generating a Schedule
Click the Generate Schedule button to automatically create a schedule. The Generate Schedule panel opens on the right side of the screen.
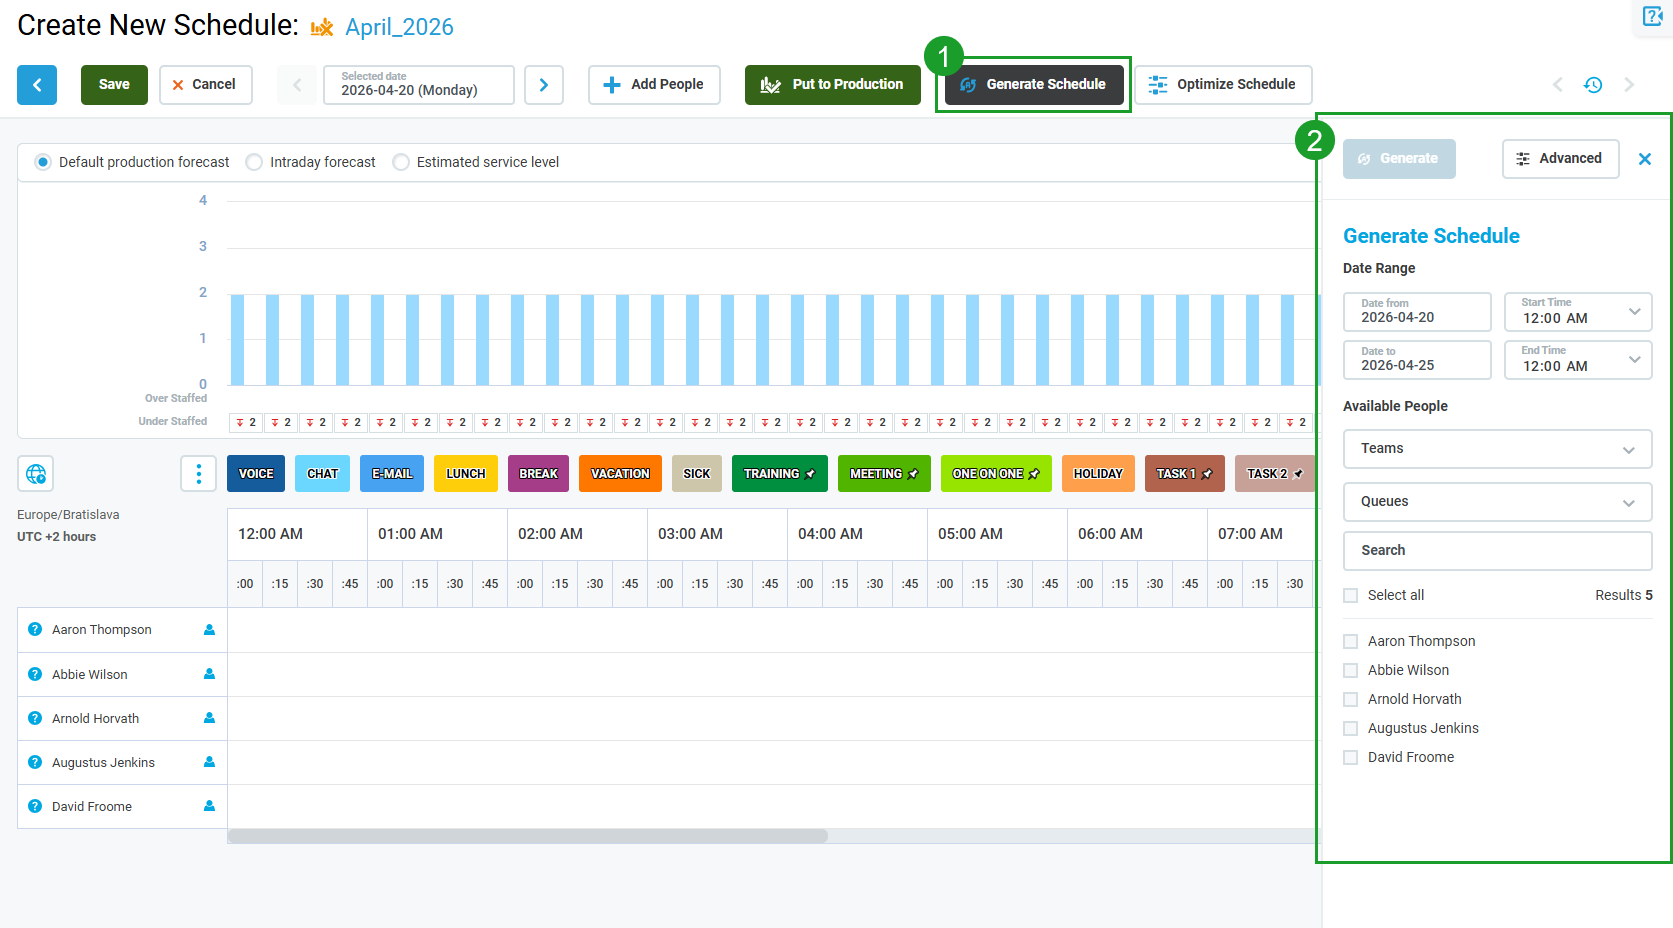
Configure the following settings:
-
Date Range:
-
Date from/Start Time – the start date and time of the scheduling period.
-
Date to/End Time – the end date and time of the scheduling period.
-
-
Available People:
-
Use the Teams and Queues dropdown menus to filter the list of available people.
-
Use the Search field to find a specific person.
-
Select the checkbox next to each person to include them in the schedule, or select Select all to include everyone.
-
Click Generate to start the process. The schedule is generated for the selected people within the defined date range.
Optimizing a Schedule
Click the Optimize Schedule button to re-optimize an existing schedule. The Optimize Schedule panel opens on the right side of the screen.
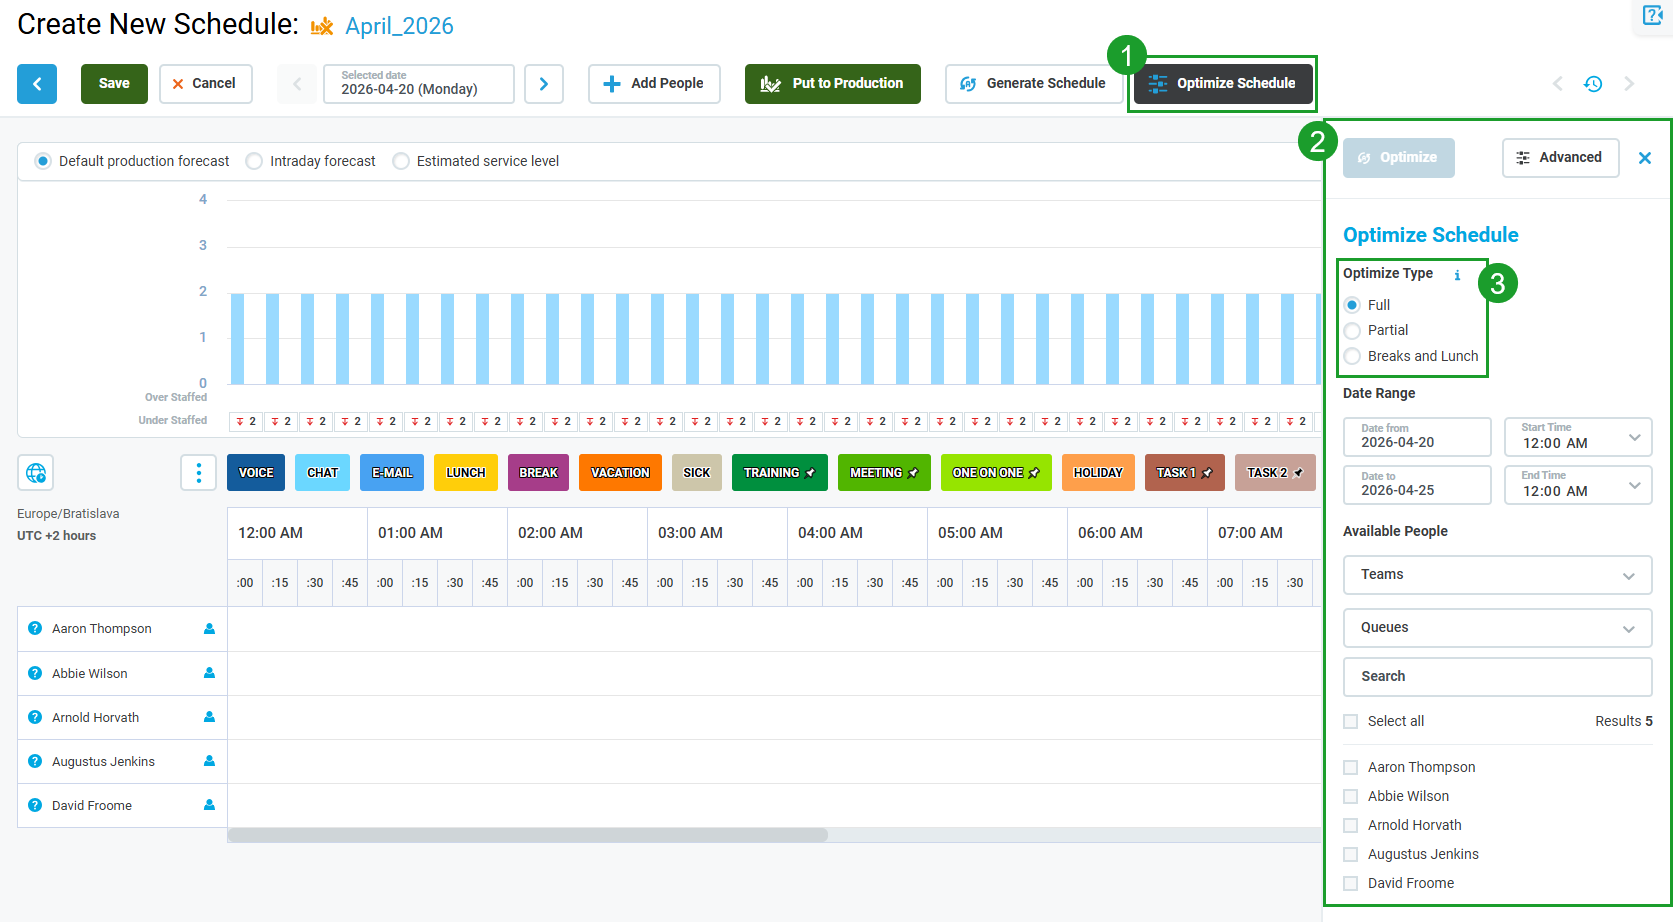
Configure the following settings:
-
Optimize Type – select one of the following optimization modes:
-
Full – Re-optimizes the entire schedule, including shift placement, start and end times, and internal activity distribution. The engine may change any aspect of a shift that is not pinned. Use this mode when the schedule needs a complete rebuild based on the current forecast and work plan constraints.
-
Partial – Re-optimizes activity distribution within existing shifts while preserving each shift's start time, end time, and break placement. Any manually made activity changes are also preserved. Use this mode to improve staffing coverage without altering shift boundaries.
-
Optimize activities within the selected time range – When enabled, only activities within that range will be optimized. When switched off, the whole shifts that start within the selected time range will be optimized.
-
-
Breaks and Lunch – The most constrained mode. All shift structure and activity assignments are preserved; only the timing of breaks and lunches is adjusted. Use this mode for fine-tuning break placement after the rest of the schedule is finalized.
-
-
Date Range – Define the date and time range to optimize, using the same fields as in Generate Schedule.
-
Available People – Select the people whose schedules should be optimized, using the Teams, Queues, and Search filters.
When Partial or Breaks and Lunch types are selected, additional switches become available at the bottom of the pane:
-
Break relaxation – When enabled, this option gives the system greater flexibility in deciding when to place breaks and lunches within a shift. Use this if you want the system to prioritize finding the best overall schedule, even if that means breaks don't land exactly where the usual rules would place them.
-
Consecutive activity time relaxation – When enabled, this option allows the system to be more flexible about how long a person can remain in a given activity without interruption. Normally, the minimum and maximum consecutive time limits set in the shift template are strictly enforced. Enabling this gives the system flexibility to exceed those limits when it leads to a better schedule.
Click Optimize to start the process.
Configuring Advanced Settings
The Advanced panel exposes an optional parameter that controls how the scheduling engine handles queue staffing requirements. Click Advanced in the top-right corner of the Generate Schedule or Optimize Schedule panels. The advanced settings expand on the right side of the screen.
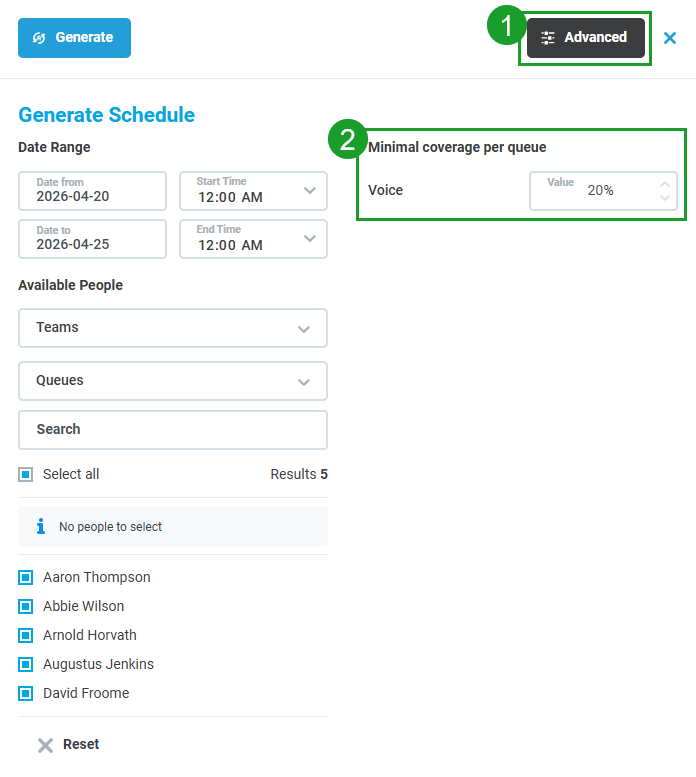
The following setting is available:
-
Minimal Coverage per Queue (optional) – The minimum required percentage of forecast coverage for each queue included in the schedule. The scheduling engine uses this value as a constraint to ensure that all queues maintain adequate staffing during each time interval. A separate value is configured for each queue type, such as Voice.
Click Generate to start the process after configuring the settings.
Running the Auto Schedule Process
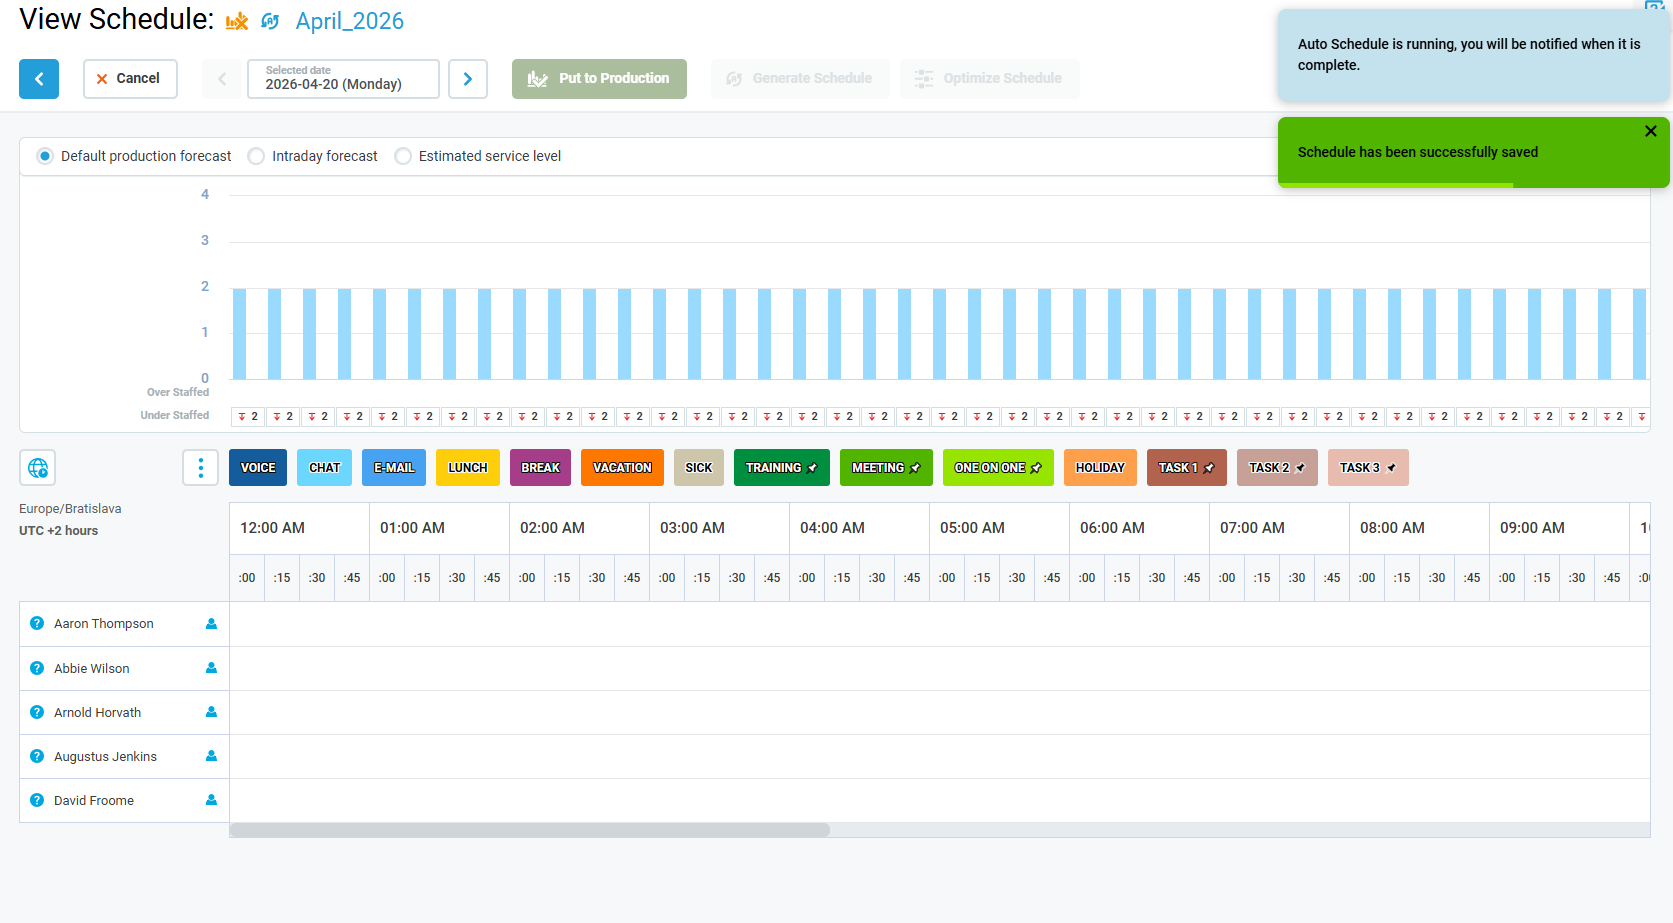
After clicking the Generate Schedule button, the schedule is automatically saved before the auto-schedule process starts. The name of the screen (Create New Schedule) changes to View Schedule, and from this moment, it is no longer possible to change the basic schedule settings (selected queues, schedule range) on the previous screen. While the auto schedule process is running, the user is in 'view mode' – they can view the schedule but not make any changes.
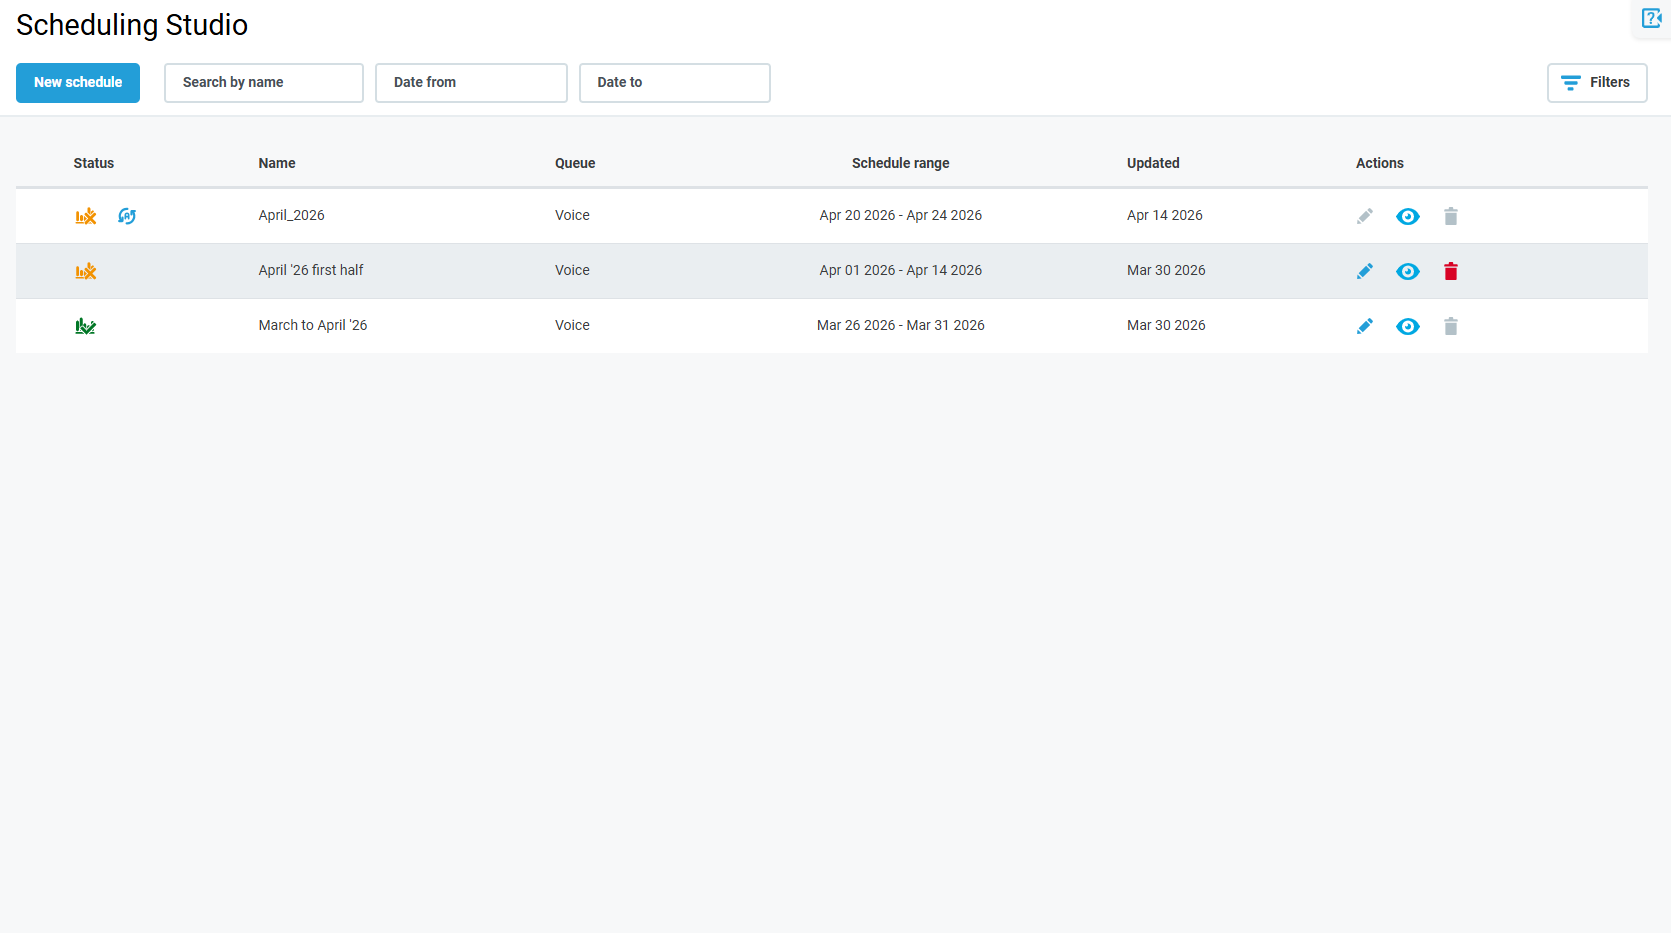
Additionally, while the Auto Schedule process is running, it is indicated by the Auto Scheduling in progress icon on the Scheduling Studio screen. The icon disappears when the process is finished.
Next Steps
After creating the schedule, proceed to evaluate the results as described on the Adding a New Schedule page.