Configuring Zoom Contact Center as Identity Provider
Preparing Zoom Contact Center for Integration
The below configuration steps are based on the following Azure guide: https://marketplace.zoom.us/docs/guides/build/oauth-app/
In order to enable SSO integration with Zoom Contact Center, the OAuth application on the Zoom Contact Center side must be prepared.
Creating OAuth application in Zoom Contact Center
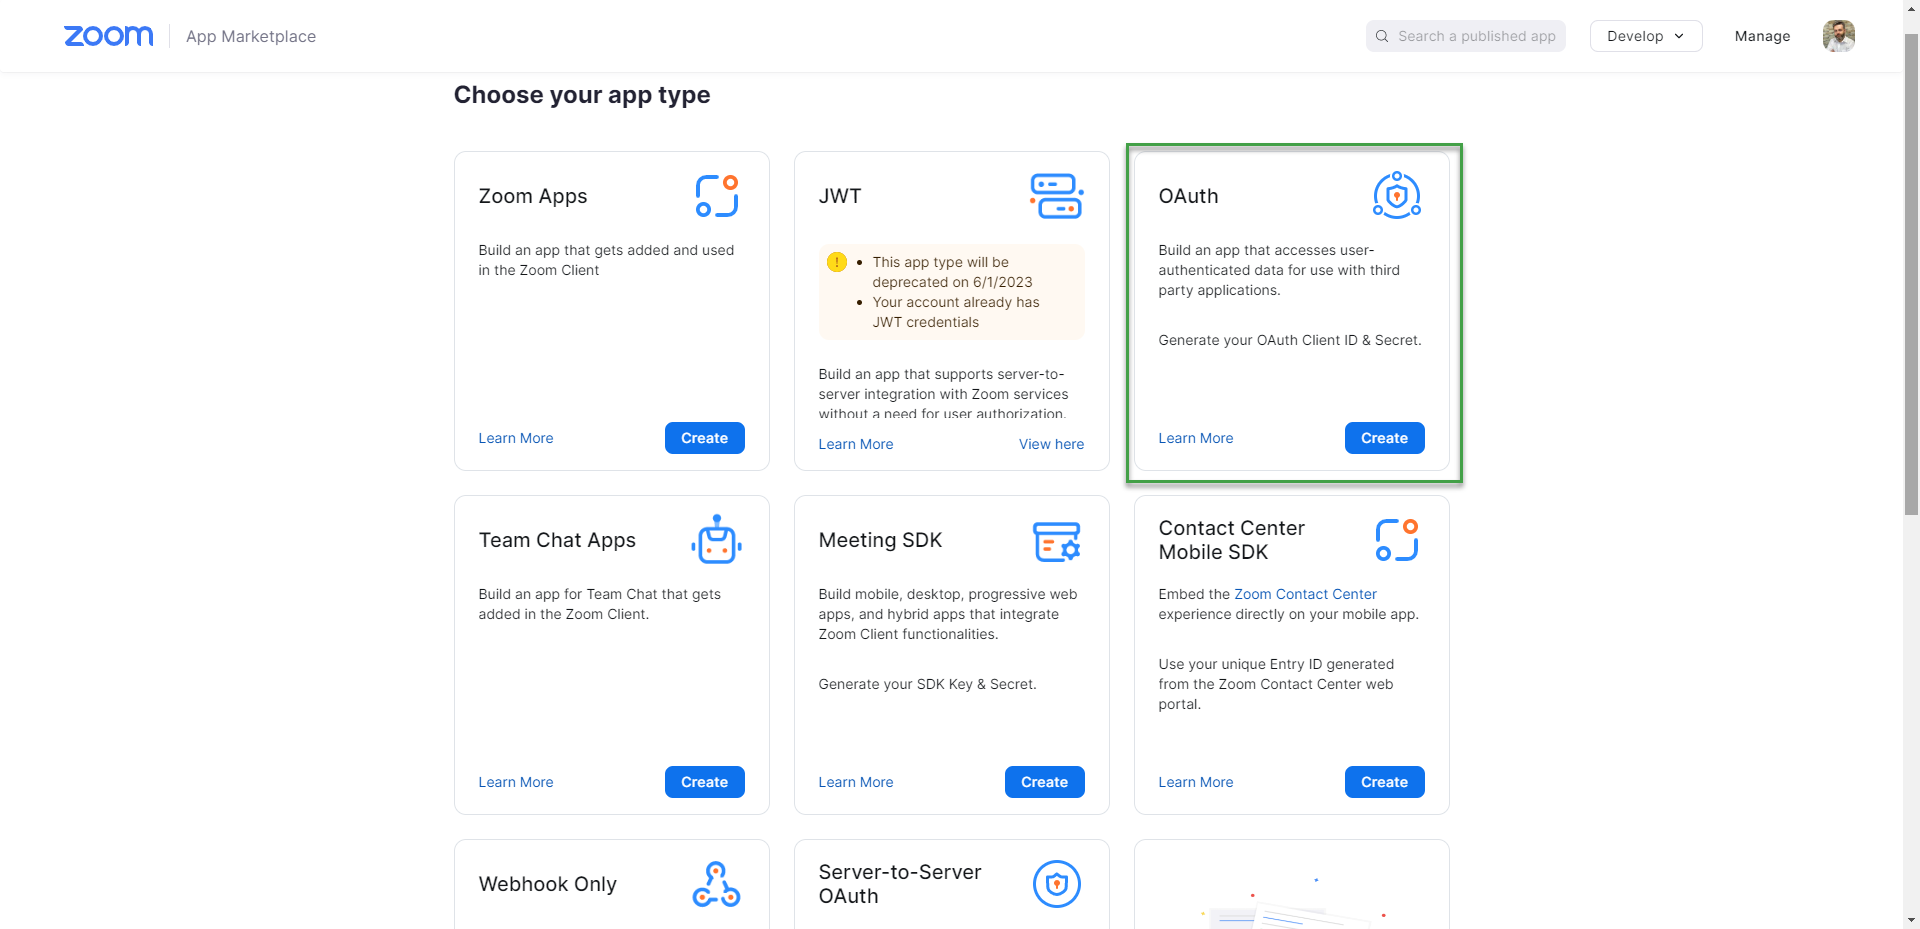
Navigate to https://marketplace.zoom.us/develop/create
Create OAuth application:
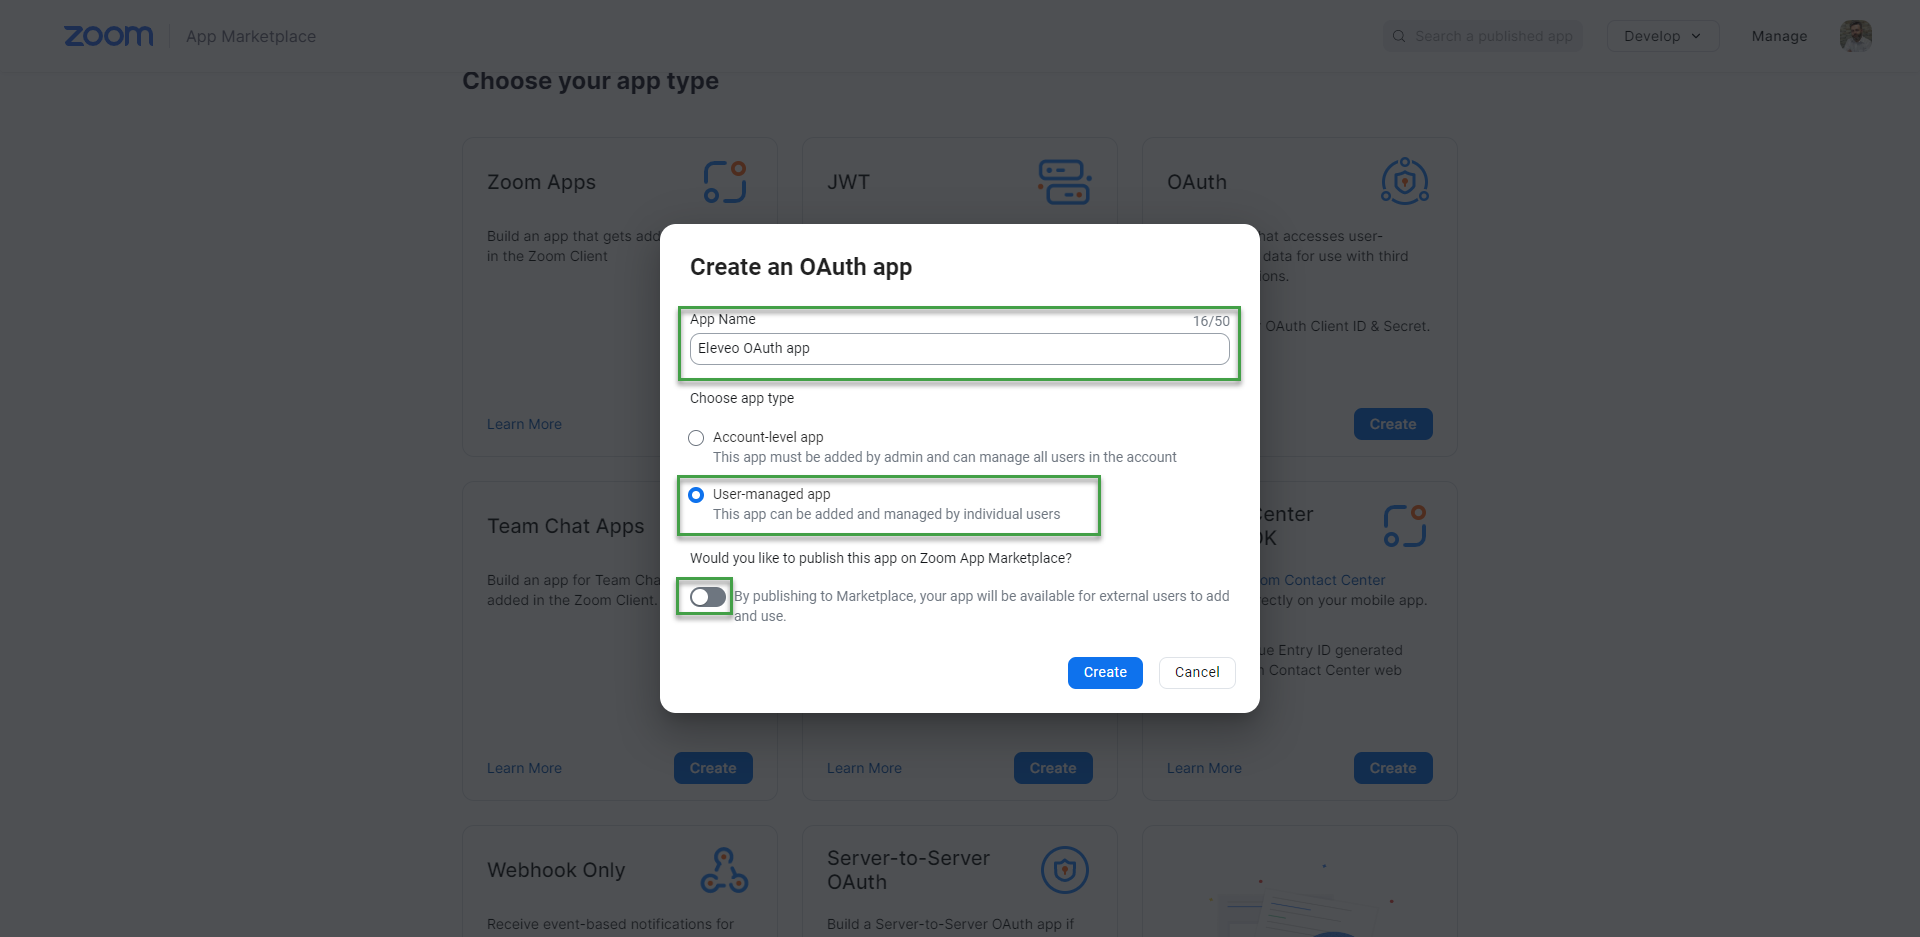
Fill in the App info:
App name
App type - User-managed App. This will reduce access only to user-level, which is enough for authenticating the user
Do not publish on the marketplace.
Navigate to the App Credentials menu and follow the steps:
Copy clientID and clientSecret
Fill in the valid redirect URL where the browser will be navigated after successful authorization, e.g.
http://localhost:8081/auth/realms/default/broker/zoomcc/endpoint.URL can be found in User Management after creating Zoom Contact Center Identity Provider.Fill in the allowed URL, FQDN of the Eleveo server will be enough, e.g.
https://<Eleveo_server_FQDN>. You can add multiple servers if you have already created Zoom Contact Center Identity Provider on these servers.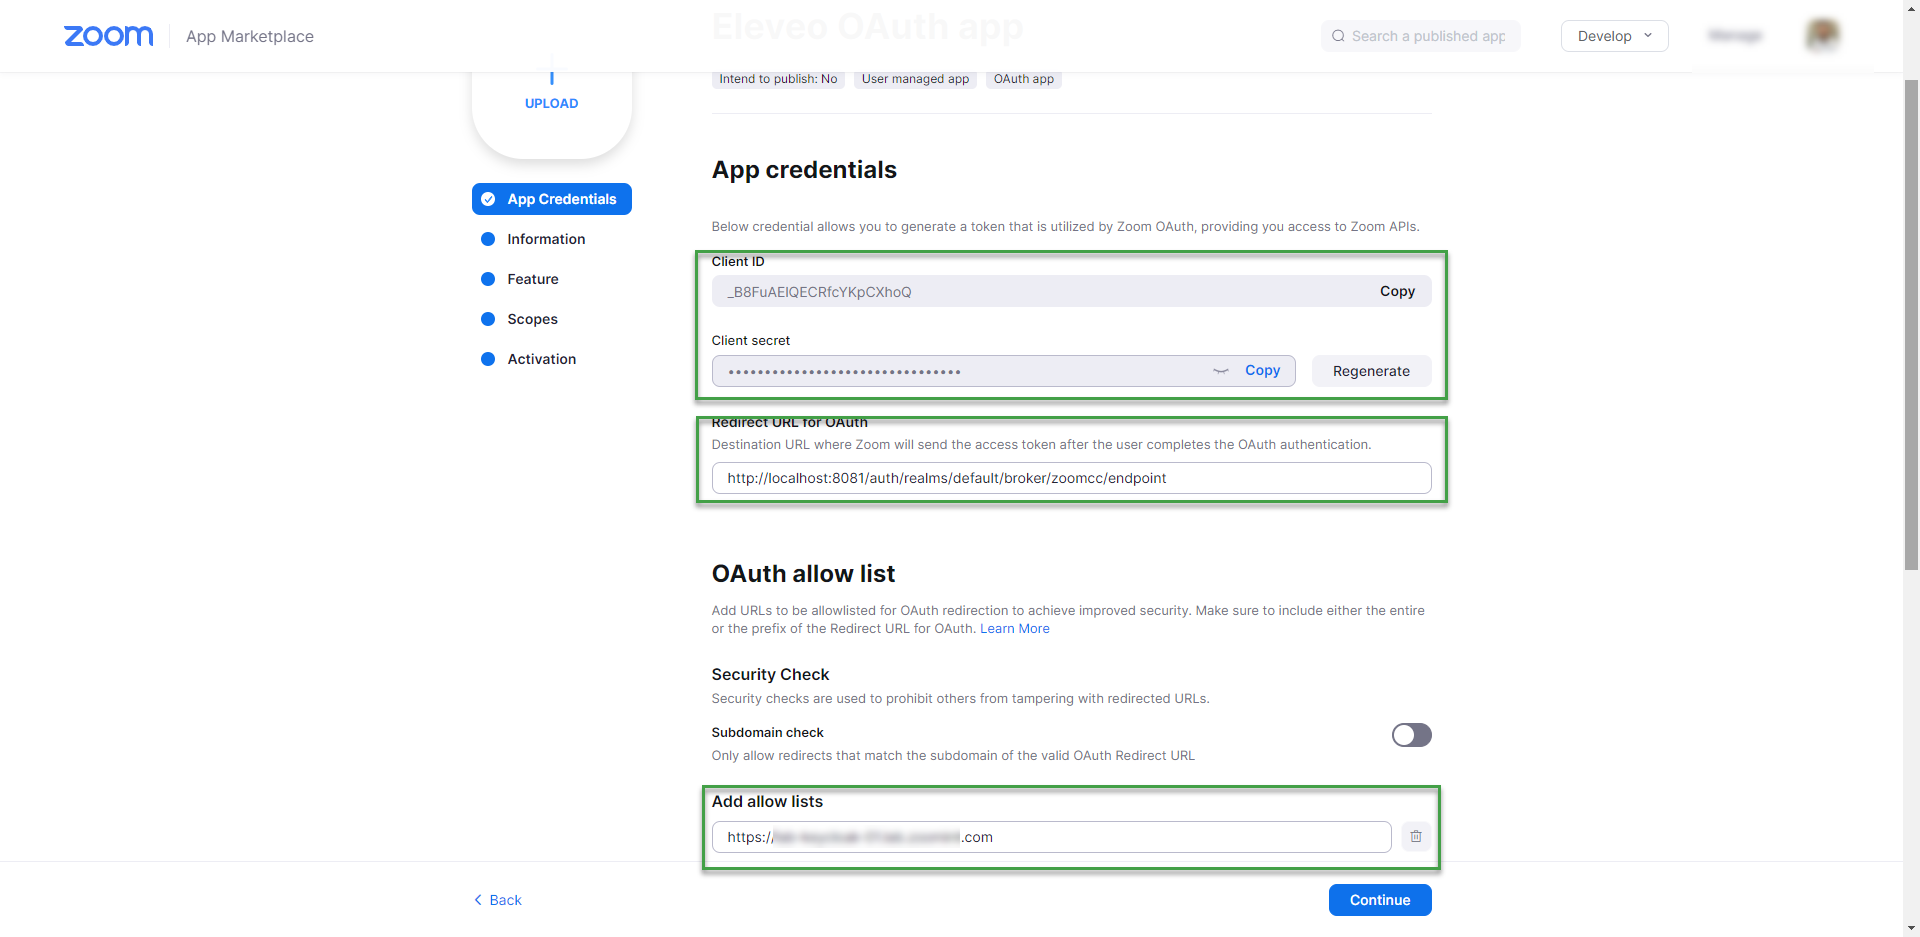
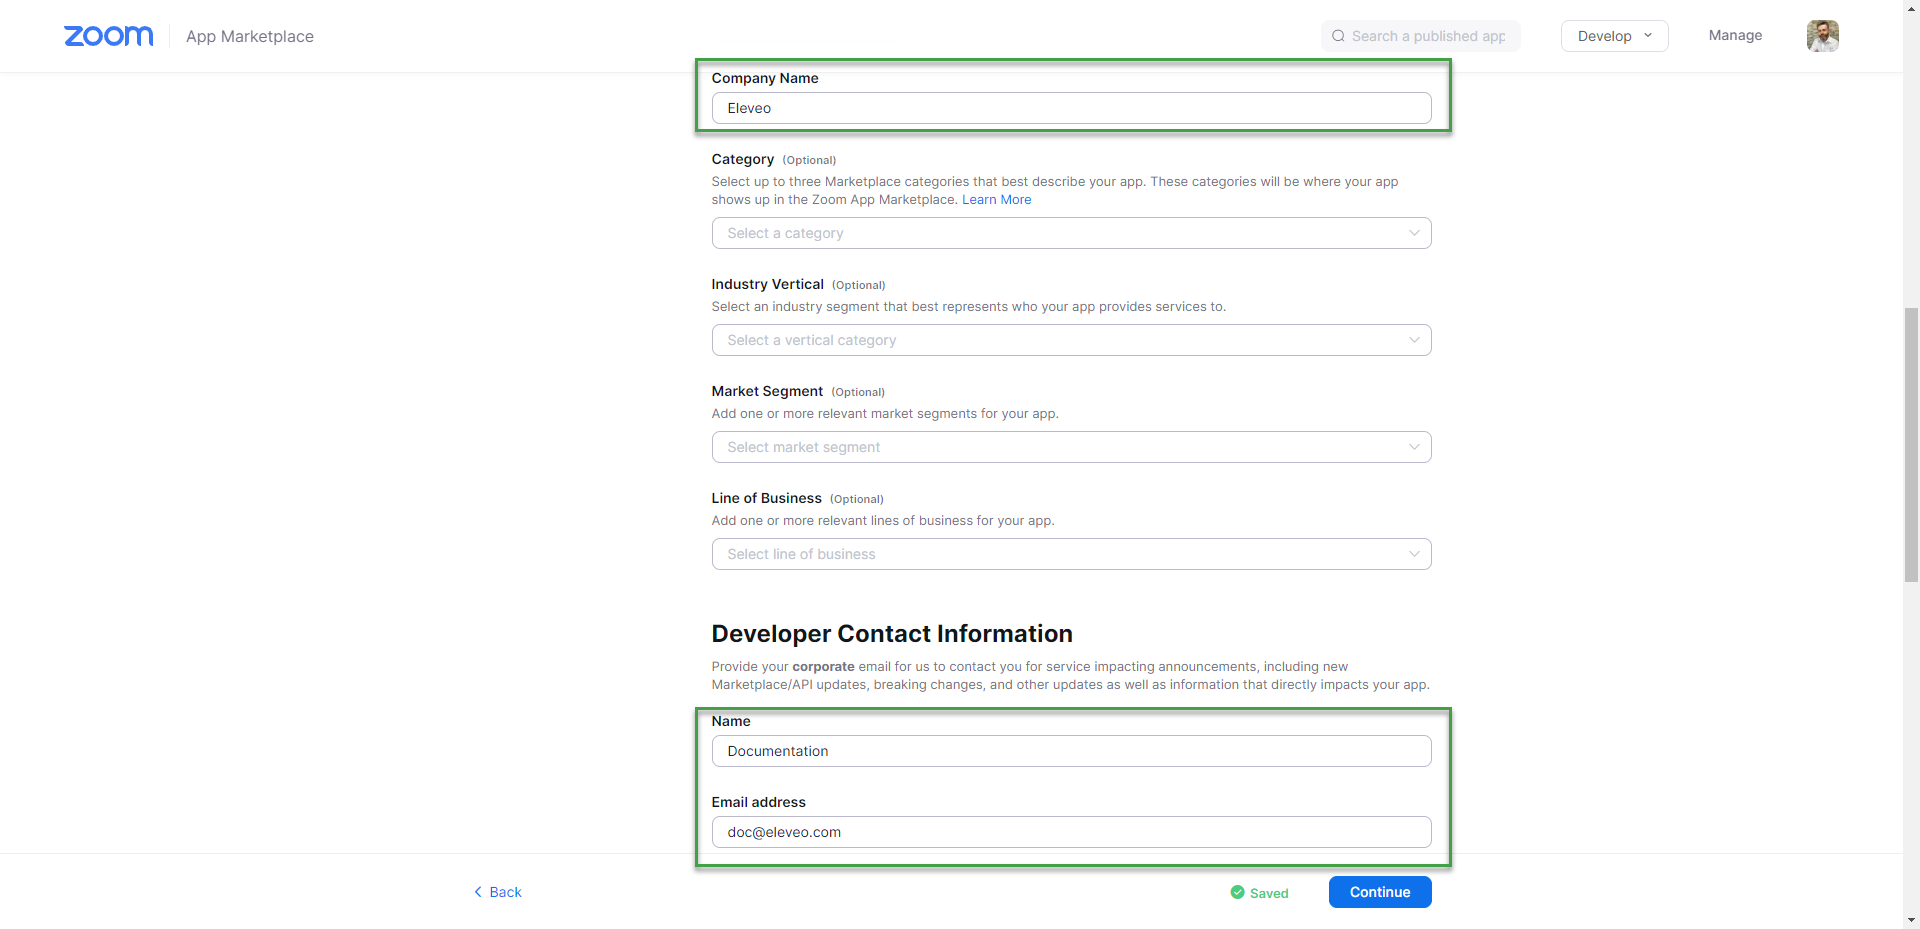
Navigate to the Information menu:
Fill in short and long descriptions for the App
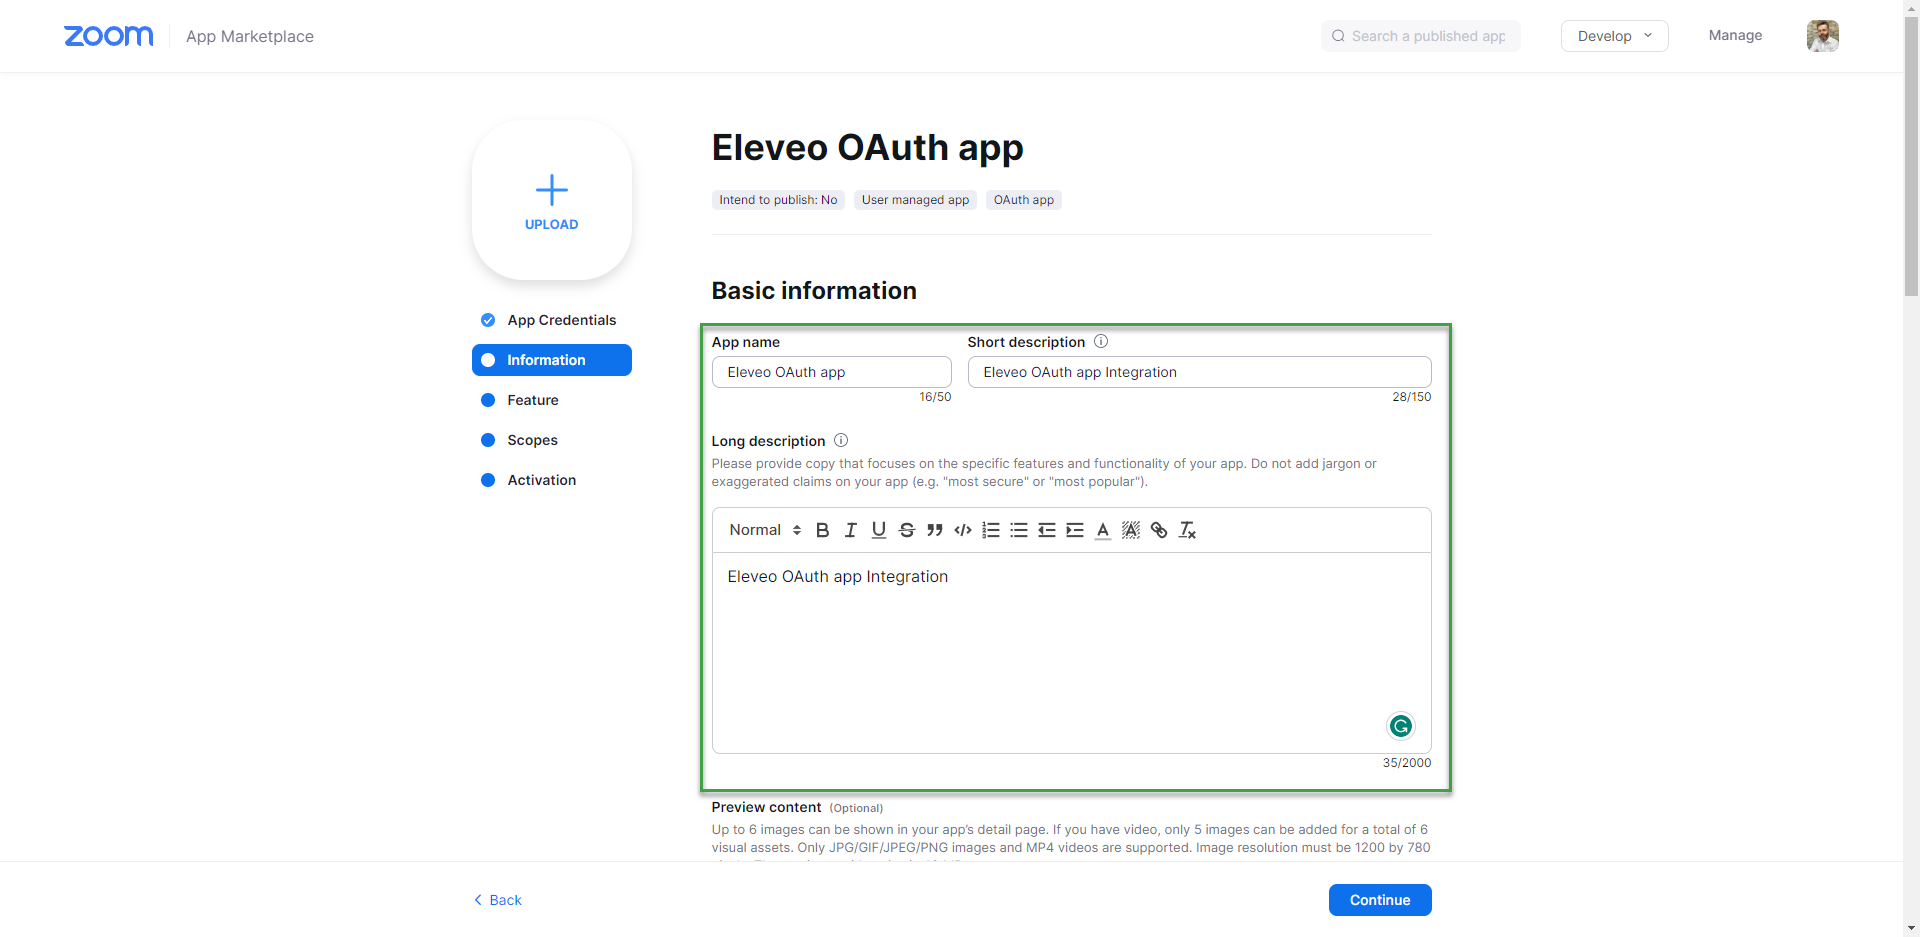
Fill in the customer's company name
Fill in the developer's name and email address (e.g. Eleveo support, helpdesk@eleveo.com)
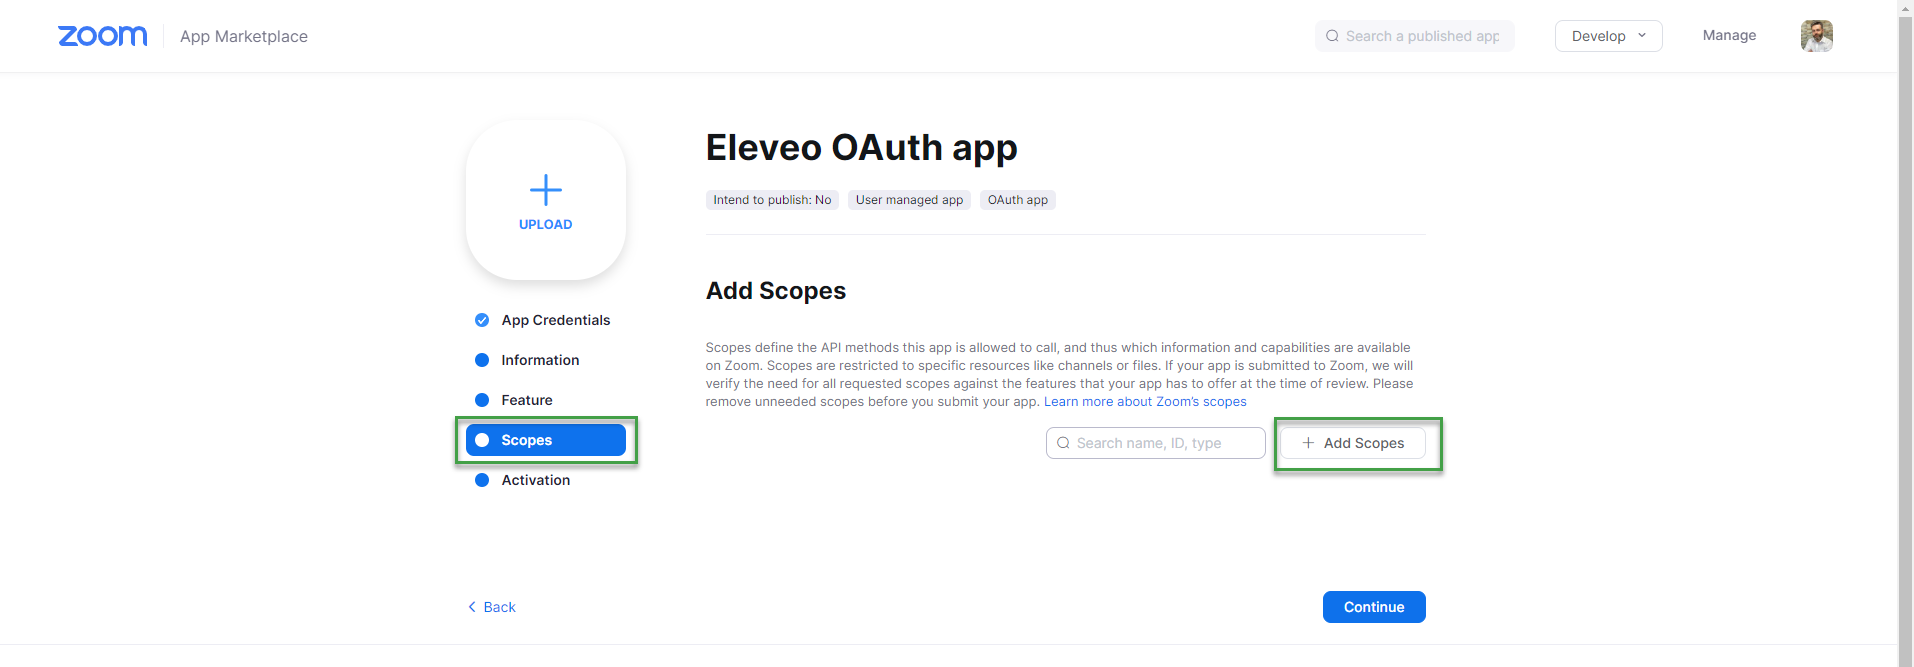
Navigate to the Scopes menu:
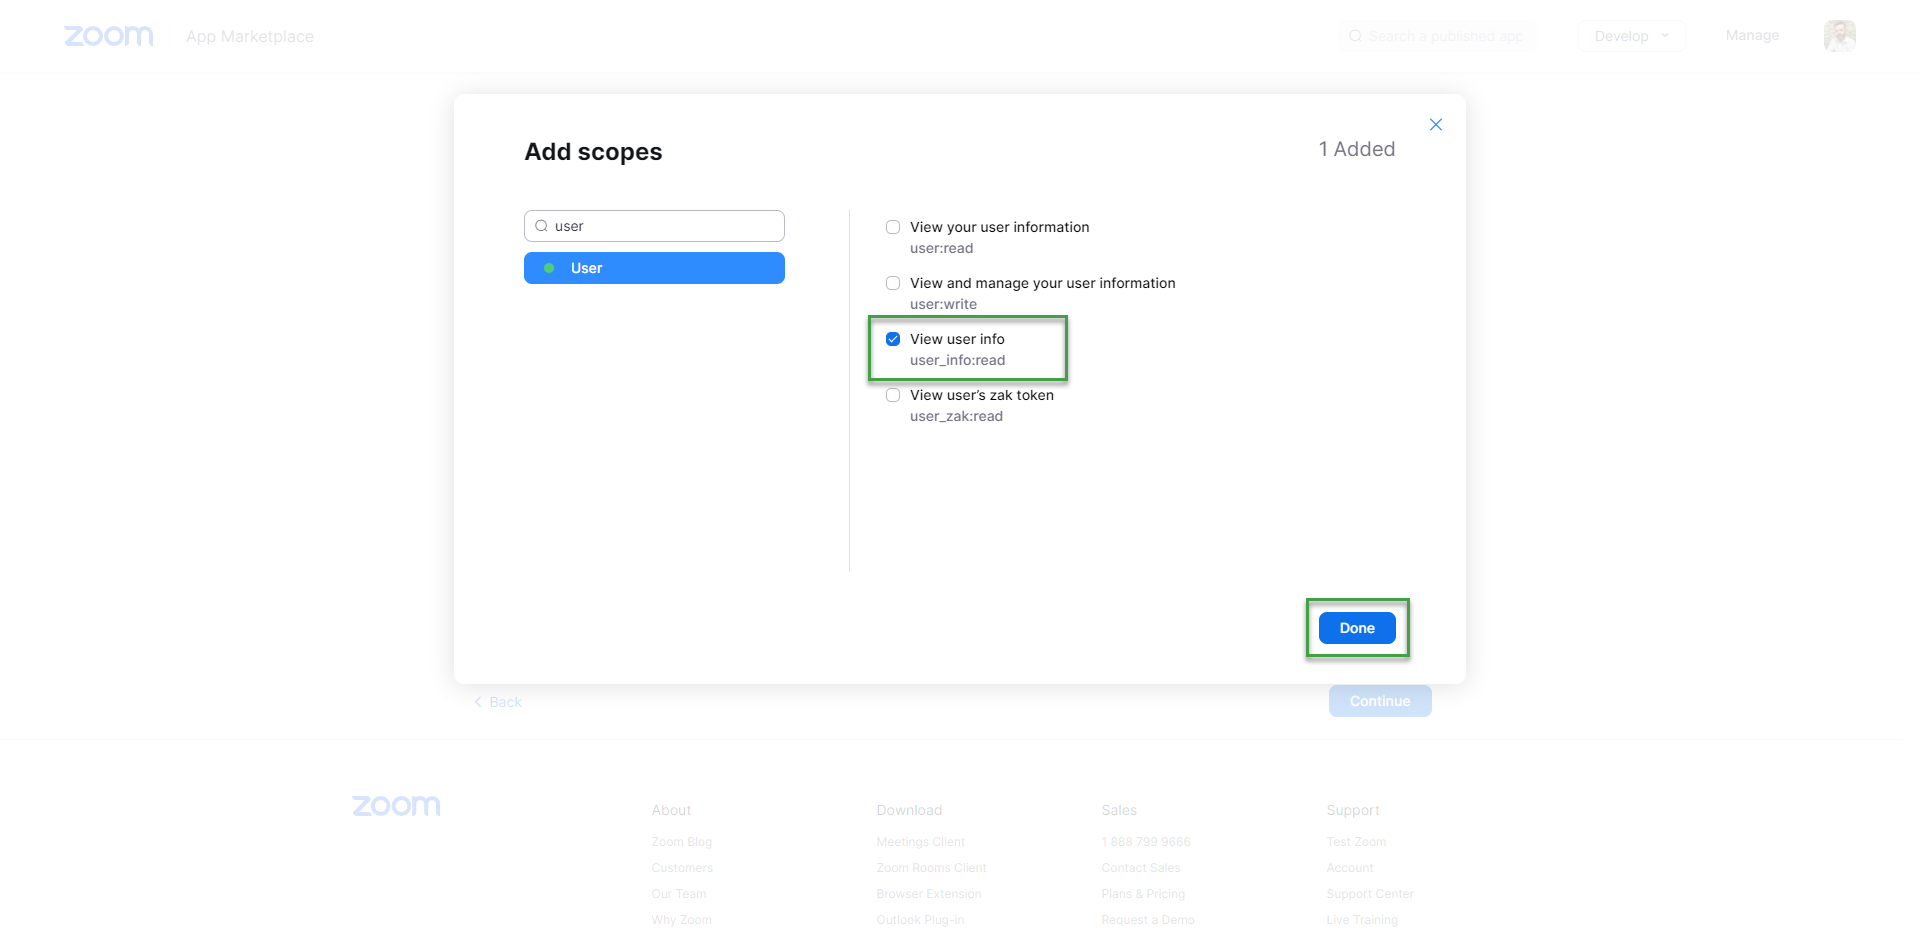
add user_info:read scope
Application integration should now be in ready to install state.
