
Conversation Review - Grading Form
Reviewing a Call
This form is used by reviewers in order to grade a particular call made by an agent.
To play a conversation in the Review Form, click the Playback icon or double click the conversation. To review the conversation click the Review icon. You will be sent to the Grading Form.
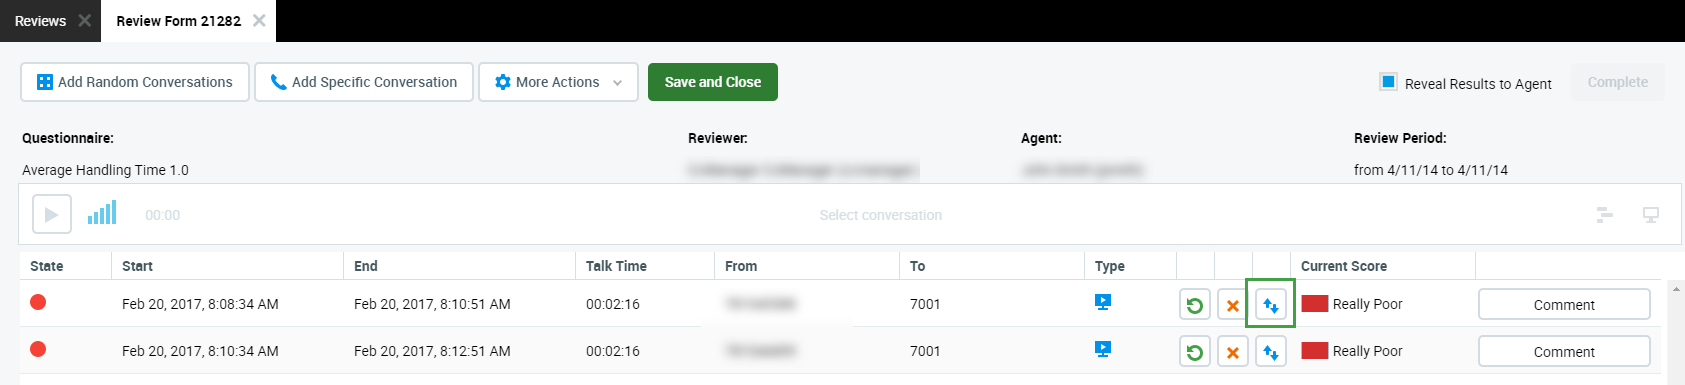
In the Grading Form users are able to listen to a call and grade it simultaneously. Related calls may be displayed in the grading form but will be greyed out. Displaying the related calls provides context from other related conversations and allows users to better understand the context of the call being graded. Current Rating will be displayed in the form selected in the Scoring Tiers options. To start the grading process click Play to play the call or video within the Player.
The Interaction Player and Its Functionality
The various parties in the conversation are displayed below the primary waveform separately. Click on the waveform button to view or hide the individual segments. Each individual waveform is color coded: green for customers, blue for agents (if the ID or DN for the specific agent is available to be paired with the conversation or segment).

Click the the Play or Pause button to control the conversation playback.
Hover over the volume and click to adjust the audio volume or to mute the sound.
If media files are present, the following options may be visible:
Screen Recording – If the conversation you are playing contains a screen recording (record will be marked with the Screen button). Click on the button to open the playback window. If no screen recording is available the button is greyed out.

During playback the button will be highlighted . Screen recordings are not loaded until you expand the playback window. Audio can be played back at any time.Video Recording – If the conversation you are playing contains a video recording (record will be marked with the Video recording button). Click on the button to open the playback window. If no video recording is available the button is greyed out .

The scroll bar (on the right hand side) is only visible in the case that there are more than four media streams.
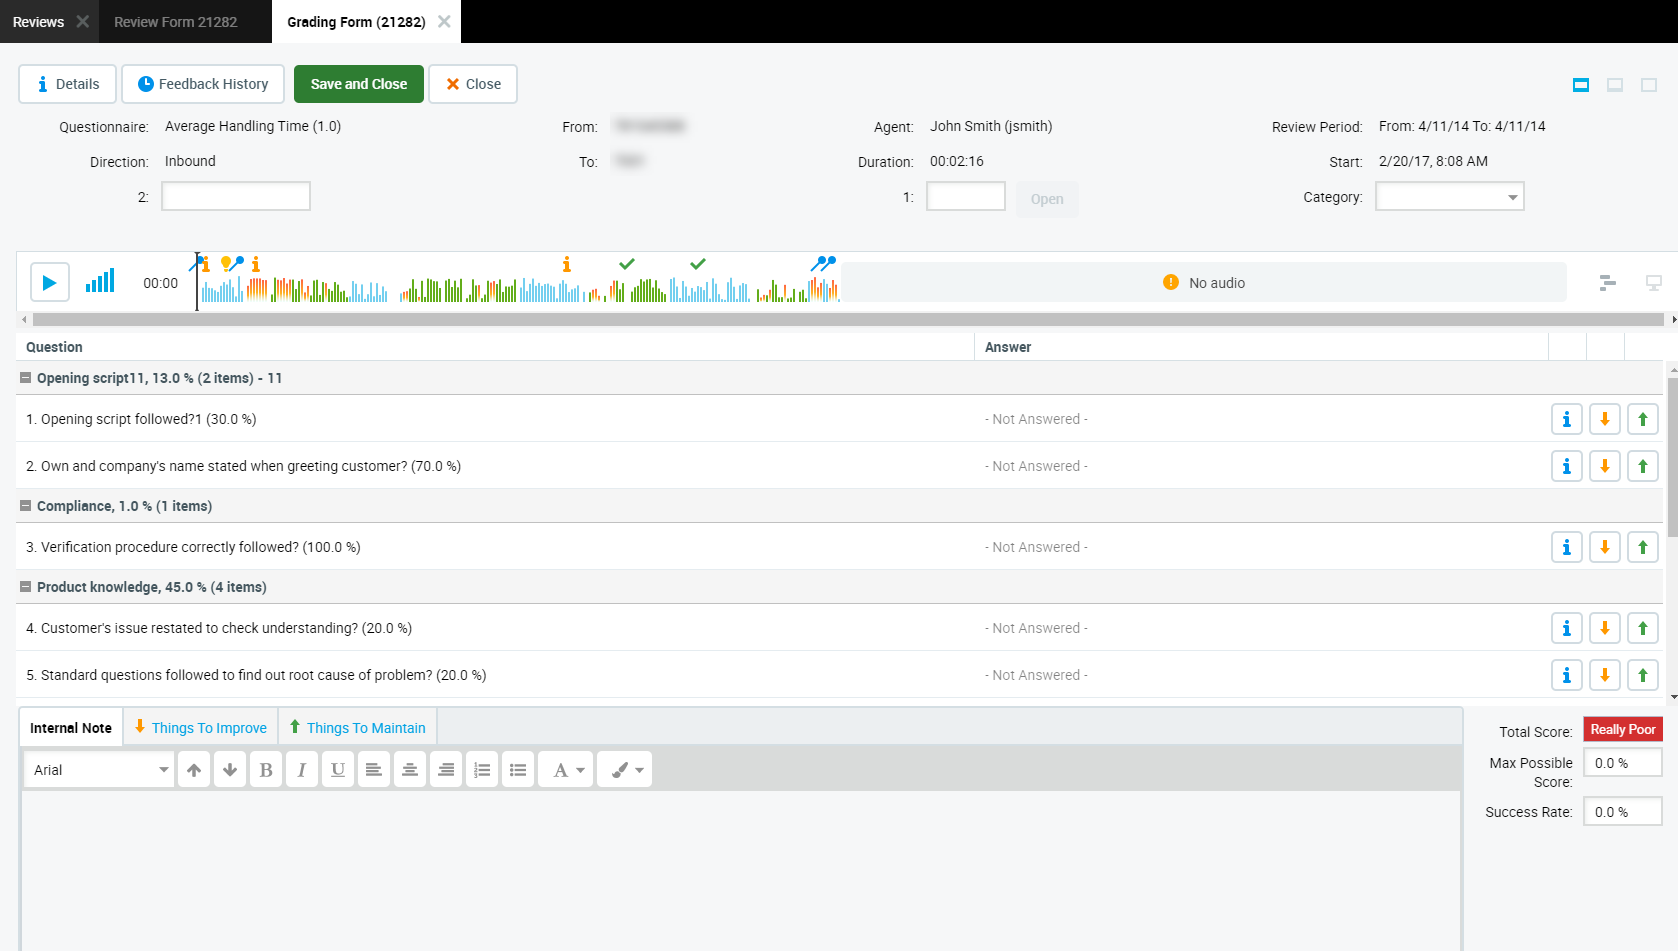
The questionnaire displays the available options in a small window at the top of the form. The Mail Tracking Number, Ticket Number, and Category can be updated as required. Scroll down in the window as necessary in order to view all possible questions. (If the dropdown menu is not large enough to display the whole question users can modify the size of the “answer” heading. The “answer” heading may be resized and adjusted by clicking and dragging the small vertical bar to the left or right in order to modify the amount of visible text.)
Select a suitable answer (form is based on selected Scoring Tiers) for each question, stopping and replaying the media as necessary. All questions must be answered for all media records present in the review before the review can be marked as complete.
The Grading Form permit users to add positive or negative feedback tide to individual questions within the grading form. The individual inputs will be cumulatively displayed within the Things To Improve and Things To Maintain feedback panel described below. This is very useful when giving an agent a poor mark on a particular question and you would like to write notes or reminders for later use, for example when providing feedback to the agent.
.png?inst-v=48eb038a-38fd-4707-8115-57bf162a5cfb)
The purpose of the Internal Note field is for reviewers to be able to write notes which are never visible for the reviewed agent. Supervisors and higher roles are able to see internal notes in the review form, in the printed file, and in the exported file.
The following two feedback fields Things to Improve and Things to Maintain are visible to the reviewed agent and help in communication between a supervisor and an agent.
These feedback fields are cumulatively filled based on input during the review process (when adding positive or negative feedback). Additionally, you can write and edit text directly within these feedback fields. For example, Things To Maintain can be used to keep a list of points illustrating areas of good performance by the agent, whereas any areas for improvement should be noted in the Things To Improve field.
You may switch to your desired section just by clicking the respective tab, each containing common rich-text controls for enhanced text formatting.
The content of the Internal Note/Things to Improve/Things to Maintain fields from the completed Grading Form can also be copied for use elsewhere. In order to copy the text, it is necessary to first right-click inside the field. A new window will appear. Select and then copy the text using CTRL+C - from within this new window.

Take advantage of available screen real estate by minimizing or expanding the panels at the top and/or bottom of the screen. Click on the icons in the corner of the screen.

Finalizing the Grade
Click Save & Close at the top of the grading form to keep all modifications made within the form fields. The current grading session will be saved and can be returned at a later time.
Click Close to close the grading form.
A dialog appear may appear stating "Review of this conversation is not complete. Do you really want to save and close?" This alert informs you that parts of the form have been left incomplete (for example no feedback was added). However, you can still save your progress and close the form.
You are returned to the Review Form where the Current Rating of the specific call and the Total Rating of all reviewed conversations are displayed.
Click Complete to close the completed Review Form.
Viewing Conversation Information and External Data in the Grading Form
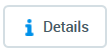
To see information and external data associated with the call click Details.
A Conversation Information dialog displays all the information and external data available for that segment of the call.
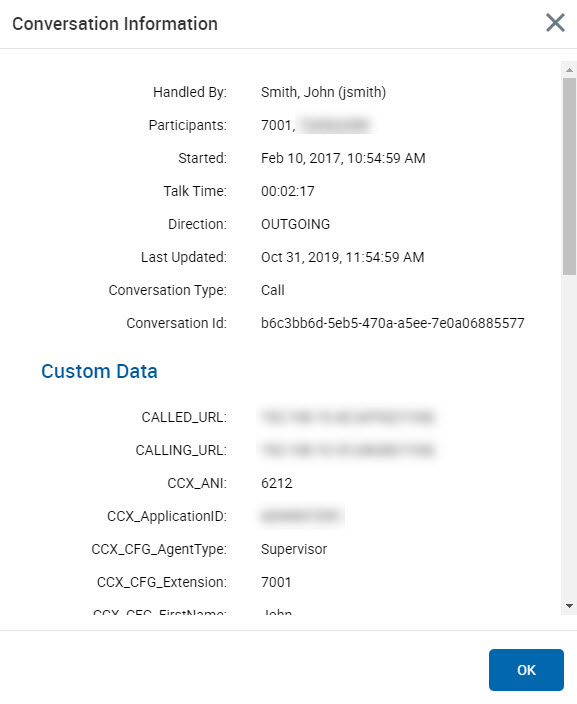
To close the dialog box click OK.
The Grading Form is the last form that has to be completed in the review process. After this form has been completed, the reviewer can either print it or just send a notification to the agent.
The time displayed corresponds to the timezone of the current user. Not necessarily the server timezone.
Customizing Fields
If the fields Label of custom tracking number 1: and Label of custom tracking number 2: have been filled in on the tab Quality Management Preferences then the Grading form will appear slightly different as the default labels "Mail Tracking Number" and "Ticket Number" will appear differently. By default the Grading Form will display as follows:

In this example the following labels have been entered on the Quality Management Preferences tab:
.png?inst-v=48eb038a-38fd-4707-8115-57bf162a5cfb)
This results in an immediate change. Simply reopen the Grading Form to see the change displayed. In this example, we see that Tracking No. and Case No. have replaced the default fields.
