New search functionality. Users with the required permission can create and share search filters with other users. Users who have filters assigned to them by a supervisor/manager will be able to view additional conversations based on the newly assigned filters. Please read about the new Advanced Permissions functionality in the section Saved Filters.
Getting Started
The Conversation Explorer screen provides search and replay functionality for the various media types saved to Elevēo servers. Use the advanced search filters to find and then review recorded media. The built-in Interaction Player supports playback of several media types; including audio, video and recorded screens. If you have email or chat integrated with your installation, the Conversations Explorer provides a preview of these conversations. Currently, we support email integration with Salesforce.
Click Conversations in the navigation tree of Quality Management to get started. The Conversation Explorer is where you can search and view emails, chats or play recorded conversations as well as initiate a conversation review. You need proper privileges to access the Conversation Explorer and to view conversations. See the Quality Management Roles page for more details.
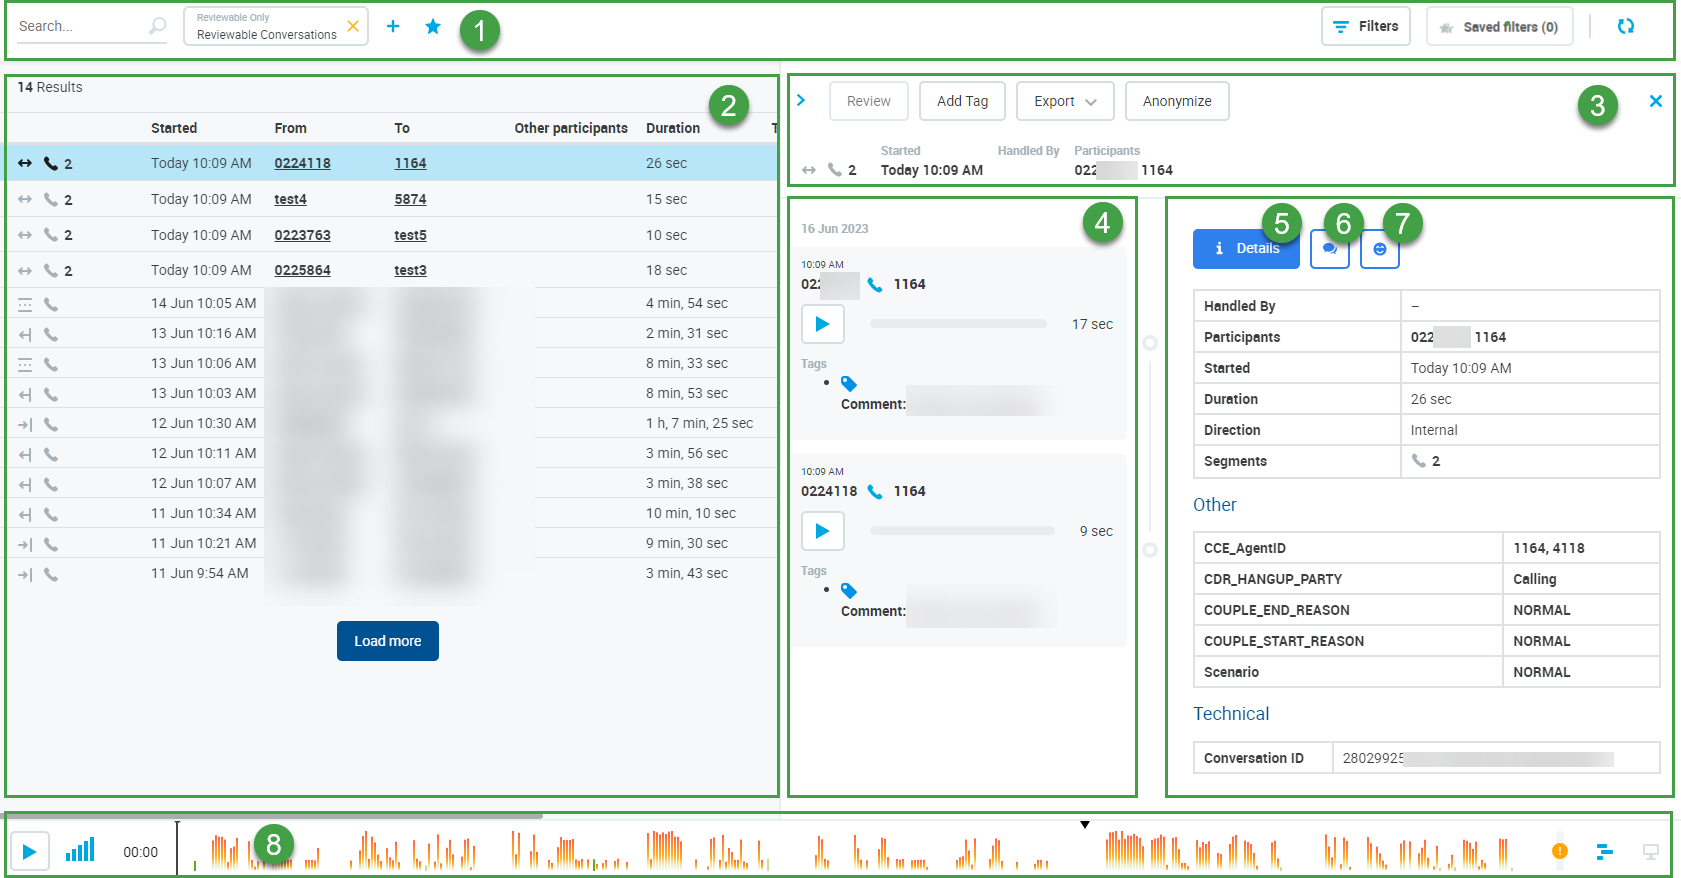
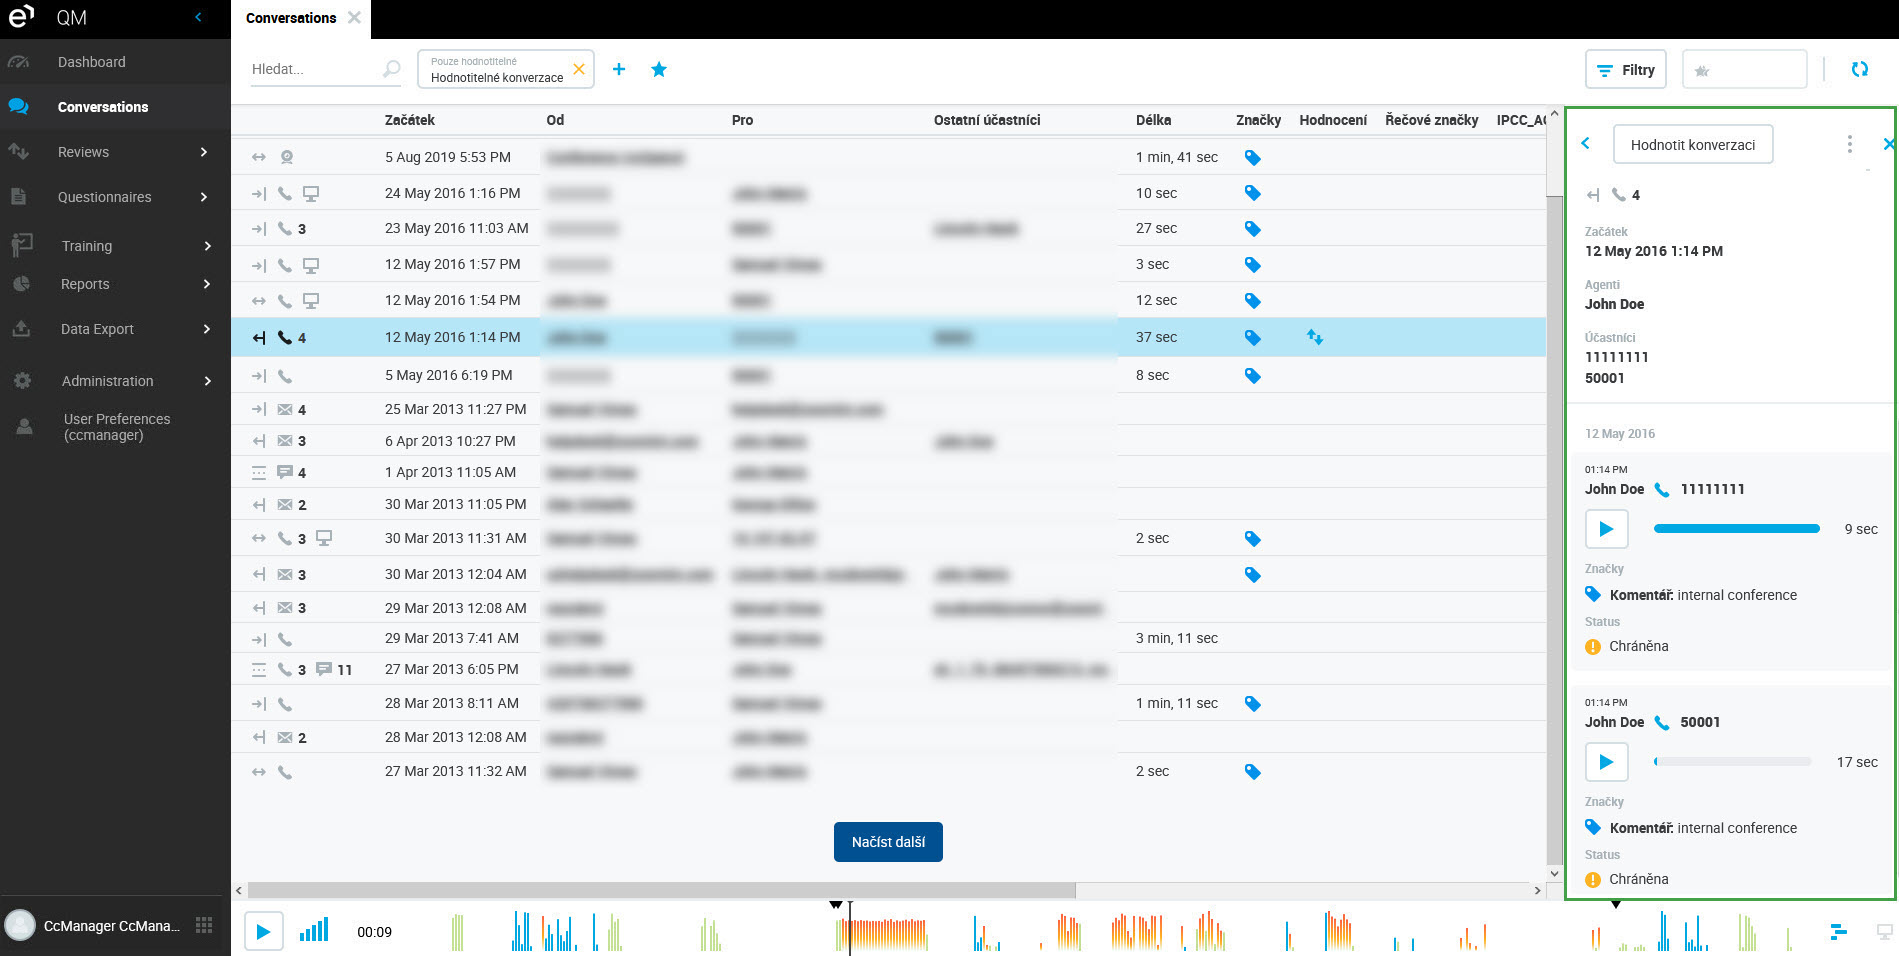
The Conversation Explorer consists of the following main sections.
Top bar – Contains the search bar, currently applied filters, and action buttons used for saving, refreshing, and resetting of filters.
List of conversations – All or the filtered conversations are listed in this main section, together with the number of the conversations found. The Load More button and the selected row will be highlighted. The columns displayed are customizable. By default, Conversations are displayed in the order in which they occurred. Starting from the current time (most recent events) and then proceeding backwards in time.
Key conversation info and actions – Summary of the selected conversation and the key actions used for reviewing, tagging, exporting, or anonymizing.
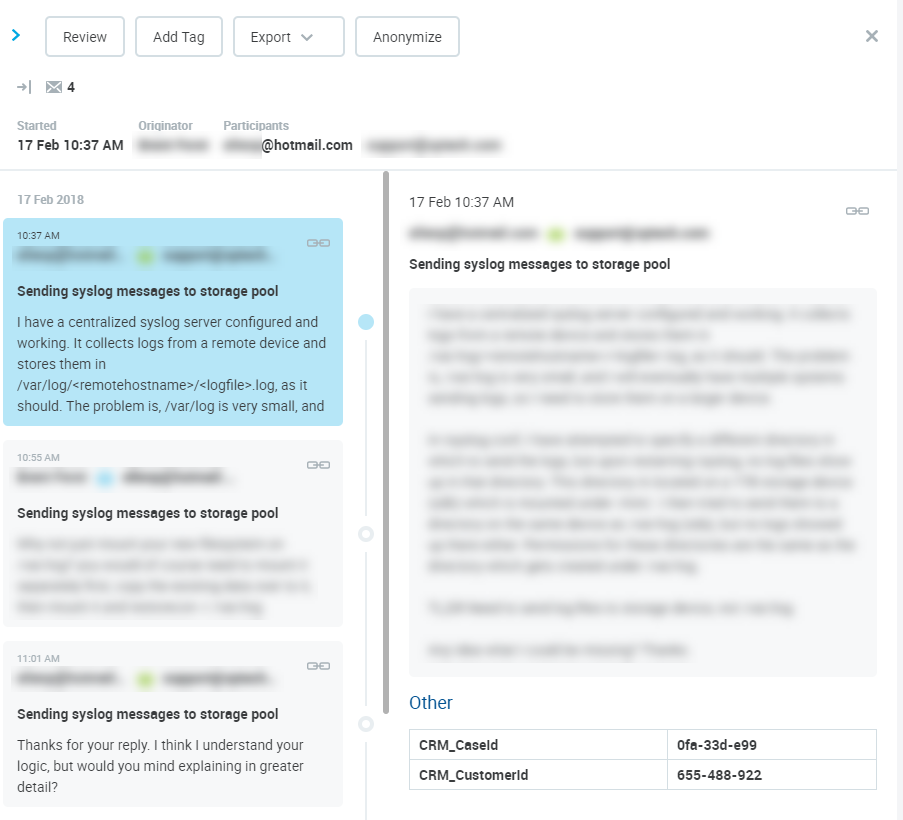
Preview pane – Shows conversation segments and review history in a timeline. Call segments can be played from here, chats will be grouped in threads, and emails listed in the order they occurred.
Detail pane – Shows detailed information about the selected conversation segment. (click on one of the segments to view more details, including the Automatic Review score and Correlation ID/SID) Note- if MP4 files are processed there will be multiple segments visible in the details pane.
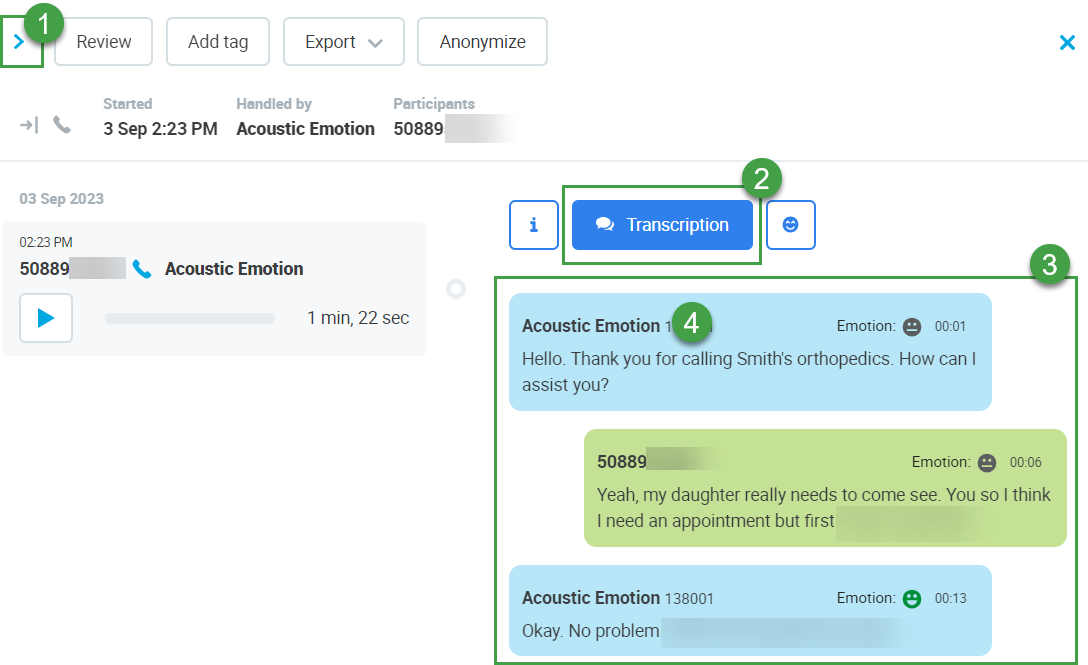
Transcription –Transcriptions for the media (if available) display in the Detail Pane. Click to reveal, and then scroll to view the available transcription. The name of the speaker (if known) and their emotion (if available) are indicated for each spoken phrase.
Acoustic and emotion – Acoustic and emotion information is displayed (if available). Click to reveal, and then scroll to view the text. The overall emotion of the speaker at the end of the last segment is indicated for the segment. This is the emotion of the speaker when they left the call.
Player – Media playback is controlled from within the player. The audio waveform, speech tags and other recorded media are displayed within the player.
The listed conversations are divided into (1) Default Columns and (2) Custom Columns:
Default Columns
Direction – You can determine the call direction; whether it was an Inbound, Outbound, Internal, or (due to some constrains) an unknown direction.
Types – Here you can see if the recorded conversation was a Call, Screen, Video Call, Email, or Chat, as well as the associated conversations count.
Started – The date and time when the conversation started.
From/To– Identified Agent(s) and/or customer involved in the conversation.
Other participants – Customers identified either by Name, ID, Phone or Email Address and other participating agents not identified in the Agents column.
Comments – Comments associated with any conversation or its segments are displayed.
Duration – You can see the duration of the call conversation in – hours, minutes and seconds.
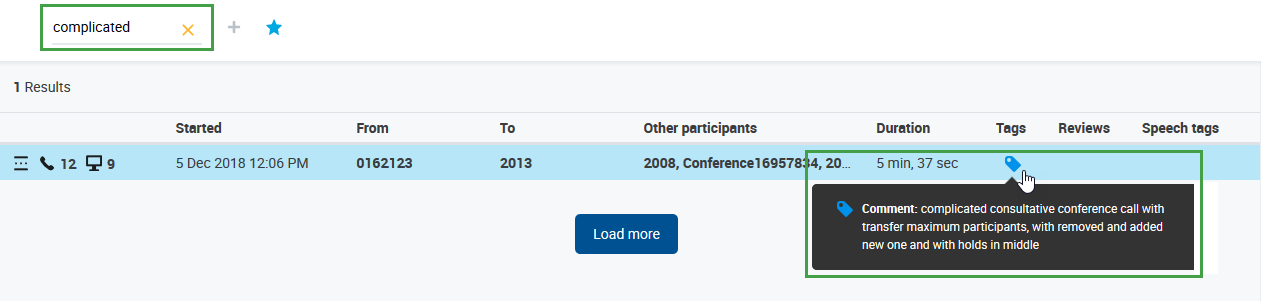
Tags – If you see the Tag icon, this indicates that the conversation is tagged. Hovering over the icon will show all available tags. Clicking the tag will enable you to view all the tags and comments associated with the selected conversation. Read more about Conversation Explorer (covered later on this page).
Review planned – If available, the review icon indicates whether or not the conversations is (at that moment) planned for a review. Clicking the review icon opens the review details section in the Conversations Details Window (covered later on this page)
Review score – If available, showing the conversation's review score. Clicking the review icon opens the review details section in the Conversations Details Window.
Automatic Review – If Automated Quality Management (AQM) is licensed, and configured, the score assigned by Automated Rules is visible. Multiple scores may be displayed, based on the Automated Rules configured within the system.
Custom Columns
Additional columns are displayed if they have been customized by an administrator, as described on the Conversation Settings page.
A NOTE ON DATES/TIMES The time displayed corresponds to the timezone of the current user. Not necessarily the server timezone. The system recalculates the time and displays it according to the current user's timezone as set in User Management. Details on how to change this setting are described on the dedicated page called Configuring User Profile and Password
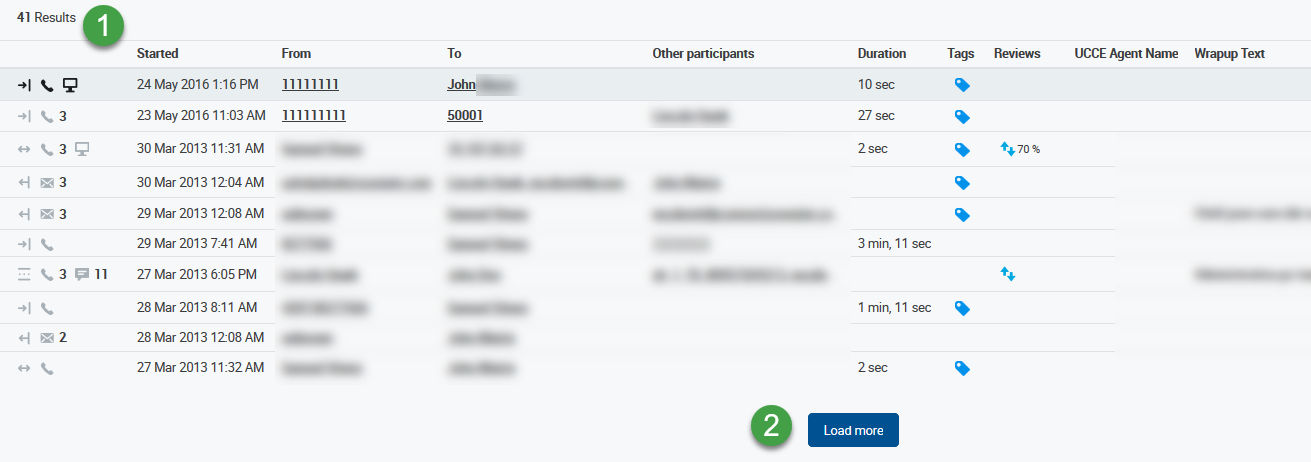
The total number of found conversations is displayed at the top of the active window(1). When you scroll down the Conversation Explorer, you can click the Load more button (2) to load more conversations.
If there are no stored conversations found the message No conversations found will be displayed.
Save or Refresh Search
Search for conversations according to the criteria described in the following sections.
The default filters are displayed on the top left of the Conversation Explorer.
Search in Conversations – Search conversations that either include or exclude specified terms, names or other entered text contained in several fields. Learn more in the Search in Conversations section. Best matching conversations are listed first.
Default Time period filter – A preset filter to display conversations that occurred in the last 90 days. You may remove the filter by clicking the cross button on the filter label. Alternatively, along with other filters, you may change the Time Period filter to another date range as explained in the following sections.
Default Reviewable Only filter – A preset filter to display reviewable conversations. You may remove or modify the filter as described in the following sections.
Add new filter – Click to view the filtering options. A filtering pane with all filter options opens to the right of the screen. Individual filters are explained in the following sections. Available options are customizable (more details on the Conversation Settings page).
Save Filter – Click to create a new Saved Filter based on the currently applied settings. (The Saved Filters pane will display.)
Clicking any of the set filters at the top bar opens the filters pane with the selected filter option.
At any time, while searching for conversations, you can use the buttons at the top right of the active window to perform the following actions:
Filters – Click to view the filtering options available to narrow down the number of displayed conversations
Active filters are highlighted
Saved Filters– retrieve and use your previously saved filters or create a new one
You can rename or delete your saved filters. (Use a unique name for each search you wish to save!) There's an immediate Undo Delete option for unintentional deletion.
Refresh Filters– re-run the search with all the parameters you've just set, or refresh the list
– The following chapters cover topics about finding conversations. –
Video Spot
In this video tutorial our trainer provides some tips and tricks on how to take full advantage of the search functionality in the Conversation Explorer.
Searching for Conversations by STANDARD Criteria
Search in Conversations - Full-Text Search
A great way to filter conversations according to content. This can be helpful when you wish to find all conversations that include a certain word(s).
With full text search you may search conversations that include or exclude specified terms, names or text. The following is searchable:
tag's comment
email address – Exact match is required for an email address to be found!
email subject
email body
chat room name
chat message
conversation ID (exact match only)
transcripts of recordings (supported if Speech Recognition is installed and properly licensed)
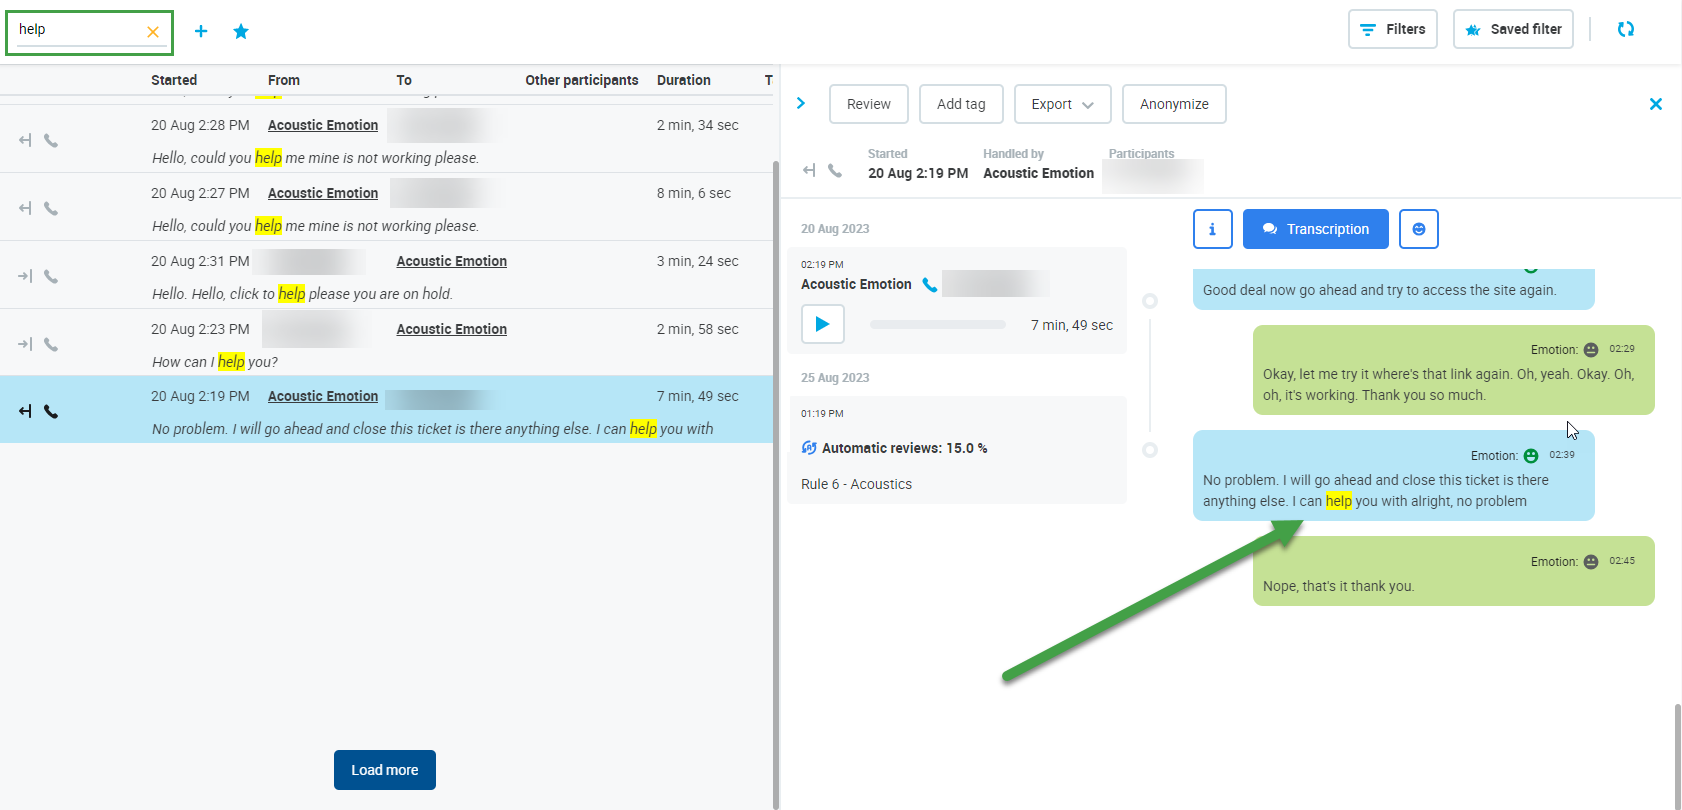
Found conversations will be sorted by their match probability score. The first occurrence of any searched terms will be highlighted and the respective text line together with the number of highlighted occurrences in the conversation displayed directly on the Conversation preview row.
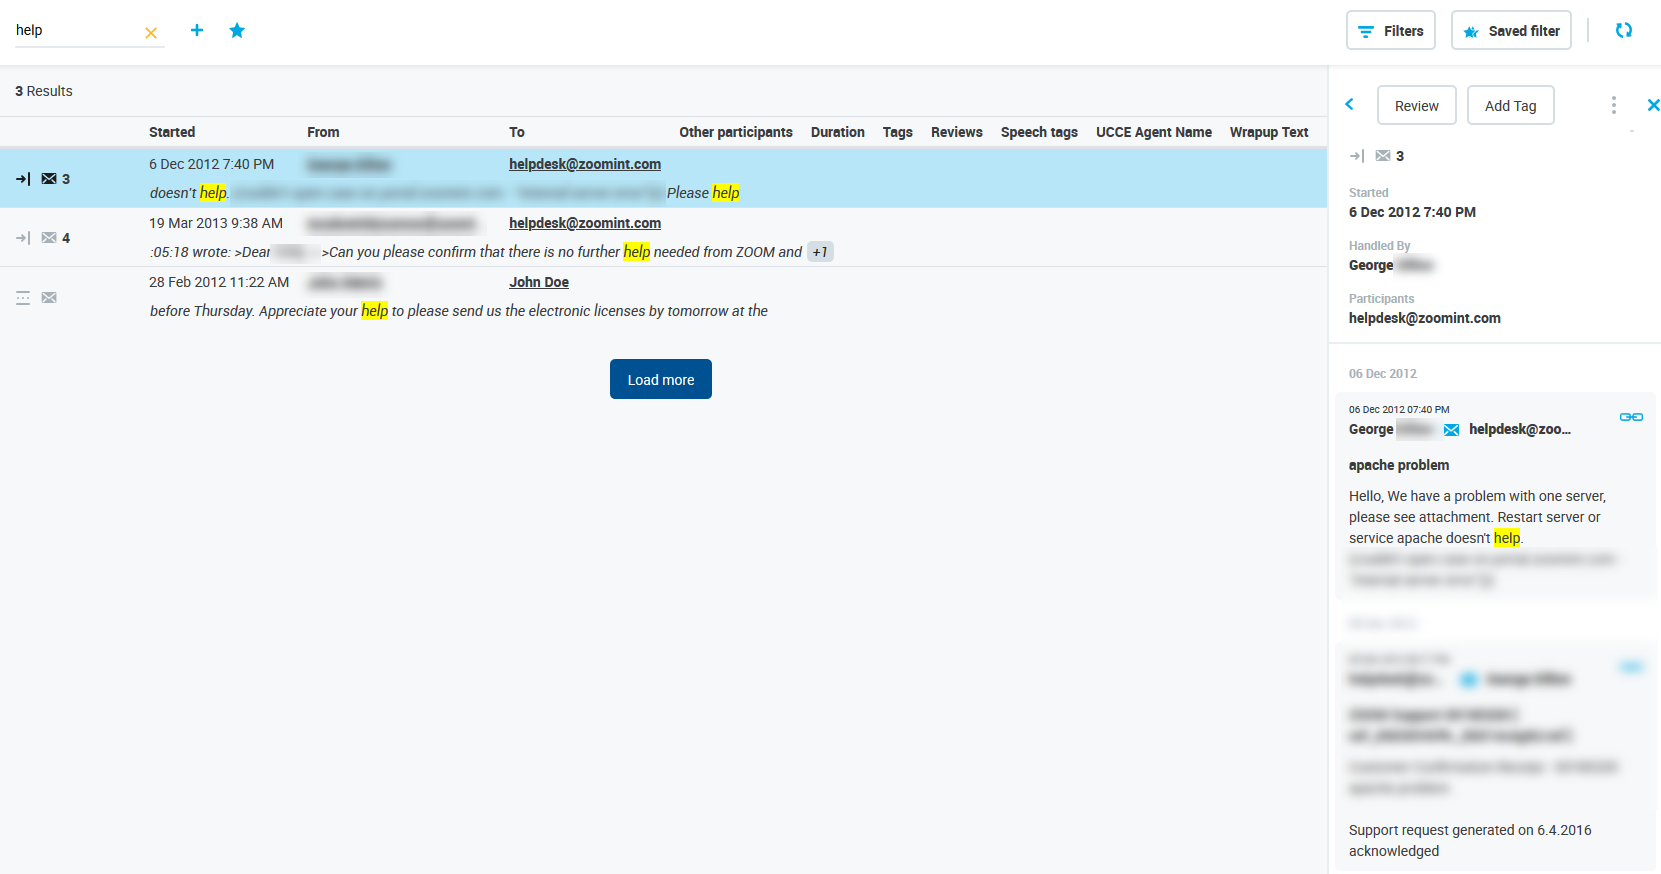
In the following example, we searched for the word "help":
The highlights will also be visible in all the conversations you choose to view.
Example of searching in Emails:
Example of searching in Transcription files:
Exact matches will be found in any language or alphabet, however, for results returning variations of the entered words the results are limited by the language you set and its library. E.g. If your language is set to English and you search for the word help, the search results return the exact match help but also helping, helped, helpful, unhelpful etc. The full text search is case-insensitive.
Please note that words that do not exist, or are misspelt will not be found. For example, if you search for the word helpe, there are no similar words associated with this word in the dictionary(since it does not exist in the English language dictionary). The search index will not find any similar words, only exact matches of this specific non-word. This is important to consider when searching for unusual words, such as Eleveo.
Full text search - language preference
The full text search is by default set to perform language analysis using the English language. A different language can be configured by your Administrator.
Using Double Quotes
To look for an exact phrase, enclose it in double quotes. For example "customer satisfaction" will match only conversations which have exactly those two terms together.
Boolean Operators
You may also use the Boolean operators (in UPPERCASE) to limit the results displayed in a full text search. The Boolean operators must be used in addition to a standard search. This table summarizes the available operators and examples for the three most common verticals:
Operator
Meaning
Example of a complete search phrase (Medical)
Example of a complete search phrase (Telecom)
Example of a complete search phrase (Banking)
-
EXCLUDE the term or phrase immediately (no space) after this operator
Monday -"appointment with a doctor"
received -"receipt"
term investment -"interested in"
+
MUST INCLUDE the term or phrase immediately (no space) after this operator
Monday +appointment Monday +"appointment with doctor"
received+"billing" received +"internet bill"
term investment +"reduced" term investment +"reduced interest rates"
AND
MUST INCLUDE BOTH the terms or phrases before and after this operator
Monday +appointment AND "Dr. Smith"
bill AND disconnection
"reduced" AND "penalties"
OR
MUST INCLUDE EITHER of the terms or phrases before or after this operator
"John Smith" OR "James Smith"
"bill" OR "invoicing"
"penalty" OR "charge"
NOT
EXCLUDE the term or phrase after this operator (this must be combined with a search phrase or other operator)
Monday NOT "appointment with a doctor"
admin@company.com AND NOT you@yourmail.com
received NOT "receipt"
term investment NOT "interested in"
Examples of common search phrases that are properly formatted (phrases enclosed in double quotes will reduce the number of results displayed to only those containing those exact terms):
Help NOT "Help needed"
Looking -"Lack of free space"
"Problem" OR "Help"
Hello AND communication
Server OR communication
Server +attachment
Server -attachment
Recorder Server -attachment
"Recorder Server" -attachment
hotline@company.com AND NOT maciadias@yourmail.com
2662 AND NOT Conference16880
Grouping more operators
It may be useful to combine more Boolean operators in one search query. For example, to search for problematic conversations for a given customer you could use the following: (problem OR issue) AND xyzCompany
Full text search
The full text search functionality searches within each instance of an indexed field (segment/comment/contactFrom/contactTo/etc.) all at the same time. This means that the full text search is searching within the sub-parts of all conversations and will display any occurrence of the word of phrase searched for, and may find multiple instances within a single conversation. Due to this it is possible that a search containing AND NOT operators will still find and display a conversation that you might expect to be excluded by your search. This occurs because another indexed field contains the word of phrase searched for. As an example, using the search phrase password AND NOT centos on our server will still result in a conversation being displayed, as there are multiple segments and at least one contains the word 'password' and not the word 'centos'
Saved Filters
Saved Filters enable users with the required permission to create and assign search filters to other users so that they can view additional conversations not normally visible to them. The required permission is assigned to the DEFAULT_CC_MANAGER as part of the Default Composite Application Roles. Users who have a Saved Filter assigned to them by a supervisor/manager will be able to view additional conversations based on the newly assigned filters. This means that the use of Saved Filters expands the number of conversations visible to a user. Users will be able to view conversations as normally, plus any additional conversations that are included in the new Search Filters.
Users with the required permission can create and assign Saved Filters to other users. Detailed information about the creation and assignment of Saved Filters and additional instructions are described on the dedicated page named Saved Filters.
Using Filters
Click the Filters button to view the filtering options
Click the more options button to Save, Modify or Reset the filters.
Quickly Create a Filter Using the Currently Available Contacts
Click on an item on the conversation list to view the available options. The following options enhance the search creation process and improve workflow:
Create new filter with contact "<contact>" – quickly create a new search filter by adding the selected contact to the current filter
Add "<contact>" to contact search – add multiple contacts to the current filter quickly and easily by selecting this option.
Copy "<contact>" to clipboard – Copy the currently selected contact to the clipboard for use outside of the application.
Contact
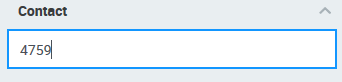
Search using the Contact field if you know a part of, or the whole name or telephone number of a participant to a conversation.It is possible to further refine the search to find conversations where one or more contacts called/sent/received a message to/from another contact, or where at least one contact was a participant in a conversation.
Use this search option if you know the participant phone number or email (e.g. customer, other agent) or at least one-to-several characters of the participant you wish to find. You may use special characters as well as spaces for enhanced clarity. By default the search will return any combination of matching characters occurring at the end of the contact. Modify the filter to search for a contact starting with, ending with or is exactly. Conversations that include the specified phone number or email, or any combination of the defined sequence, will be returned.
The default search will attempt to match your search with any party, ends with. A search for the last few digits of a known participant will rapidly display relevant content.
Modify Search Filters
You can modify the search parameters to return results. Click a filter in the list of filters to view additional options, and to modify the search parameters applied to each particular filters. When modifying the applied filters You may select from a combination of Party and Filter.
Select a party (participant):
From any party: Searches for any match.
From: Restrict results to those from a particular party.
To: Restrict results to those to a particular party.
Select a filter to limit the search:
Starts with: Returns only results where the contact starts with the search phrase.
Ends with: Returns only results ending with the search phrase.
Is exactly: Returns results only matching the exact search.
The selection will be displayed in the format; <Search phrase or number Party, Filter>
It is possible to create additional filters to further restrict the search results.
Advanced Functionality of the Contact Search Field
To further limit the results displayed you can use the following options:
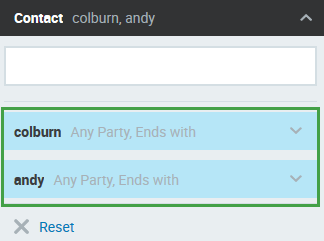
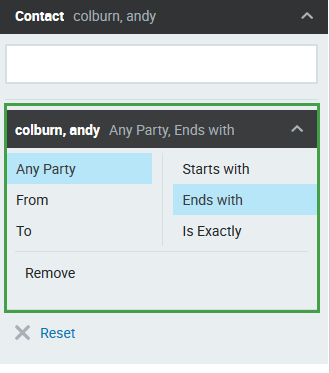
1. AND: Create any combination of filters to display only those conversations matching both of the filters. For example, creating two filters colburn, and andy and setting the filter to Any Party, Starts with returns all emails with both of these two participants (including if they were specified as 'other participants' in an email chain).
The filter appears as follows in the list of filters:
The filters are displayed at the top of the screen in the following format:
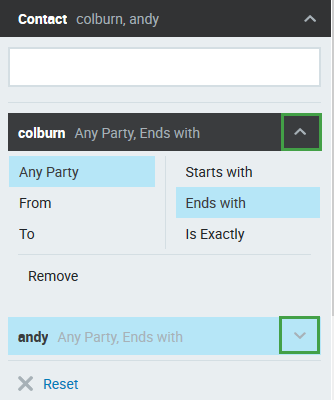
2. OR: Enter two known numbers or names separated by a comma. For example, searching for colburn, andy and setting the filter to Any Party, Starts with returns all emails with these two participants (including if they were specified as 'other participants' in an email chain).
The filter appears as follows in the list of filters:
Each component can be modified separately:
The filter is displayed at the top of the screen in the following format:
Time Period
You may search for conversations based on the time period they started.
By default two filters are applied when you open the Conversations Screen: Last 90 Days and Reviewable Only. Clear all filters to return all conversations without any time restriction. Most recent conversations will be displayed first.
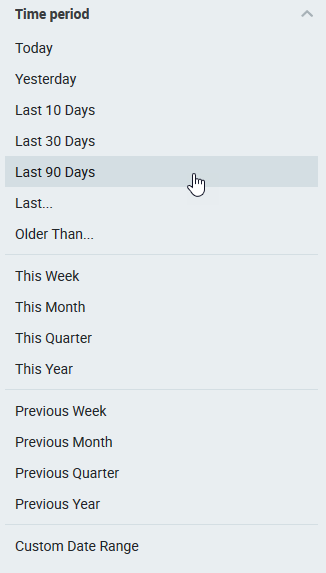
Today, Yesterday, Last 10 Days, Last 30 Days – Quickly find conversations started in the predefined time period.
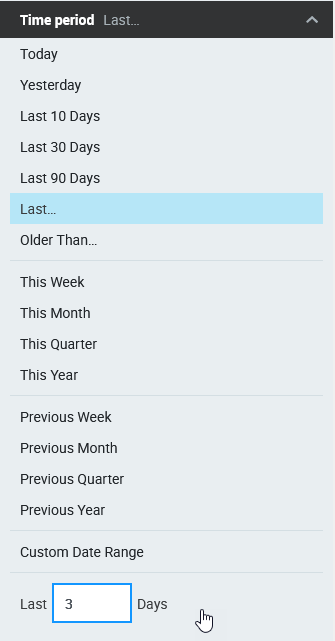
Last... # Days – Use this search criteria option to enter a custom number of days.
Using Last days
Using 'last days' returns conversations started during the selected number of preceding full days including up until the moment when the search is performed. E.g. If a search is performed on Wednesday midday to return the last 2 days the results will show conversations that started on that week Monday, Tuesday plus on Wednesday until noon.
Older Than... – Find conversations that are older than the number of days you set. In other words, if you set Older Than "90" Days, all conversations in the last 90 days will be filtered out.
This Week, This Month, This Quarter, This Year – Quickly find conversations started in the specified current time period.
Previous Week, Previous Month,PreviousQuarter,PreviousYear – Quickly find conversations started in the specified previous time period.
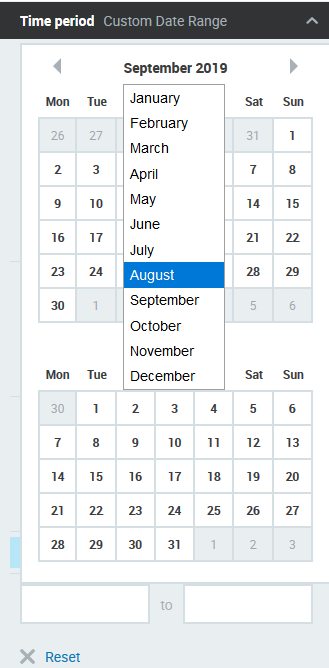
Custom Date Range – Select this option to pick a custom date range for the conversation start using the calendar. You may click the month or year to change it.
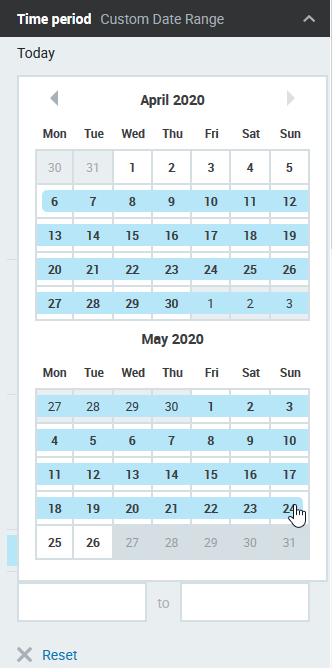
Click a date in the calendar, then click another date and the date range will be intuitively highlighted.
Your selected date range will be applied.
If you decide to change the selected time period, select a different date range from the calendar or choose your preferred item from the drop down menu and the filter will be reset.
Please Note
Only conversations started within the selected time period (based on the timezone of the current user) will be returned.
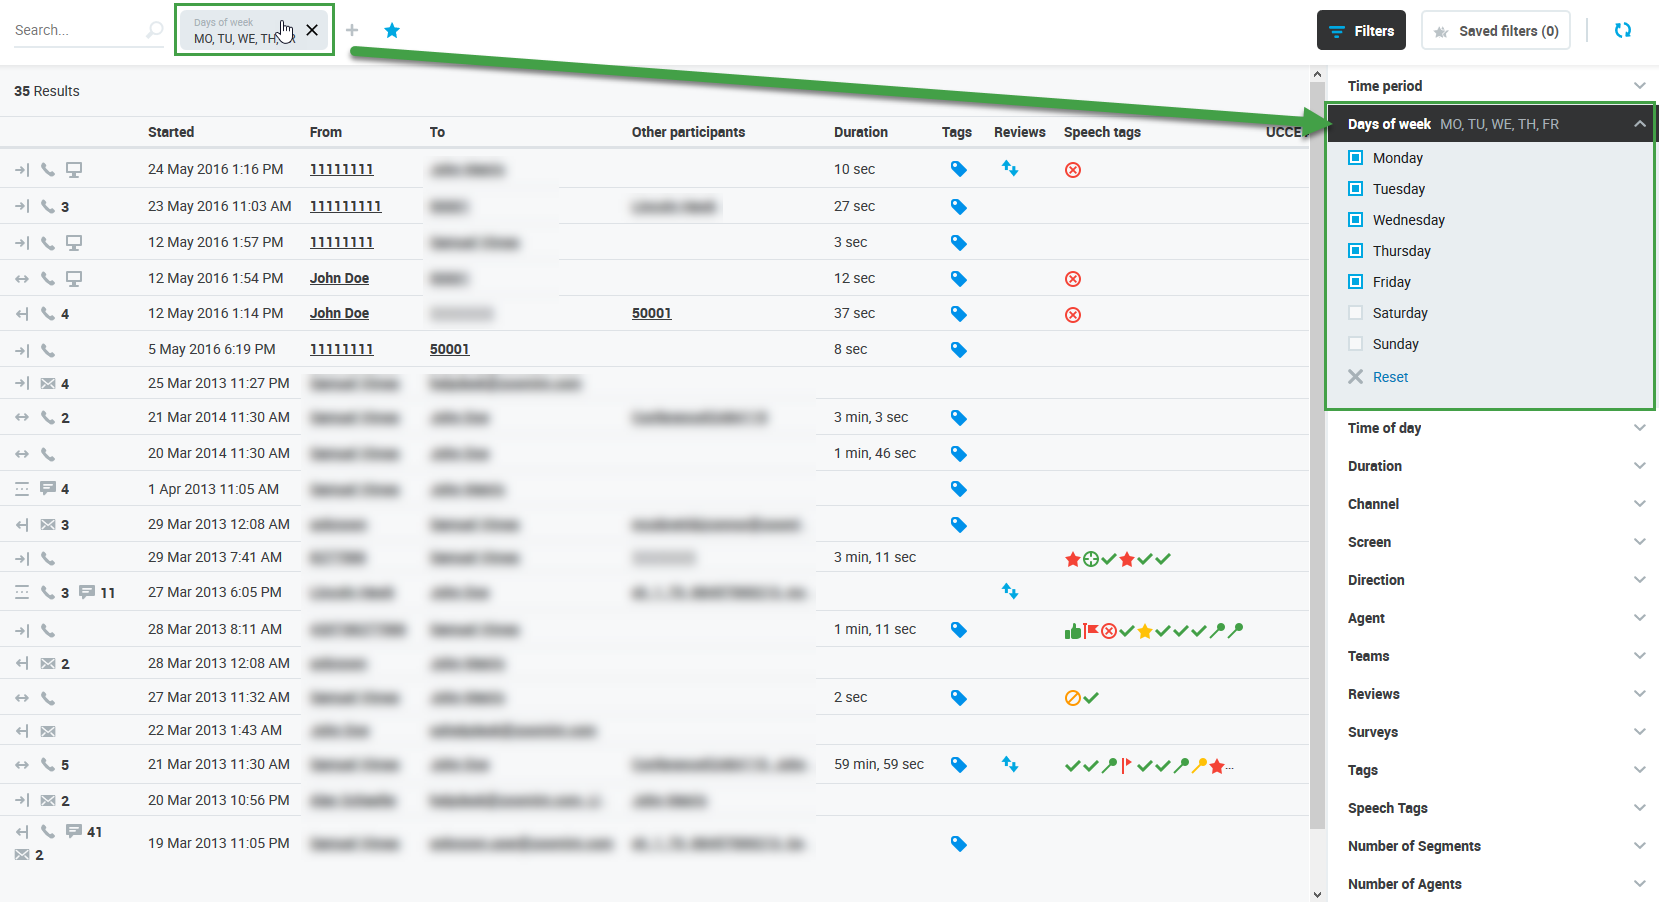
Days of Week
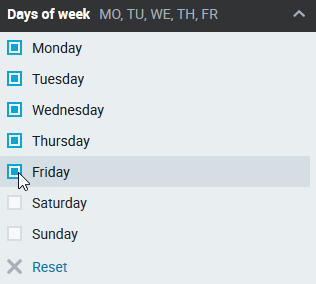
You may search for conversations that started on specified days of the week.
Monday, Tuesday, Wednesday, Thursday, Friday, Saturday, Sunday – Choose a day or more days of the week to filter conversations that started only on the specified day. Selected days will also display next to the filter label.
Time of Day
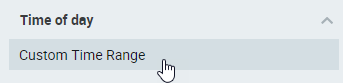
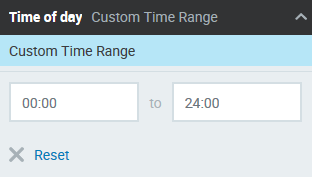
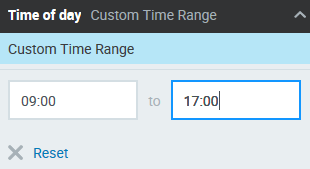
You may further define your search for conversations by time of day range, e.g. If you know at what time they roughly occurred. Click Time of day, then Custom Time Range.
Custom Time Range – Use this option to search for conversations that started during the specified hours of the day. Enter the specific hour and minute of a day in each field in the suggested four digit format 00:00 – 23:59.
The time displayed corresponds to the timezone of the current user. Not necessarily the server timezone.
Custom Time Range
The two time fields work on a From – To basis, thus the second field must represent a later time.
The application accepts incomplete values as illustrated in the following examples:
User input
Result
3
3 hours
3.5
3 hours and 30 minutes
3:5
3 hours and 5 minutes
Time discrepancy - Daylight Savings Time
When performing searches based on time of day, conversations falling outside of the defined range may be displayed. This is due to a known issue related to daylight savings time. Unfortunately, the system does not always take into account daylight savings time when processing data.
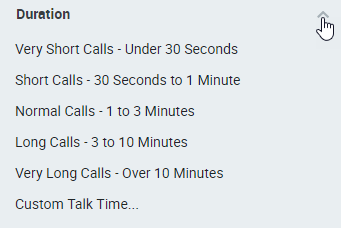
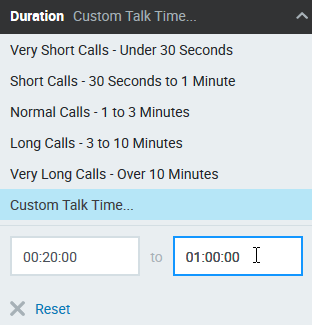
Duration
You can search call conversations by the duration of their talk time.
Search for conversations with the specified talk time:
Very Short Calls - Under 30 Seconds
Short Calls - 30 Seconds to 1 Minute
Normal Calls - 1 to 3 Minutes
Long Calls - 3 to 10 Minutes
Very Long Calls - Over 10 Minutes
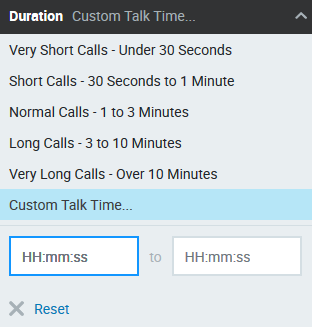
Custom Talk Time... – You may specify the Talk Time (left side) as the minimum duration and the maximum duration (right side) in hours, minutes and seconds, using the format – HH:mm:ss.
Custom Talk Time
If you leave the left Talk Time field with the default value (00:00:00), the field will be considered as having the duration value of 0. If you leave the right duration field with the default value (00:00:00), the field value will be considered as unlimited.
The application accepts incomplete values as illustrated in the following examples:
User input
Result
3
3 minutes
3.5
3 minutes and 30 seconds
3:5
3 minutes and 5 seconds
75
1 hour and 15 minutes
1:3:5
1 hour and 3 minutes and 5 seconds
Channel
Select one option to filter conversations by channel type.
Calls – Include conversations that contain a call.
Emails – Include conversations containing an email.
Chats – Include conversations containing a chat.
Videos – Include conversations containing a video recording.
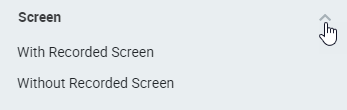
Screen
You may choose to filter conversations by whether or not they contain an agent desktop screen recording.
With Recorded Screen – Include only conversations with recorded screen.
Without Recorded Screen – Include only conversations without recorded screen.
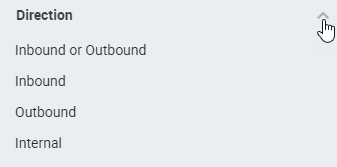
Direction
You can search for conversations based on their direction.
Inbound or Outbound – Include both, either inbound or outbound conversations. Internal conversations will be excluded.
Inbound – Displays inbound conversation only.
Outbound – Displays outbound conversation only.
Internal – Displays only internal conversations, for example between agents.
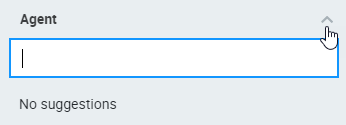
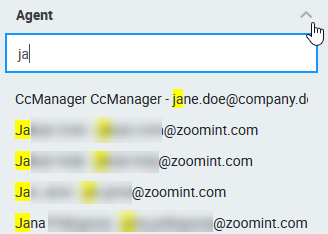
Agent
You may search conversations by participating Agent's name, extension or email address. As soon as you type the second character the search will start suggesting matches. You may search for one agent at a time.
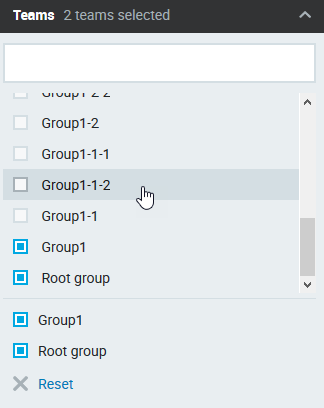
Teams
You can search for conversations based on Team. To filter conversations by a particular team or teams enter the first few letters of the team name. Select the relevant team or teams from the suggested options. Multiple teams can be selected, any combination of results matching any of the selected teams will be displayed. If a group is selected the system will also display conversations that belong to sub-groups of the selected group(s).
For details related to who can view conversations, please see the page Quality Management Roles.
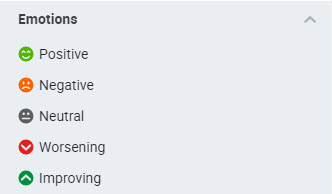
Emotions
You can search for conversations based on Emotion detected by Speech Recognition(if Speech Recognition is installed and properly licensed and it is supported for your language). Conversations meeting the criteria will be displayed on the Conversation Explorer.
Filter conversations containing one or more of the 5 levels of emotion detected for each of the participants when they leave the conversation:
Positive
Negative
Neutral
Worsening
Improving
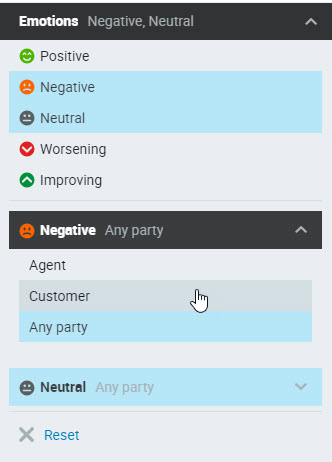
It is possible to select multiple emotions and and also which party expressed the emotion. Search for emotion from:
Agent – agent emotion detected
Customer – customer emotion detected in the conversation
Any party – emotion detected is by either party
In this example we filter by Negative and Neutral emotion from any participant in the conversation. Click to expand each individual section.
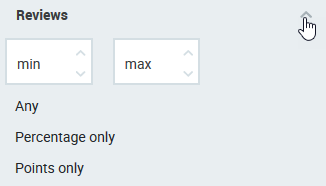
Reviews
You may choose to filter conversations by the review score. You may select; Any, Percentage, or Points. Conversations meeting the criteria will be displayed on the Conversation Explorer.
Min/Max – Fields are optional. Only conversations that have a score falling within the range specified will be displayed.
Any - Only conversations that have a review connected will be filtered.
Percentage Only – Include only conversations that have at least one review scored using percentage as a scoring system within the range defined.
Points Only – Include only conversations that have at least one review with points as a scoring system within the range defined.
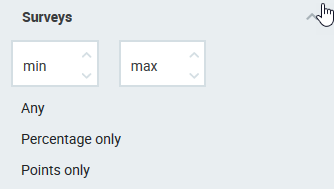
Surveys
You may choose to filter conversations by the Survey score. You may select; Any, Percentage, or Points. Conversations meeting the criteria will be displayed on the Conversation Explorer.
Min/Max – Fields are optional. Only conversations that have those survey score will be dispayed.
Any - Only conversations that have a survey connected will be filtered.
Percentage Only – Include only conversations that have at least one survey scored using percentage as a scoring system within the range defined.
Points Only – Include only conversations that have at least one survey with points as a scoring system within the range defined.
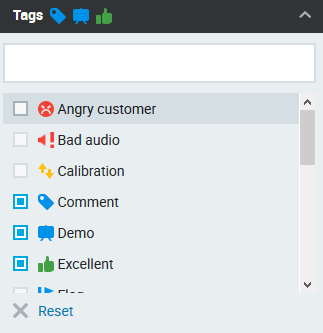
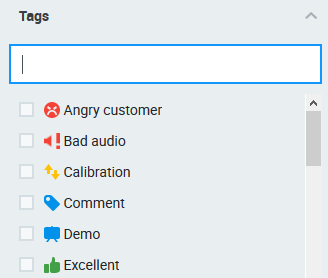
Tags
Searching by Tags
Tags are a great way to mark conversations for future references, such as for quality management or compliance purposes, use the Tags filter to quickly find tagged conversations.
Type in the tag name to quickly find it, useful in the case of many tags. As you start typing, you will see the available options with a match highlighted.
Alternatively, use the scroll bar to see all available tags and to find the tag you need.
Use the corresponding check boxes to choose one or more tags. Already selected tags will also be displayed in the form of an icon next to the filter name. To remove a selected tag, uncheck its checkbox. To remove all checked tags click (x) Reset.
As soon as you make your tag(s) selection conversations will be filtered by the chosen tags.
When multiple tags are selected any conversation with one or more matching tags will be displayed. The search logic used for multiple tags is OR.
You may also use the Full Text Search to find conversations with particular text contained in the tag's comments. The text is case insensitive.
Data Tags
Tags can also have an associated data Key-Value pair and thus two additional behaviors:
If you add such a tag to a conversation, the corresponding Key-Value pair will be applied to the metadata of all conversation's segments. Modifying or deleting such a tag will also affect the metadata Key-Value pair.
When metadata for a segment includes the corresponding Key-Value pair, it will be visualized as this data tag automatically by the system. This visualization is not a user-added tag and cannot contain comments. However, it can be used to modify metadata directly for just one segment by changing the data tag to another data tag or deleting it completely.
In addition to any user-added tags, the application will show a data tag for each segment with the corresponding Key-Value pair. This means that in a conversation you should see 1 tag that was added by a user plus as many tags as the number of segments with the corresponding Key-Value pair. Segments without the corresponding Key-Value pair in the source DB won't show the data tag, resulting in there being fewer tags than segments in the conversation. This could potentially occur when you delete the tag from one of the segments in the QM Conversation Explorer.
Changes to the data tags will also be propagated back to the conversation's metadata (couple_extdata table) stored in the database.
EXAMPLE: When you use a GDPR tag for a conversation with, say, 7 segments, you will see 8 tags in total (1+7). If one metadata representing GDPR tag is removed via the Conversation Explorer, you will see that there are 7 segments, but 1+6 tags.
The Add Tag button is explained in the Adding Tags section.
Special characters in Metadata - Ext Data Key
There is a known bug that affects SOLR and leads to a 400 error on the Conversation Explorer. If an Ext Data Key contains a combination of spaces and/or special characters, the Conversation Screen will not load properly, this is due to an error in the way that SOLR handles special characters. In the process of testing this issue, we have determined that some combinations of spaces and characters are not supported. See the list below for examples of problematic and non-problematic Ext Data Keys.
Supported (note the lack of spaces and the hyphen)
SpeechREC-total tags
Tag-test
Unsupported (spaces used in combination with hyphen)
SpeechREC - total tags
Tag - test
@
#
&
Speech Tags
If your Quality Management version also includes Speech Recognition functionality you may benefit from this powerful technology. Read more about the Speech Recognition.
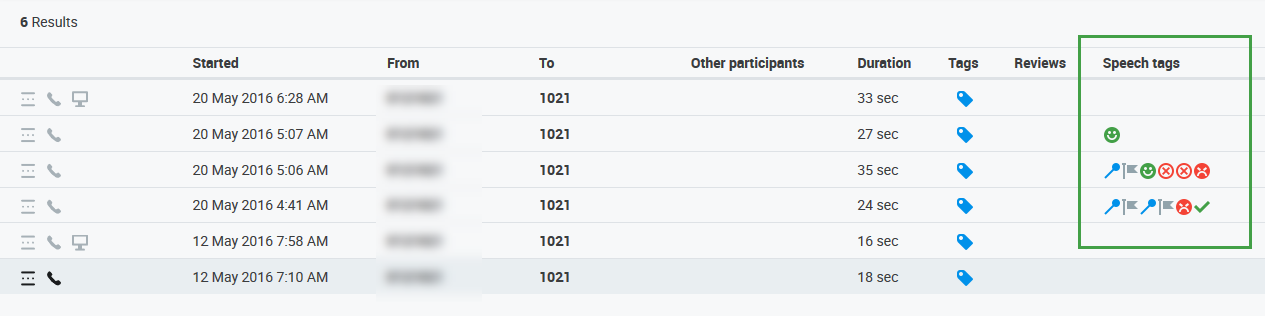
Search for conversations based on the configured Speech Phrases / Speech Tags. Read more about it on the page Using Speech Tags and Phrases.
Each conversation with Speech Tags will display the first 20 Speech Tag icons on the row in the order as they appear in the conversation. If there are more than 20 Speech Tags, this will be indicated with the number of additional Speech Tags found in the conversation.
To search conversations by Speech Tags, filter the available conversations using the Speech Tags drop-down menu.
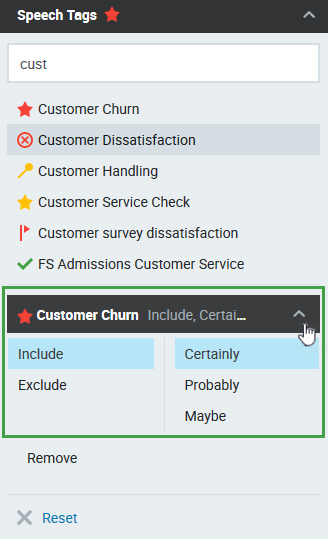
Use the search field to search based on the available Speech Tags (listed alphabetically). Scroll down if needed. Enter the first letter to view the first ten results that contain the typed character. Once you select one Speech Tag only those conversations will be returned in your search that either include (by default) or exclude this specific Speech Tag depending on your selection. After selecting a Speech Tag you may specify the following options by clicking the relevant Speech Tag to view its associated drop-down.
Click the active Speech tags in the list to view additional options:
Include – Default action. Conversations with the Speech Tag within the specified confidence range will be included.
Exclude – Conversations containing the Speech Tag will be excluded from the searched conversations. Conversations with the Speech Tag within the specified confidence range will be excluded.
Certainly – Default confidence. This means that the confidence is 65% or higher.
Probably – The minimum confidence is set to 50%.
Maybe – The minimum confidence is set to 40%.
Remove – Click to remove the Speech Tag from your filter.
The more Speech Tags you choose to be included or excluded the narrower your search will be. All filters applied are displayed alongside the Search bar.
To return to the default setting showing conversations not filtered by specific Speech Tags, remove all the Speech Tags you selected. Alternatively, click Reset Search, however, this will clear ALL the search filters you've set.
Number of Segments
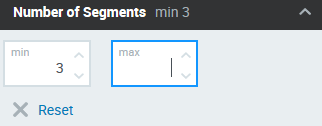
You may choose to filter conversations by the number of segments they contain. This includes chats, emails and calls. You may select; only one, or both of the Min/Max filters. Calls meeting the criteria will be displayed on the Conversation Explorer.
This is a good way to enhance your search to determine which agents are often transferring calls, putting customers on hold, or that the automated routing system is incorrectly assigning agents to calls.
Min – Include only conversations with at least this many segments.
Max – Include only conversations with no more than this number of segments.
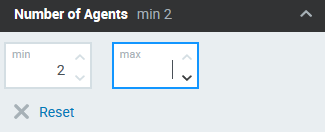
Number of Agents
You may choose to filter conversations by the number of Agents who participated. This includes chats, emails and calls. You may select; only one, or both of the Min/Max filters. Calls meeting the criteria will be displayed on the Conversation Explorer.
Min – Include only conversations with at least this many Agents.
Max – Include only conversations with no more than this number of Agents.
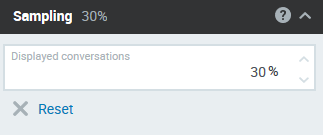
Sampling
Applying a sampling filter displays a selection of conversations with a uniform distribution based on the same percentage defined in the search. For example: If an existing filter is configured to find all conversations from the previous day, and 1000 conversations are found, if sampling is set to 10%, only a subset of 100 conversations will be displayed. If the the sampling filter is set to 30%, then a subset of 300 conversations will be listed. The sample is not an exact percentage, but an approximate sample, the sample criteria performs better when more conversions are available for selection.
Any number may be used between 0.01 and 99.99
Tip: The sample provided by the system is stable. This means that if a sampling filter is saved it will display the same list of conversations repeatedly (if all calls are from the same time period).
Automatic review rule
Filter conversations based on one of your predefined Automated Rules. All rules that were ever active (now or in the past) are displayed, you may also search for a specific rule.
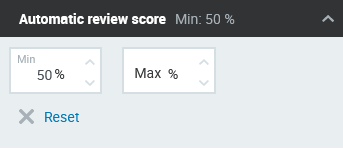
Automatic review score (AQM)
Filter conversations based on the score assigned to a conversation based on predefined Automated Rules. Click on the up or down arrows to select a value, or enter any number between 0-100. Click outside of the field or hit enter on your keyboard to apply the filter. Accepted values range from 0-100% and include numbers with up to 2 (two) decimal places. For example, 10-88% or 10.5 - 33.33%.
Min – Include only conversations with at least this score.
Max – Include only conversations with a score no higher than this score.
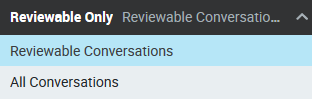
Reviewable Only
By default, you will only see "Reviewable" conversations. This means any conversation with at least one playable segment or containing chat/email. In other words, conversations with no playable media and without chat/email will be excluded from search.
To see all conversations, including those without playable media, click the Reviewable filter and select the All value.
Searching for Conversations by CUSTOM Data (Configurable by Administrator)
In addition to the standard filters you may also search conversations by the custom external data stored within the email, chat or media recording. External data includes: JTAPI_CISCO_ID, Genesys Connection ID, or additional information that is collected or integrated into your contact center applications. The custom data available are configured by your Administrator.
Autocomplete is executed (suggestions are displayed) only after the Search Suggestions button is clicked.
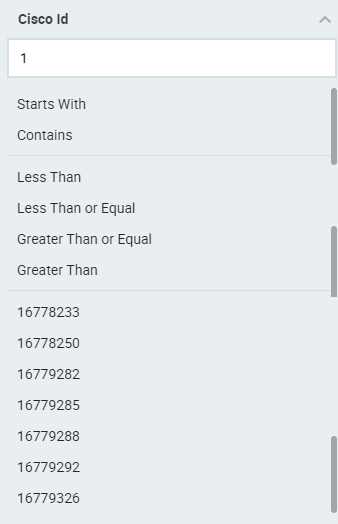
An example of a searching based on custom data is to filter by Cisco ID.
Starts with – Search for conversations where Cisco ID starts with the characters you typed
Contains – Search for conversations where Cisco ID contains the characters you typed
Less Than, Less Than or Equal, Greater Than or Equal, Greater Than – Optionally, use any of the available operators to define the Cisco ID. Only available if the typed character(s)/digit(s) match any of the records.
You may use the checkboxes next to the found matches to include those specific Cisco IDs in your search.
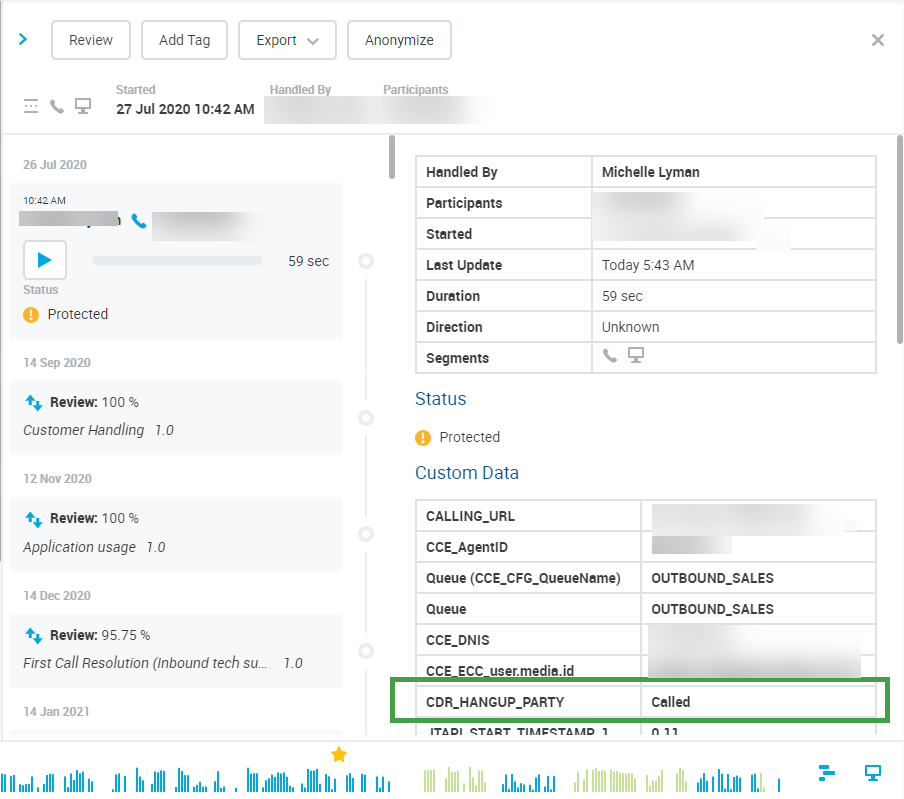
Example: CDR Hangup Party
If your implementation supports it (and the call type is supported) information about who hung up first is available in the metadata of each recording. The information shows who hung up the call first. The values available are Called or Calling.
If an administrator configures Quality Management to display this information on the UI, you may see an extra column and/or a search filter on your screen.
Use the filter to refine your search.
Conversations with this attached metadata will display
Compare with additional information (Queue, for example) to determine if the call is inbound or outbound. This will help you understand who hung up first.
The information for each recording is also visible in the Details pane.
Please note that in order to properly understand what the information means you need to know who initiated the call. Calling / Called does not equal agent or customer. You must compare who hung up with the information about who initiated the call.
EXAMPLES
An agent makes an OUTBOUND call, interacts with the customer and the customer hangs up on the agent. The system will display that the called party hung up first.
An agent receives an INBOUND call, interacts with the customer and the customer hangs up on the agent. The system will display that the calling party hung up first. The information available is installation dependent. Refer to the cisco documentation to better understand how the information is collected and displayed.
Viewing Conversations
Conversations includes recorded call and screen conversations as well as emails and chats. Currently, we support integration of emails from Sales Force.
Selecting a conversation row shows the conversation preview on the right of the screen. The preview shows the key information about the conversation, including, the direction, type, calling parties, conversations segments, review status, flags or comments.
To see more detailed information about the selected conversation click the expand arrow showing the details.
Conversation Explorer will display the selected Conversation Details for all its segments (calls, chats and emails) including, if available, Review details such as the Questionnaire name, Reviewer, Reviewee, score, and technical information such as Correlation ID's (SID).
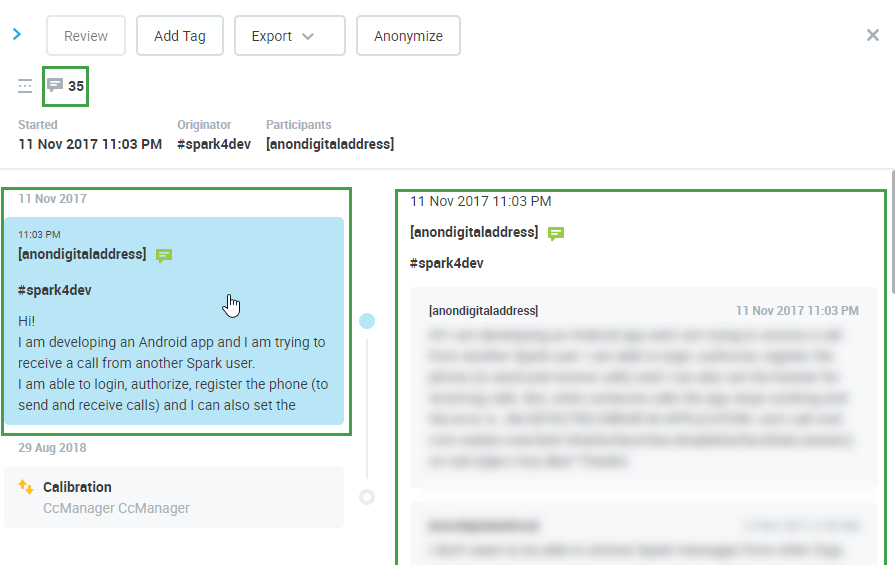
Chat conversations will be grouped together as shown below until the occurrence of another segment type such as call or email.
In the case of emails, all details such as sender, sent date, recipients and subject will be shown. Click each conversation segment in the thread to see it expanded on the right.
Viewing the content
If an agent switches teams, who can view their conversations?
If an agent switches between teams at any time, the previous Supervisor will be able to view conversations from before the team change, the new Supervisor will be able to view conversations from after the team change. However, due to the way that conversations are indexed by the server if a conversation is updated (For instance, a tag is added to a conversation from the Quality Management UI, etc,) the conversations will become visible to the new Supervisor because the Agent is assigned to that supervisor at the time the conversation is updated! The conversation will no longer be visible to Supervisor A.
Case Example: An agent works for Team A until the end of May and then is moved to Team B from the 1st of June. Supervisor A (from team A) can see all conversations that were done by the agent until the end of May. Supervisor B (from Team B) can view only those calls that are made from the 1st of June. However, if the conversation created in May is updated (tag is added by Supervisor A during a routine review) then it will visible to Supervisor B, as the agent is a member of Team B at the moment the conversation is updated.
Viewing conversations involving multiple teams (transfers, email chains, or conference calls)
If a Supervisor or Team Leader can view a part of a conversation (because it was done by an agent from their team) then they can view the whole conversation (even the parts that were done by agents from different teams)!
Results of Reviews
The result of Reviews connected to conversations are displayed within the Preview Pane to users with the appropriate permissions. Results are not visible to agents from within the conversation screen, even if the Reveal Results to Agent option is selected when creating the review.
Additional information is provided in the Detail Pane.
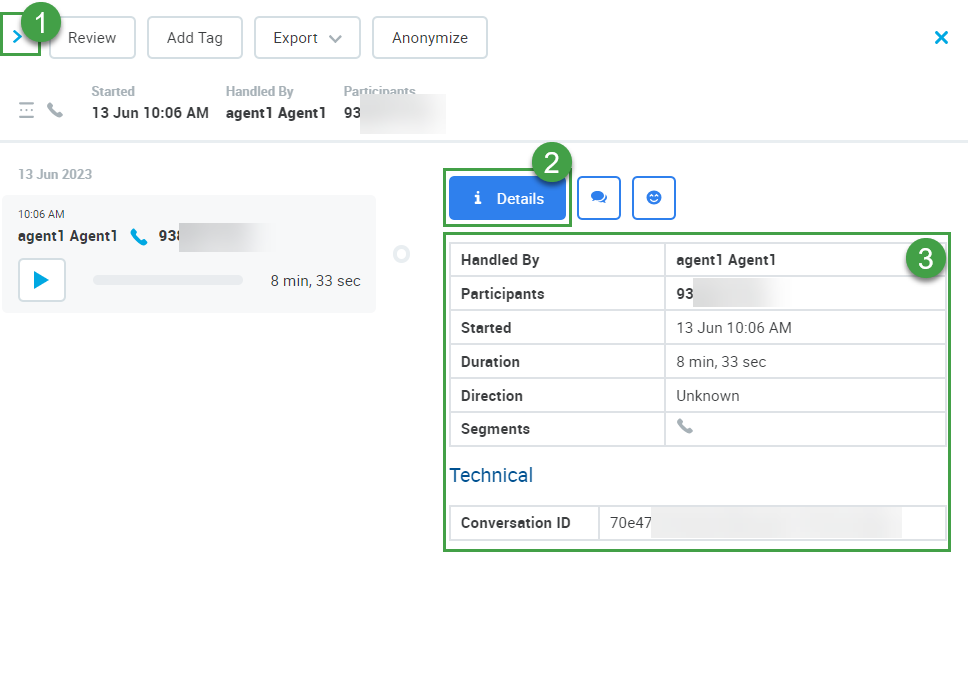
Detail Pane
Click an item in the Preview Pane to expand the Detail Pane. Click on the info icon to view details.
Select a object to view detailed information related to it. The information displayed will vary based on what is selected, content available is installation dependent:
To view detailed information about the selected segment/conversation when the Details Pane is open, click to select an object.
General Information
General information about the entire conversation:
Handled By – Name or number of the agent (if detected)
Participants – Number of the participants (customer/agent if detected)
Started – Time an date the conversation began
Duration – length of the conversation
Direction – Inbound, Outbound, Unknown
Segments – number/type of segments
Automatic Review Score (AQM)
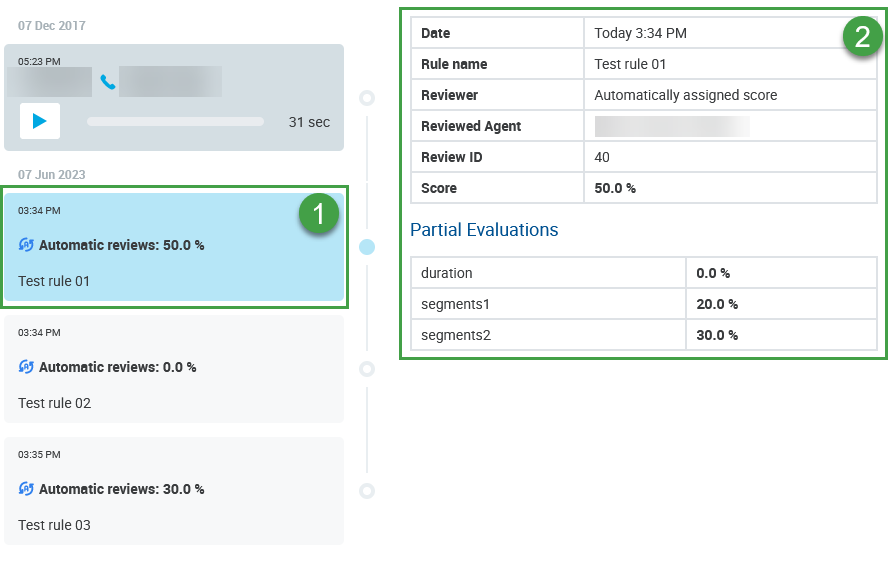
The score assigned to conversations by Automated Rules are displayed in a dedicated column on the Conversation Explorer and also within the Preview Pane (1) to users with the appropriate permissions.
Additional information is provided in the Detail Pane(2).
Click an item in the Preview Pane to expand the Detail Pane.
The following information is listed: (Additional information may be displayed, installation dependent)
Date: Creation date.
Rule Name: Name of the Rule used
Reviewer: Automatically assigned score
Reviewed Agent: Name of the agent
Review ID: ID number
Score: Total score assigned by the Automated Rule
Partial Evaluations: A detailed breakdown of how the score was calculated is displayed
Results of Manual Evaluations
Date – Creation date.
Questionnaire Name – Name of the Questionnaire used
Questionnaire version – Version of the Questionnaire used
Questionnaire ID – ID of the Questionnaire
Reviewer – Name of the reviewer
Reviewed Agent – Name of the agent
Review ID – ID number
Score – Total score
Reason for the Score – The comment (if it exists) is displayed
Status
Additional system information
Custom /Other Data
Installation dependent technical information is displayed
Technical Information
Conversation ID / Correlation ID's (SID) – Please note that the correlation ID is only visible within the Conversation Detail pane if the media is selected
Click here to find out how to view the Correlation ID / SID
Transcription
Click an item in the Preview Pane to expand the Detail Pane.
Click on the Transcription Iconto view the transcription.
The emotion is shown for each transcription utterance (sentence). The emotion detection feature combines acoustic features and word sentiment scores to determine the emotion of each individual sentence. This is installation dependent and is not supported for all languages.
If the system is able to detect the participant their name is shown for each transcribed phrase. If the system cannot detect who the speaker was, then a phone number will be displayed.
Background noise and other sounds are not included within the transcript. Only words / phrases are included in the transcription.
The 5 levels of emotion displayed for each utterance are as follows:
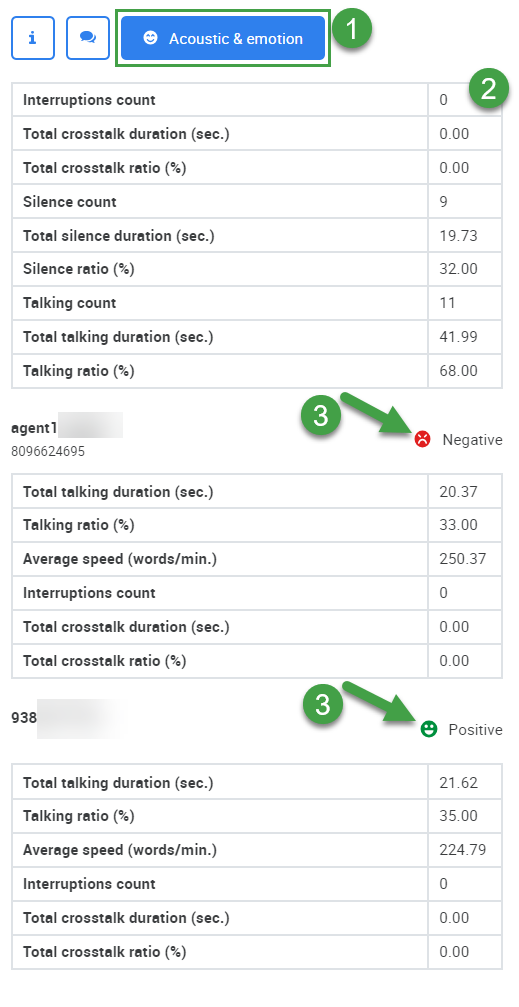
Click an item in the Preview Pane to expand the Detail Pane.
1. Click on the Emoticon Icon to view the Emotion and acoustic parameters.
2. The list of available data will be displayed
Data available may include:
General statistics – Aggregated for the entire conversation
Interruptions count – Number of interruptions
Total crosstalk duration (sec.) – Total time that the speakers were interrupting or speaking over each other
Total crosstalk ratio (%) – Ratio of time that the speakers were interrupting or speaking over each other
Silence count – Silence count includes all silences that are greater in length than 800 milliseconds. This means that the silence count may be 0. In contrastTotal silence duration might be greater than 0 as it combines all silence time, even short periods of silence.
Total silence duration (sec.) – How much time was silent (no audio)
Silence ratio (%) – Ratio of time that was silent relative to talk time
Talking count – Total count of utterances (i.e. phrases, sentences in the transcription)
Total talking duration (sec.) – Total time a participant was speaking
Talking ratio (%) – How much time (as a ratio) a participant was speaking
Speaker specific statistics
Gender (Male/Female) – If detected the system displays the gender of the speaker (this information is not displayed unless configured by an administrator)
Total talking duration (sec.) – Total time the participant was speaking
Talking ratio (%) – How much time (as a ratio) the participant was speaking
Average speed (words/min.) – How fast the speaker was speaking. Average number of words per minute (rounded to 2 decimal places)
Interruptions count – Number of interruptions (times the speakers spoke over each other)
Total crosstalk duration (sec.) – Total time that the speaker was interrupting or speaking over the other
Total crosstalk ratio (%) – Ratio of time that the speaker was interrupting or speaking over the other
Average talk speed – Average number of words spoken per minute
Agent talking ratio – Ratio of the call, in percent, where the agent is speaking
Agent crosstalk ratio – Ratio of the call, in percent, where there is crosstalk
Agent number of interruptions – Number of times crosstalk is detected
3. The emotion of each participant is shown.
The emotion shown can be improving, positive, neutral, negative or worsening. This is the overall emotion (of one party) during the last segment they were participating in. E.g. This is the emotion of the speaker when they left the call.
The 5 levels of emotion displayed for each of the participants when they leave the conversation are as follows:
Icon
Emotion
Improving
Positive
Neutral
Negative
Worsening
Interaction Player
The Interaction Player and Its Functionality
The various parties in the conversation are displayed below the primary waveform separately. Click on the waveform button to view or hide the individual segments. Each individual waveform is color coded: green for customers, blue for agents (if the ID or DN for the specific agent is available to be paired with the conversation or segment).
Click the the Play or Pausebutton to control the conversation playback.
Hover over the volume and click to adjust the audio volume or to mute the sound.
If media files are present, the following options may be visible:
Screen Recording – If the conversation you are playing contains a screen recording (record will be marked with the Screen button). Click on the button to open the playback window. If no screen recording is available the button is greyed out.
During playback the button will be highlighted . Screen recordings are not loaded until you expand the playback window. Audio can be played back at any time.
Video Recording – If the conversation you are playing contains a video recording (record will be marked with the Video recording button). Click on the button to open the playback window. If no video recording is available the button is greyed out .
The scroll bar (on the right hand side) is only visible in the case that there are more than four media streams.
For more details and advanced functionality please refer to the Interaction Player page.
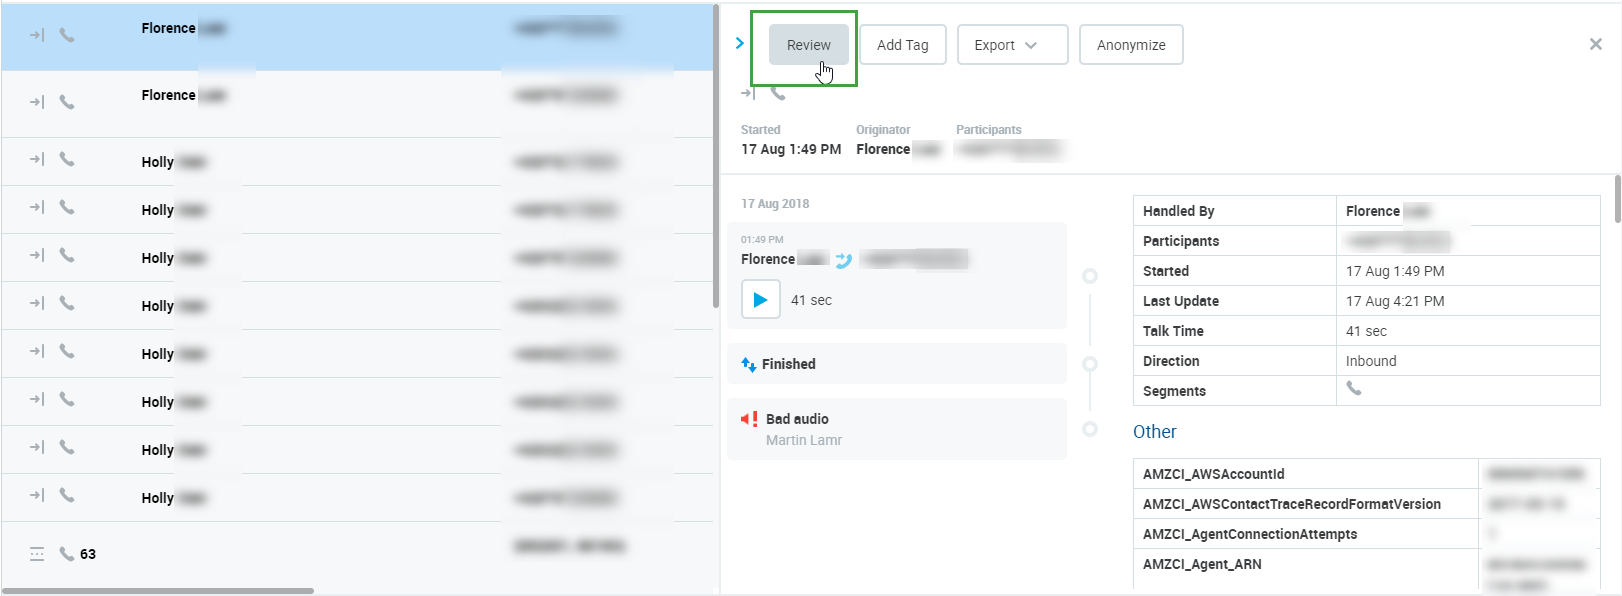
Review
The Conversation screen enables you to review selected conversation. A conversation may have one or more identified agents associated with the selected conversation:
In case there is only one identified agent in the conversation, click Review and the Review Conversation dialog displays.
In case there is more than one agent associated with the conversation, the Review button changes into a dropdown from which you need to select the agent you wish to review.
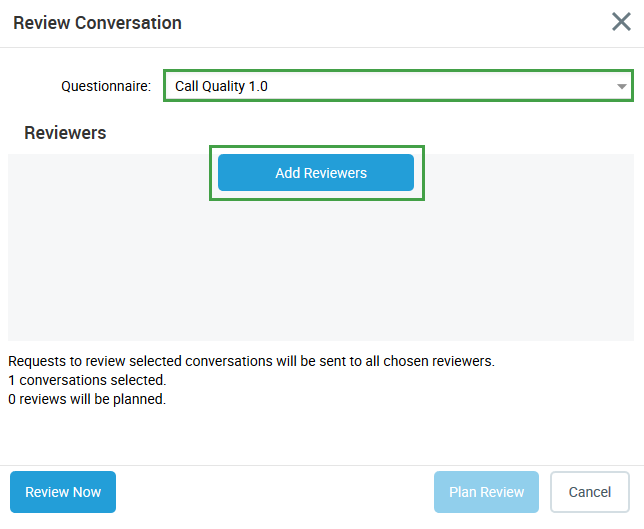
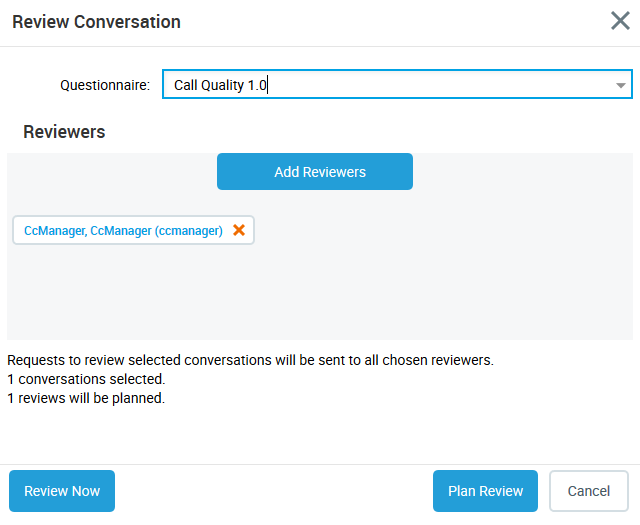
The Review Conversation window displays:
Select a Questionnaire to be used for the given review.
Click Add Reviewers to continue.
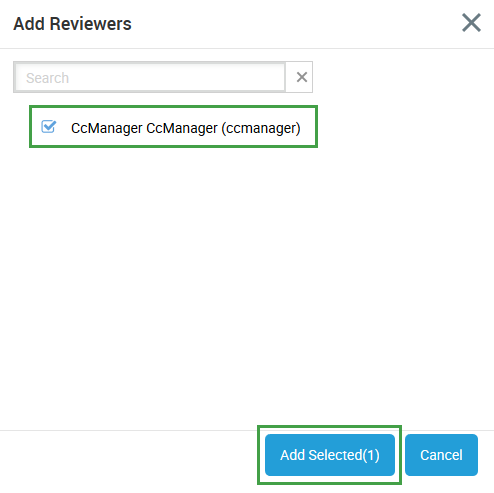
In the Add Reviewers window select one or more Reviewer(s) for example for calibration purposes. You may select/deselect all Reviewers by clicking the top checkbox next to Reviewer. Only reviewers that have the right to review the respective agents will be listed. This includes also the agents that participated in the conversation if they have the "Review - Review Myself" and "Reviews - Assign to Myself" permissions. See the Quality Management Roles page for more details on permissions. – Click Add Selected to confirm. The button also displays the count of selected reviewers.
You will be returned to the Review Conversation window. At the bottom of the window you will see a message: "Request to review selected conversations will be sent to all chosen reviewers." including the selection details.
A summary of the reviews that will be created will display.
The window also shows the number of conversations selected and the number of reviews that will be created.
Click Plan Review to conclude the review request for all selected reviewers.
If you selected yourself as the reviewer (in our case) you can click Review Now to quickly create the review and subsequently perform the review process.
The Quality Management application recognizes membership in one group only. This group should be marked as a 'main' group in User Management. If users were imported from external systems, like UCCX or UCCE, consider carefully if their group membership and/or the main group selection should be manually modified from within User Management. A reviewer must have the agents main group assigned to them (more details on the page: Adding Users to Groups) if they wish to perform reviews on these agents.
The following rules apply to setting the main group in User Management:
If a user is a member of one group only, this group is set as main.
In case a user is a member of more than one group, only one group can be set as main.
If a user is removed from the main group, the first group from available groups sorted alphabetically will be set as the new main group.
Self review
Agents need "Review - Review Myself" and "Reviews - Assign to Myself" permissions to be able to do a self-review.
To see the reviews go to Reviews in the navigation tree.
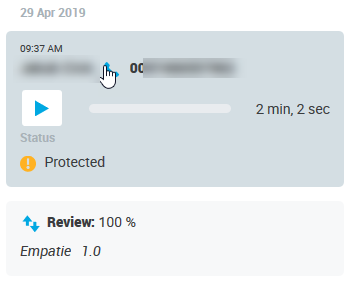
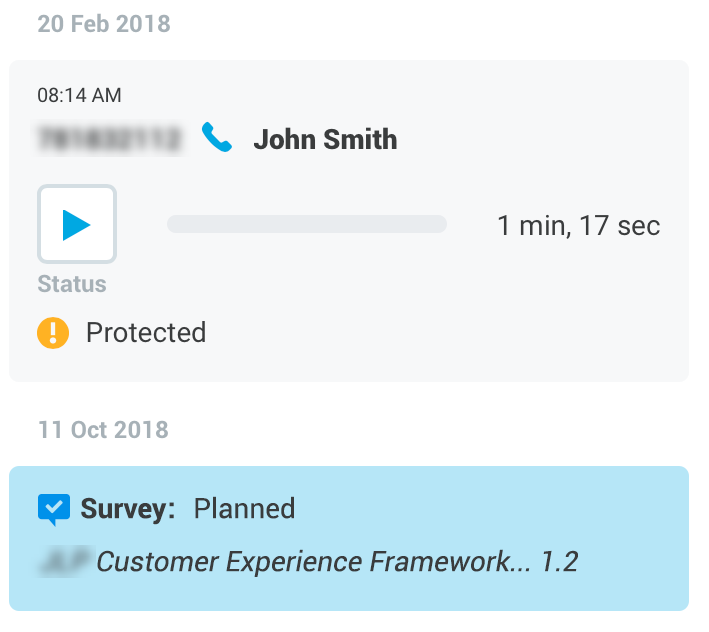
All conversations used in reviews are flagged and marked as Protected and the score is displayed.
Video Spot
In this video tutorial, our trainer provides an overview of the review process. In the video we compare the difference between a review created in the Review Scheduler and one created in the Conversation Explorer.
Adding Tags
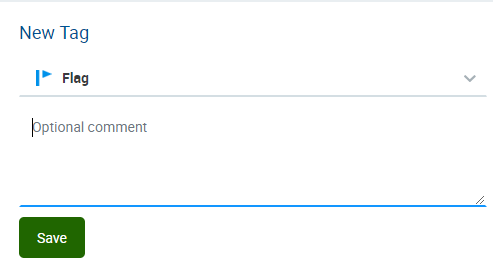
You have the option to tag any selected conversation so you can find it in the future with ease. Select a conversation and click Add Tag.
Clicking the Add Tag button shows the preset Flag tag – you may add a comment not exceeding 1000 characters.
You can choose from the available tags, one at a time, and optionally type a comment. If you choose the Comment tag, entering a comment is mandatory. There is a one directional comment propagation from segment comments stored in the database into the Comment tag's comment.
You may even create your own custom tag. See the Tags page for more information. Please note that you need a permission to manage tags, by default assigned to the CC Manager and Compliance Analyst role as part of the DEFAULT_CC_MANAGER and DEFAULT_COMPLIANCE_ANALYST roles. Refer to the section Default Composite Application Roles on the page Quality Management Roles.
Alternatively, it's also possible to manage tags via Framework Data API. More info can be found on your QM local host's API Swagger documentation (e.g. http://your.local.machine/encourage/api-doc/index.html). More about Swagger (OpenAPI 2.0).
Custom tags
New key-value pair custom tags are usually created by Administrators.
Any custom tag added to a conversation will propagate its corresponding Key Value pair back to the media recording metadata.
Data tags, and the use of key-value pairs are explained in the Data Tags section.
Tagged conversations will display a general tag icon. Hover over the icon to see the exact tag(s) with any comments that were added.
The tags will also be visible within the Conversation Details window. Click the Details button to view or modify it.
Warning Message
If the following message displays when working with tags please refresh your screen and add the tag again.
Unable to perform action. Refresh search results and try again.
Editing or Deleting Tags
The Conversations Details window also enables you to edit or delete the tags and their comments. Select the conversation, click to expand the Details pane and choose the tag you wish to modify or delete.
You may also modify or remove your own custom tag, at the moment only via Framework Data API. More info can be found on your QM local host's API Swagger documentation (e.g. http://your.local.machine/encourage/api-doc/index.html). More about Swagger (OpenAPI 2.0).
If propagation of a tag change to the metadata stored in the database fails you will see an error message with a prompt to try saving your changes at a later time.
A saved filter that includes tag(s) with Key-Value pair will also return results based on Key-Value pair associated at the time of the search execution.
Tag changes in Audit Log
User added tags updates will be marked as CONVERSATION_EVENT_TAG_UPDATE in the Audit Log.
System-visualized tags changes will be marked depending on the channel as follows:
CONVERSATION_EVENT_EMAIL_CHANGE
CONVERSATION_EVENT_CHAT_CHANGE
CONVERSATION_EVENT_METADATA_CHANGE
Export
The Export feature is only available to QM users with "Conversations - Export MP3" or "Conversations - Export JSON" permission. More about roles.
The following options are available in the Export dropdown:
Data (JSON) – You can export data from any selected conversation into a JSON file – an open-standard file format that uses human-readable text. Information about the data exported can be found on your QM local host's API Swagger documentation (e.g. http://your.local.machine/encourage/api-doc/index.html). More about Swagger (OpenAPI 2.0).
It is possible to select and export data from one conversation at a time
The export file is saved to the user's computer
This option only exports data (e.g. Participants, custom data, reviews, etc.), text contained within emails, chat content, assigned tags and transcriptions. It does not contain voice or video recordings!
Media (MP3) – This option, only active if the selected conversation contains at least one call, enables you to download the call conversation audio file.
Call segments will be merged into one MP3 file. In case of missing or erroneous media in one or more segments, the MP3 file won't be exported and you will see an error message.
The downloaded file name will be in the following format: conversationID_UUID.mp3
All Media (ZIP) – This option exports all available media in ZIP format. (Screen Recordings are not available for export)
In case of missing or erroneous media the exported zip file may be empty.
The downloaded file name will be in the following format: conversationID_UUID.zip
If the Export option is not visible, click on the expandable options menu (three dots).
Regulatory Compliance
When exporting conversation data, ensure that any Personally identifiable information(PII) or any other sensitive information from a customer is not included in the exported file sent to another customer or compliance party.
Anonymize
In order to facilitate compliance with regulatory requirements related to personal data protection (such as GDPR), users of QM are able to select conversations on the conversation screen and anonymize Personally Identifiable Information at the click of a button. The Anonymize feature is available by default to QM users granted the permission "Conversations - Anonymization".
* Compliance setup
Learn how to choose which Personally Identifiable Information (PII) can be anonymized on the Compliance Setup page. Special permission is required.
Protection against Anonymization
Certain conversations may be protected against anonymization and deletion for compliance reasons. You cannot easily anonymize conversations protected due to compliance unless you have the 'INTERACTION_ANONYMIZE' permission. Call conversations marked by MiFID II TAG are already protected against deletion by the Delete tool. In Quality Management, users with the "MANAGE_DATA_LIFECYCLE" permission (assigned to the DEFAULT_CC_MANAGER as part of the Default Composite Application Role) have the ability to protect selected conversations against anonymization (see the Protected Conversations Against Anonymization section).
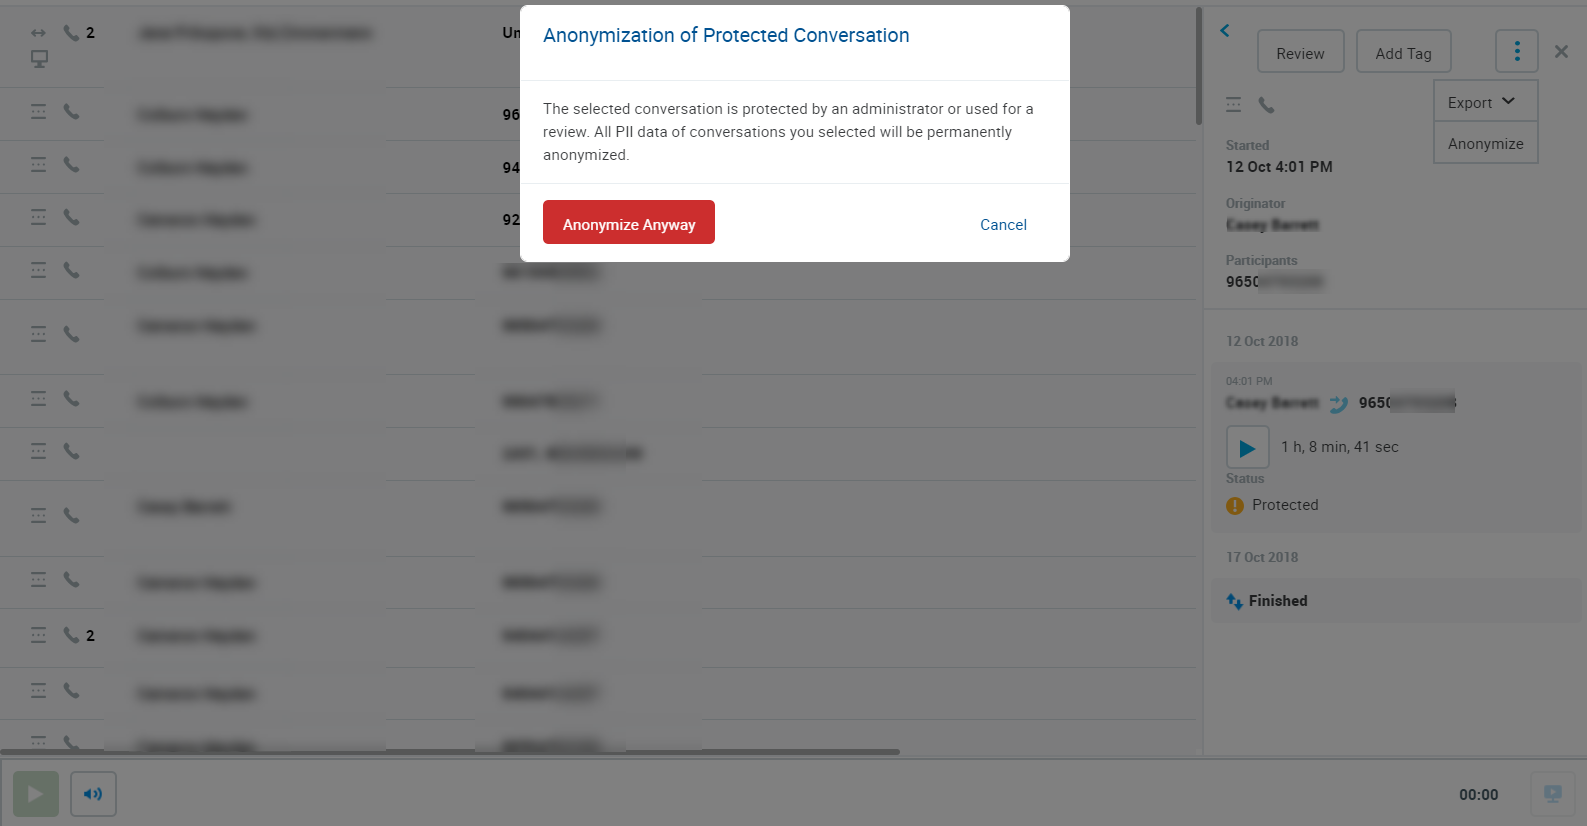
Anonymizing Conversations Marked as Protected
Certain conversations may have a "protected flag", typically for two reasons:
"Protected flag" is set by a User of a third party integration.
All conversation segments that are either reviewed or planned for a review are automatically marked with a "protected flag".
You are able to anonymize this type of protected conversations. If such a conversation with at least one protected segment is being anonymized, a confirmation dialog, as shown below, is displayed and when confirmed, the "protected flag" is removed.
Example:
Let's imagine you have a planned review in Quality Management and a conversation is assigned for a review. Then all call segments of the conversations are marked as protected.
If you have proper permissions to anonymize such protected conversation, all the conversation's segments will be unprotected if you confirm the warning prompt pictured above. The following happens:
Conversation metadata will be anonymized (those that are marked to be anonymized).
Conversation´s segments will be marked for deletion (if media files should be deleted, see Compliance Setup).
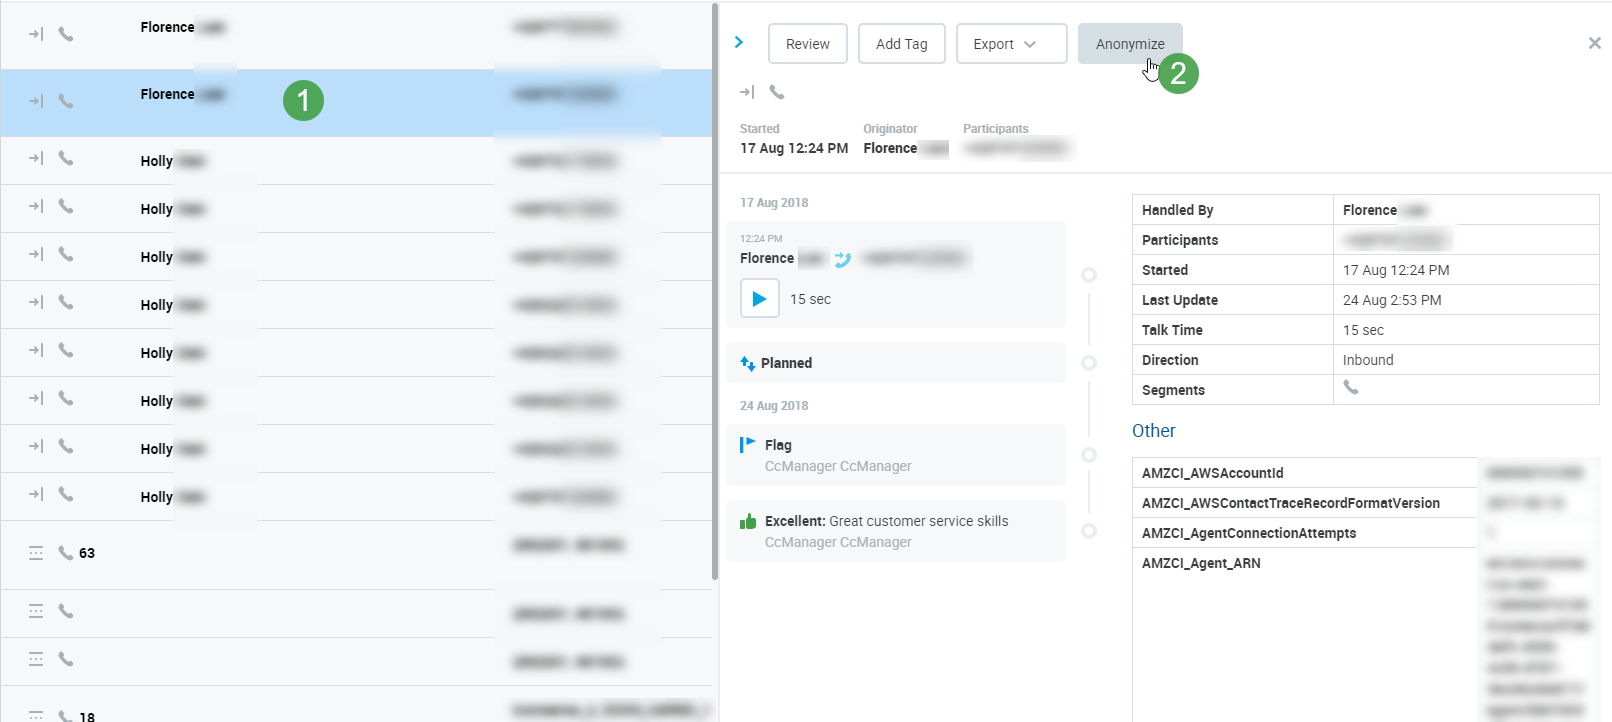
To Anonymize Personally Identifiable Information (PII)
Find and select the conversation on the Conversation Explorer that you wish to anonymize.
Click Anonymize to anonymize the select PII data.
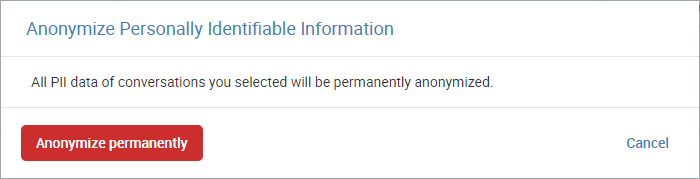
You will be notified that the anonymization is permanent and can not be reverted in the future. – Anonymization will be executed for the following:
Any data field* marked for anonymization will be anonymized in the source database.
Call Data anonymization will occur in all databases.
External databases are not affected by the anonymization process. These include, for example, emails from SalesForce.
Once you confirm by Clicking Anonymize Permanently and Anonymization is successfully performed you will see a confirmation message. An alert will display in case of an anonymization process failure.
The selected conversation will refresh and the anonymized data will be replaced by a placeholder indicating that the data was anonymized.
Various data fields can be selected for anonymization (see the Compliance Setup page).
PII data which can be anonymized includes Basic Data(such as phone number, email address or texts within email subject and body, chat room name and messages, etc.).
CustomData (which includes all metadata configured as filters in the Conversation Explorer) and Other metadata, such as external data.
Protected Conversations Against Anonymization
Certain conversations may be protected against anonymization and deletion, by the Quality Management toolset, using protected saved filters. Any conversation matching the protected saved filter criteria will be protected against anonymization. Call conversations marked by MiFID II TAG are already protected against deletion.
This feature only protects media from being deleted by the Quality Management toolset (which is designed primarily for the removal of non-call conversations) AND against anonymization triggered by Quality Management. This is separate from the Media Lifecycle Management (MLM) Tools. If media is deleted by a MLM tool then it will also be deleted from in Quality Management regardless of the data protection configuration here!
Users with the "MANAGE_DATA_LIFECYCLE" permission (by default assigned to CC Managers) can set protection by using saved filters.
CAUTION
Please check the default Reviewable Conversations filter when creating saved filters. To change it, choose All Conversations from the Resource flags filter. More about Conversation Explorer conversations.
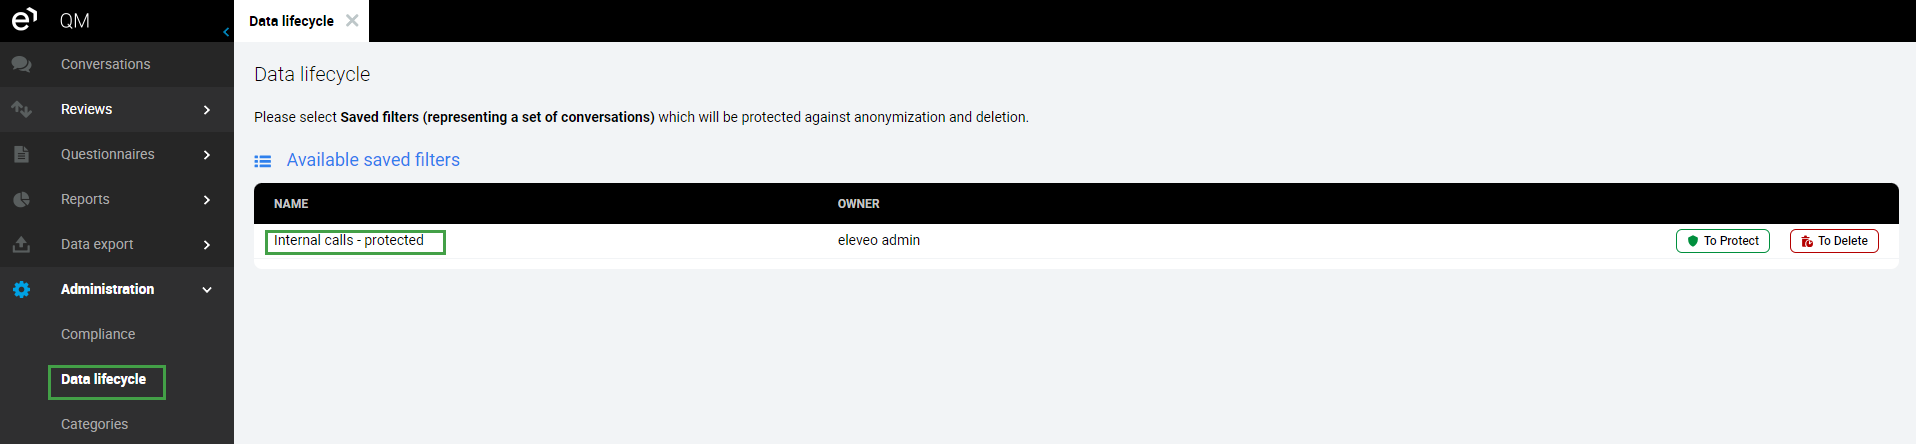
The example below shows how to save a search which will then be set for protection against anonymization. In this example we will protect Internal calls.
On Conversation Explorer choose the Internal option from the Direction filter.
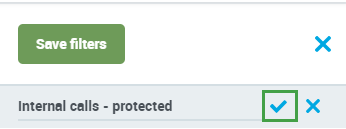
Click Save Filters to save the filtered conversations (Internal calls).
Name the Saved Filter as needed, e.g. "Internal calls - protected" and confirm saving.
This newly saved filter can be set as protected under the Data Lifecycle section in Quality Management, accessed via Administration > Data Lifecycle. Learn more on the Data Lifecycle page.
Now, when you try to anonymize an Internal call, you will be notified that the conversation is protected and cannot be anonymized.
This means that the internal calls that match the protection criteria are protected, preventing all the matching conversations from anonymization. If needed, you can cancel the protection on the Data Lifecycle page.
JavaScript errors detected
Please note, these errors can depend on your browser setup.
If this problem persists, please contact our support.


.png?inst-v=c80cfd37-f758-42c6-830e-f5649ea1c8f6)