
Editing Users
| CONTENTS |
|---|
To edit an existing user, go to the Users screen and click Edit to the right of the username.

The user configuration screen will display.
Details
The Details tab allows for the configuration of basic user settings, the same as were configured during the user creation process. Settings, which were not configured during the user creation process or were not imported from the external system, may be added now. The username cannot be changed.
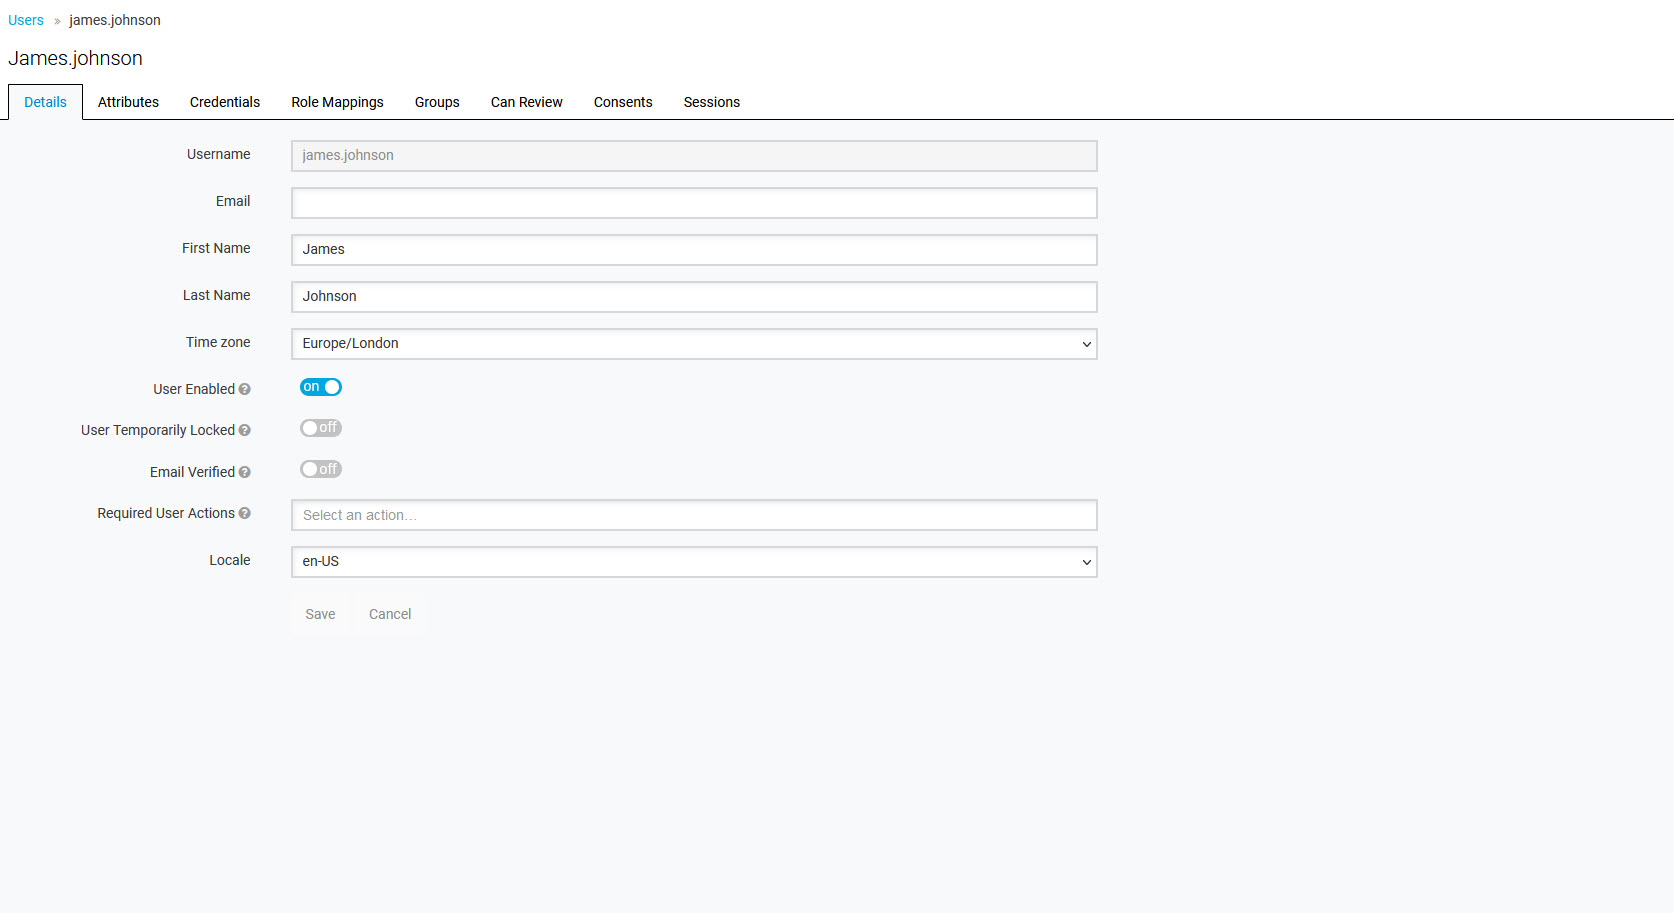
Configure as necessary:
- Email – email address of the user (Not mandatory; however, it is recommended that a valid email address be entered. This is especially important as the email address is used to send notifications and to reset passwords.)
- First Name – first name of the user
- Last Name – last name of the user
- Time zone – time zone of the application (when not selected, the value from Realm Settings is used), find out more on the Adding New Users page
- User Enabled – by default a new user is enabled, the switch allows for deactivation of the user, find out more on the Activating and Deactivating Users page
- User Temporarily Locked – user can get temporarily locked after several unsuccessful login attempts, the switch allows to activate the user, find out more on the Activating and Deactivating Users page
- Email Verified – if the user's email address was verified or not
- Required User Actions – actions required after user's login, find out more on the Adding New Users page
- Locale – language of the application (when not selected, the default language is English)
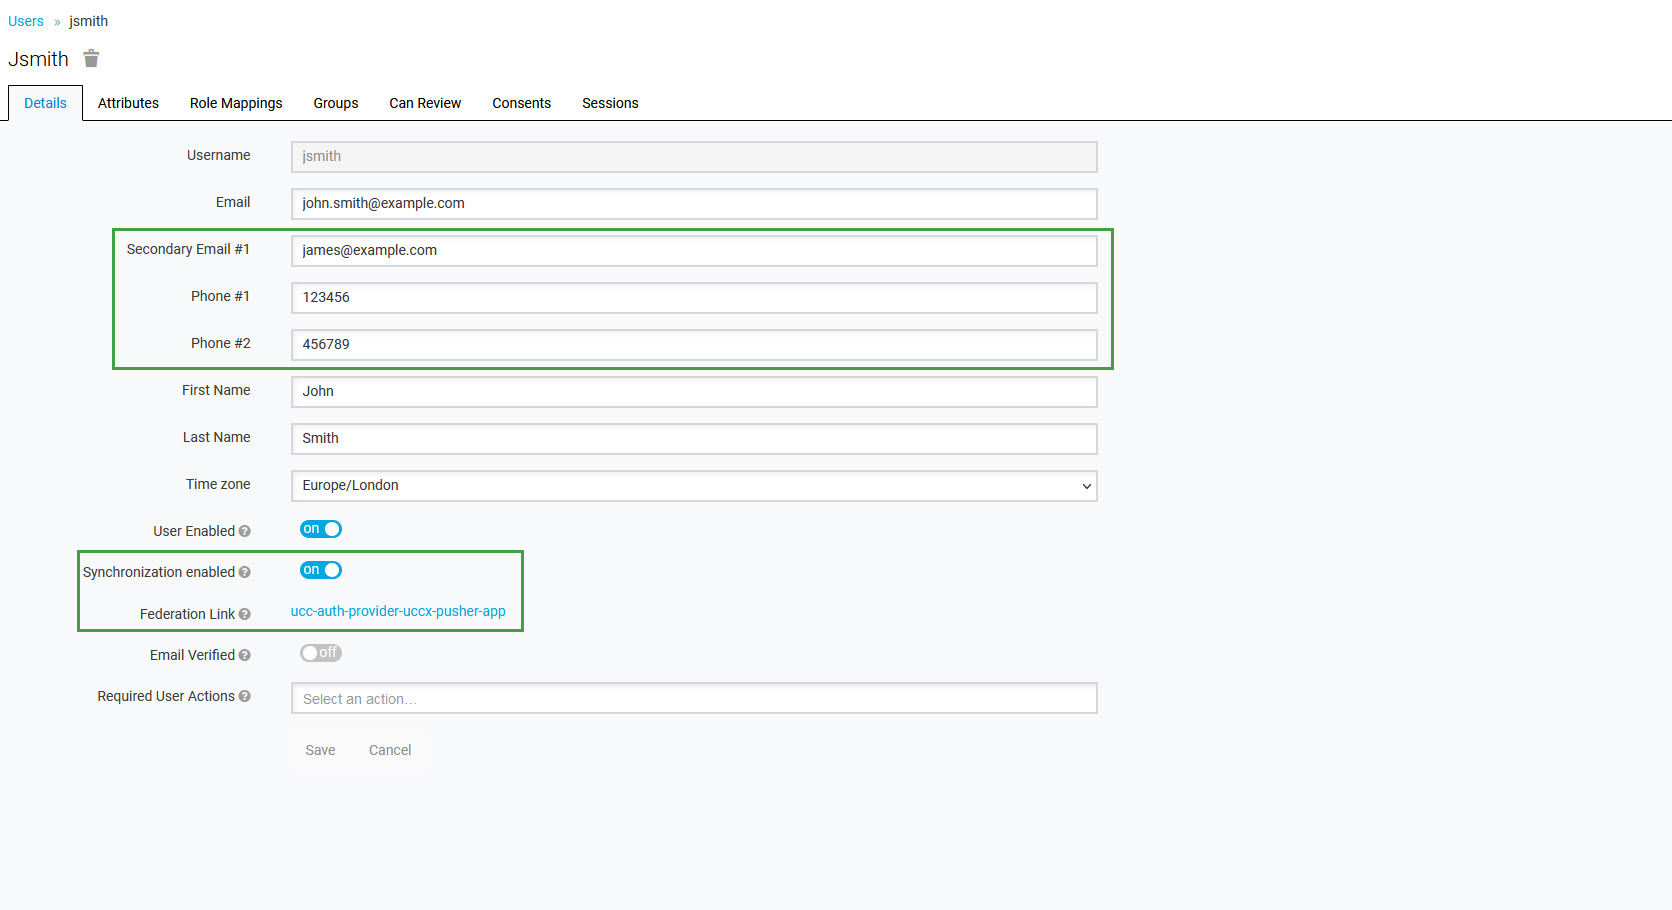
For the users who were imported from external systems, additional settings are displayed (these settings are not visible for manually created users):
- Secondary email – other email address(es), only if this attribute was imported from the external source (more emails can be imported, in such a case, they are numbered, for example,
Secondary email #1) - Phone – phone number(s), only if this attribute was imported from the external source (more phone numbers can be imported, in such a case, they are numbered, for example,
Phone #1) - Synchronization enabled – by default, synchronization with an external system is enabled; the switch allows you to disable synchronization
- Federation Link – redirects to a configuration of the external system from which the user was imported
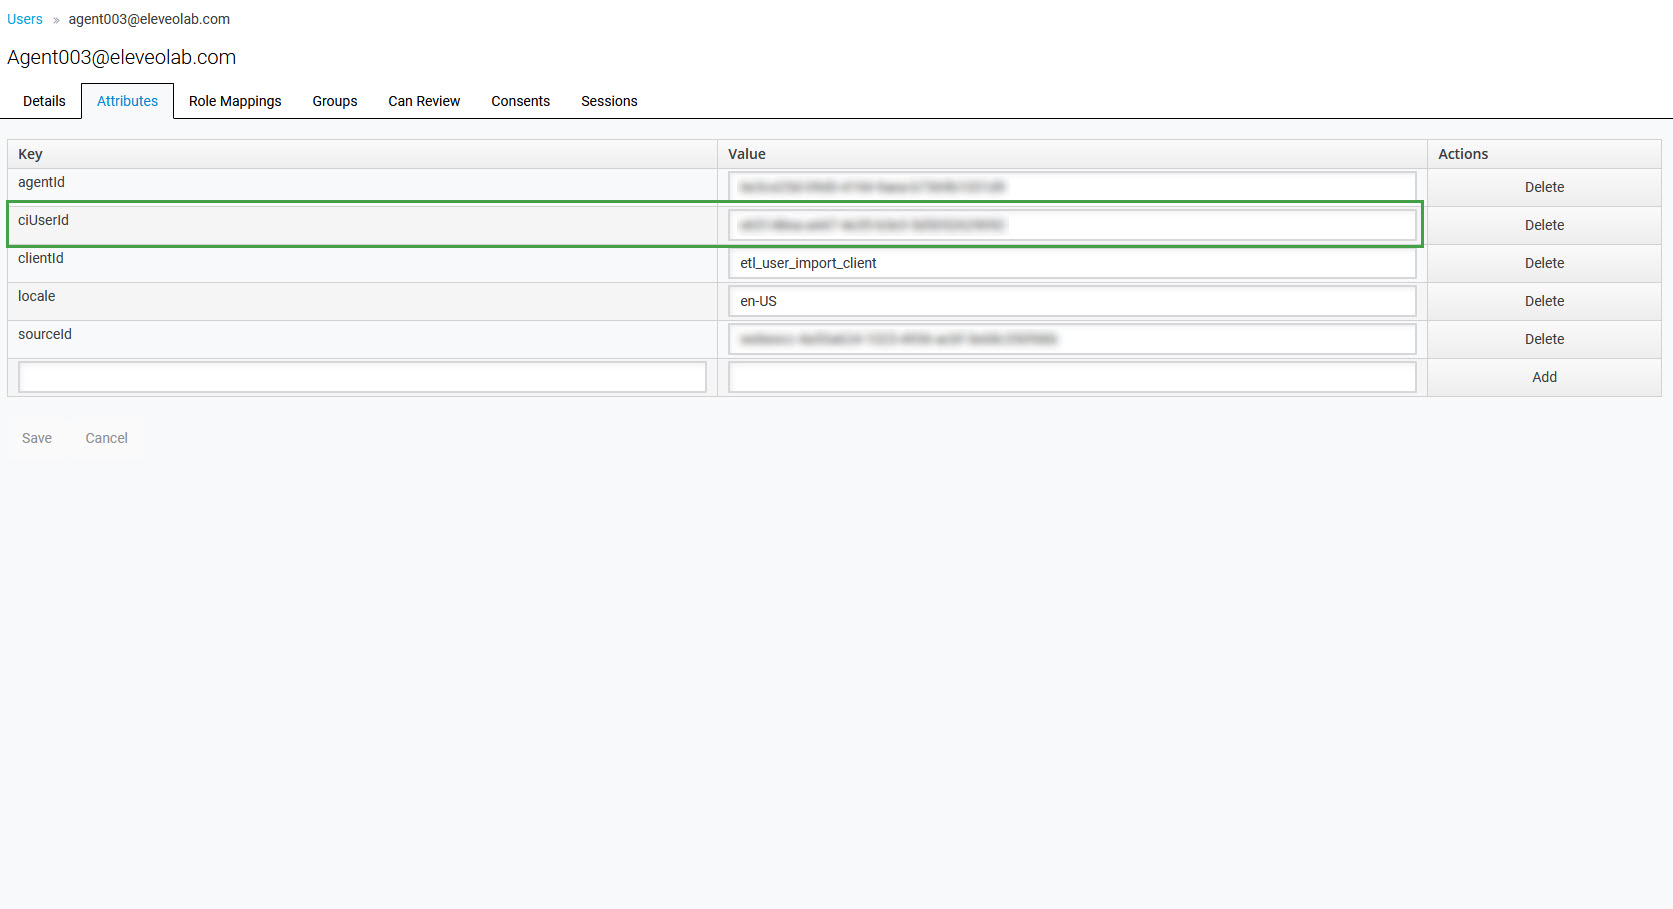
Attributes
Apart from basic user metadata like name and email, arbitrary user attributes can be stored in the system. To configure attributes manually, go to the Users screen, select a user, click the Edit button, and click the Attributes tab.
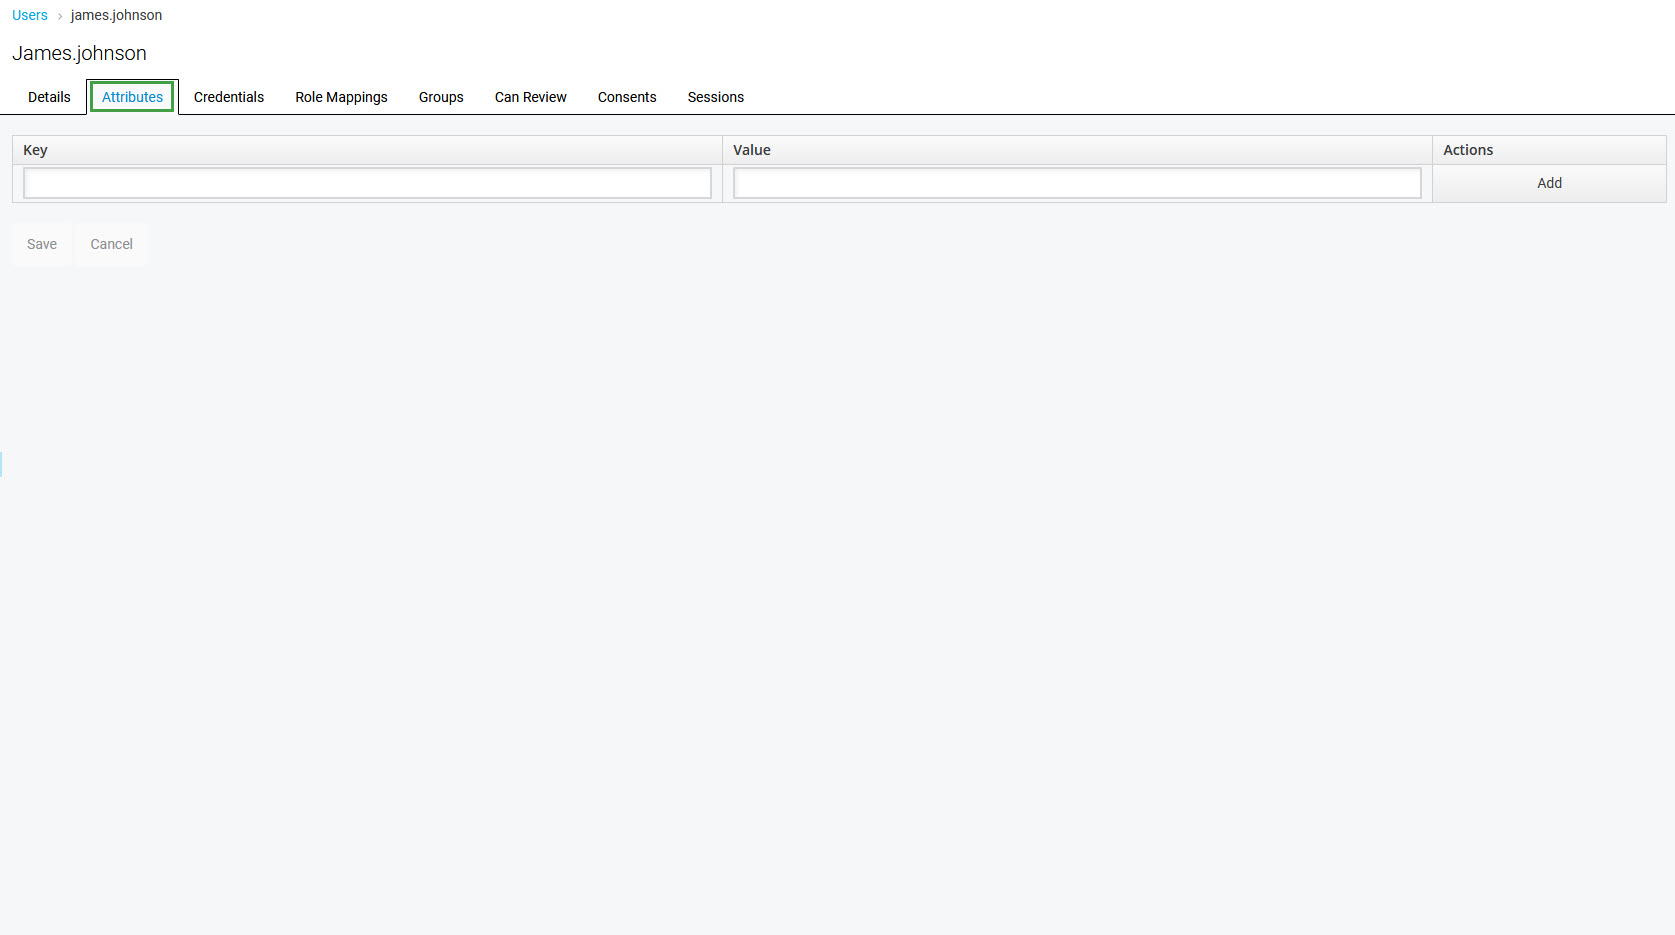
Enter the attribute name and value in the empty fields and click the Add button to add a new field. Click Save to confirm and add the attribute.
Adding Phone Extension and Agent ID
Additional attributes that can be added manually include:
- phoneExtension – Type a phone extension of the user (required to match agents to calls correctly)
- agentId – Type an identification number of an agent, if it exists (required to match agents to calls correctly)
These attributes are configured locally but are independent of the synchronization process. It means that attributes added for users imported from external systems will not be overwritten or removed during the next synchronization process.
Importing Attributes
If an external user (imported from UCCE/X or CUCM) has the phoneExtension and/or secondaryEmail attributes configured in the external system, these attributes will be imported as well. They will be displayed on the Attributes and the Details tabs.
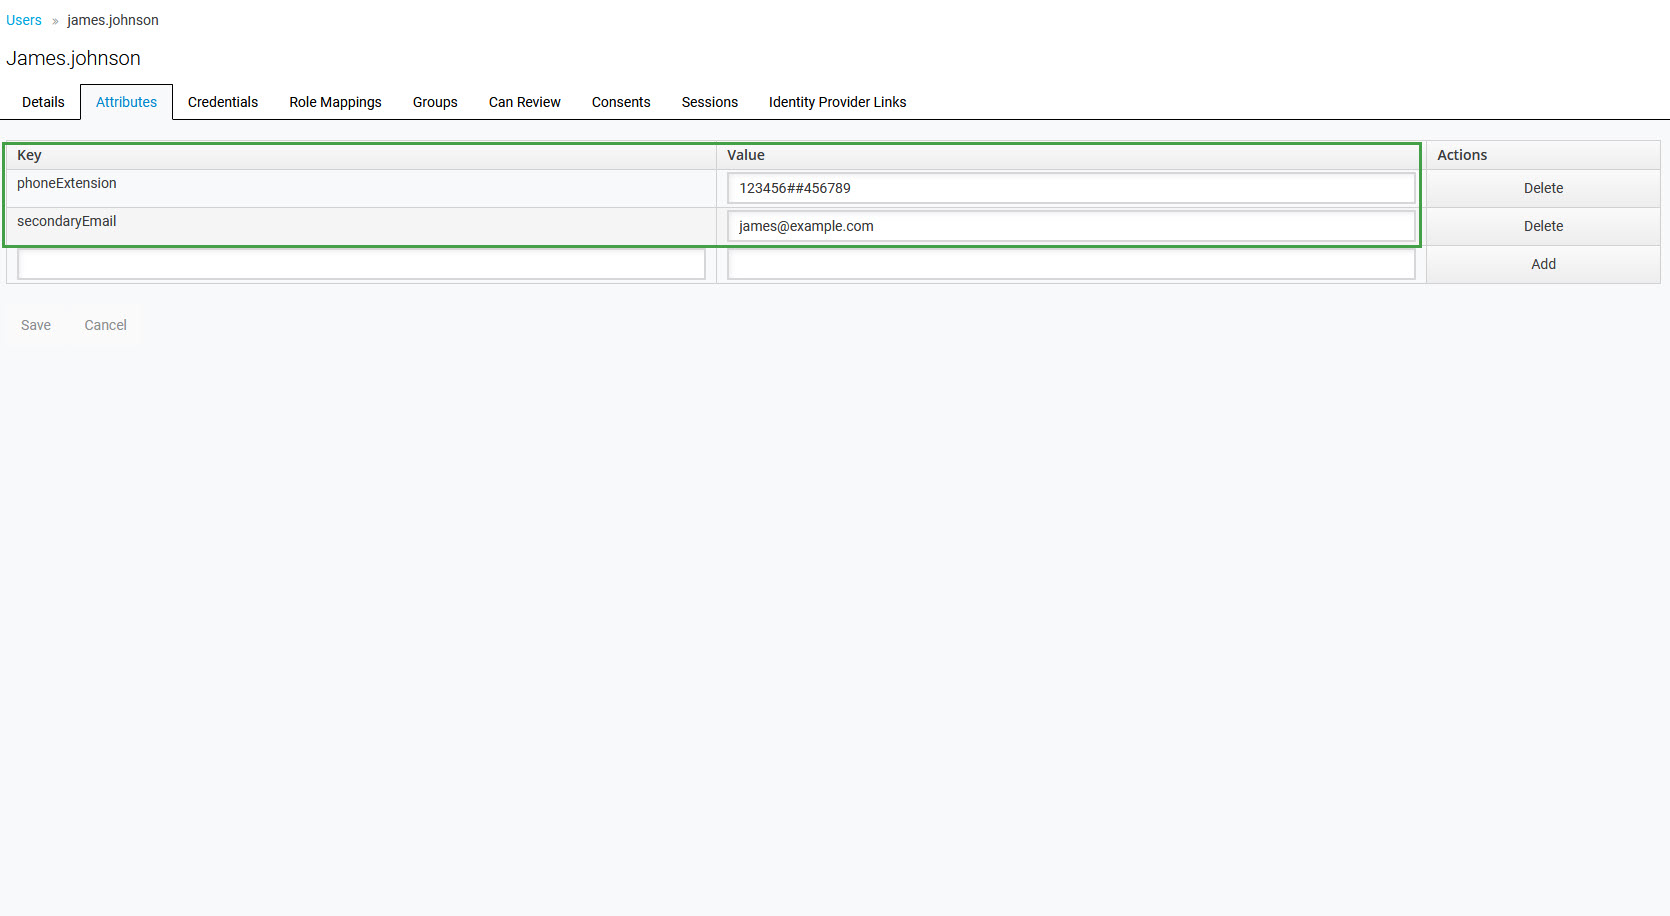
The attributes are displayed as strings where values are divided by the ## signs. On the Details tab, these values are shown separately.
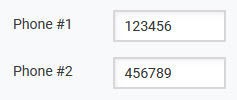
For example, a user can have two phone numbers imported, and they will be displayed as a string 123456##456789 (where one phone number is 123456 and the second is 456789):

On the Details tab, these values will be displayed as Phone #1 and Phone #2:
Multiple extensions are not currently used to identify agents in Quality Management.
Similarly, if an external user imported from Webex Contact Center has the ciUserId attribute configured in the external system, this attribute will be imported as well to enable the reception of agent adherence events (used by the RTA functionality in WFM).
Any manual changes to the attributes imported from external systems will be overwritten or removed during the next synchronization process.
Credentials
To set a password for a new user, go to the Credentials tab on the management page of the user.

Type in a new password in the Password and Password Confirmation fields. Click the View icon on the right (
Use the Temporary switch to decide if the password can be used once or multiple times:
- the switch is on – password can only be used once and the user will be asked to change their password after they have logged in
- the switch is off – the user will not be asked to change their password
The Set password button will activate after typing the password in. Click it to confirm. A new window will display, confirming the change. Click Set password to confirm.

The "Success! The password has been set" notification will display.
Role Mappings
Open the Role Mappings tab to assign composite roles to a new user. Composite roles are a predefined set of effective roles (privileges to use particular functionality of the application, for example: view a schedule, edit a forecast, upload a file) and they are defined separately for each client application. A new user has no roles assigned.
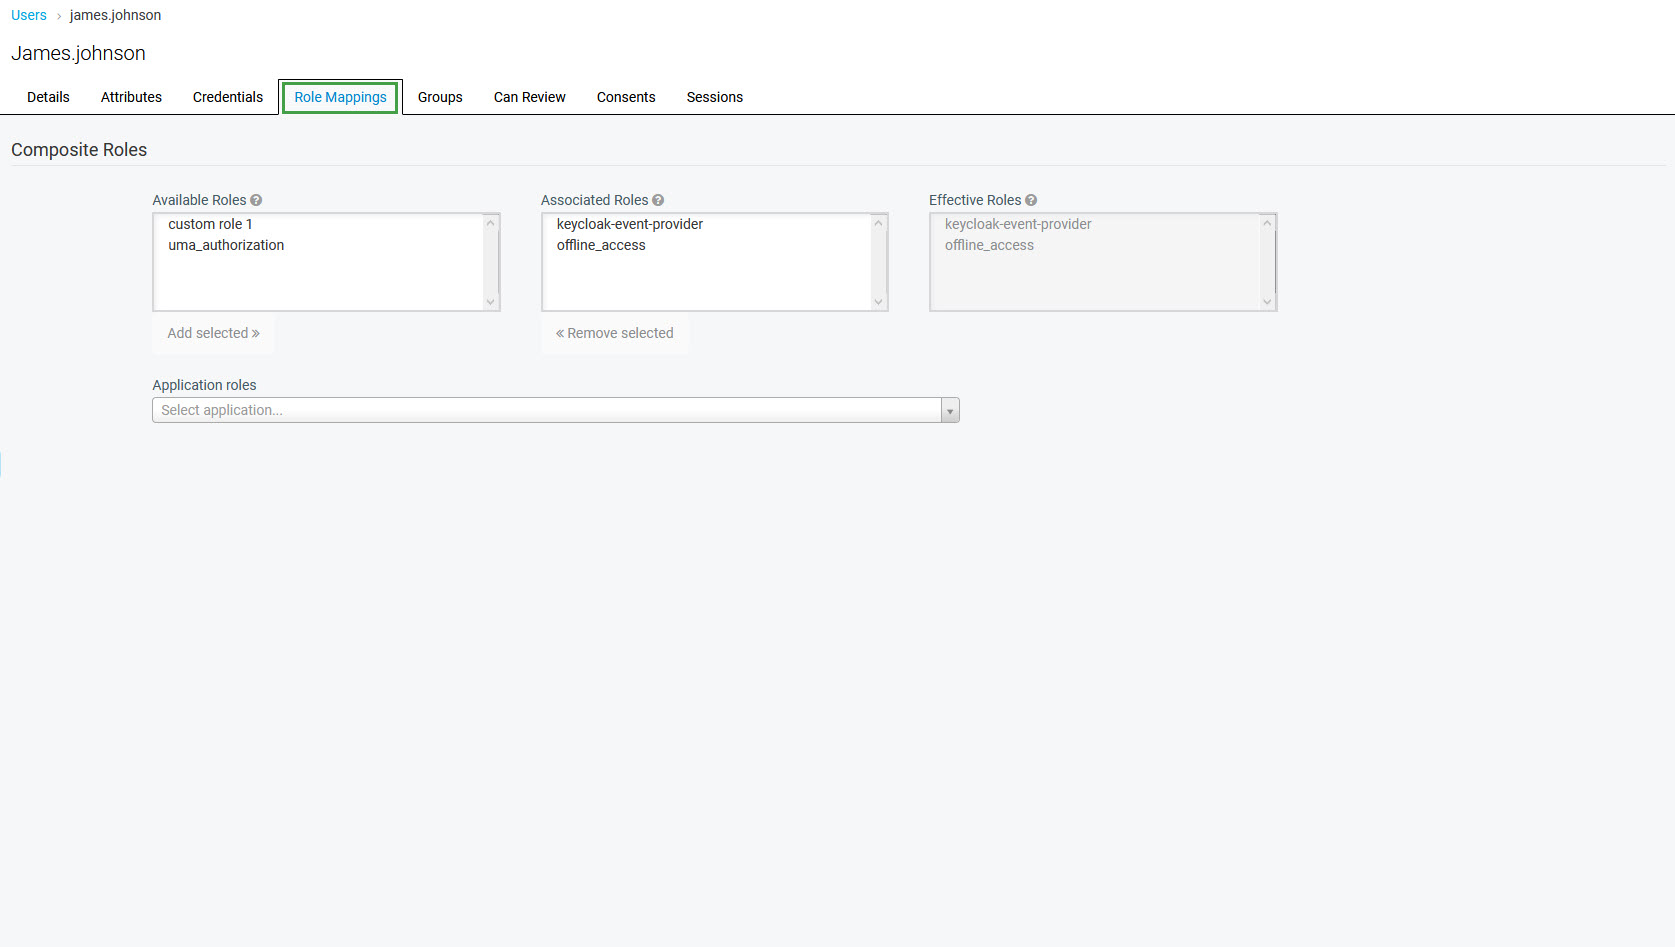
To assign or unassign roles, follow the steps described on the Assigning Roles page.
Groups
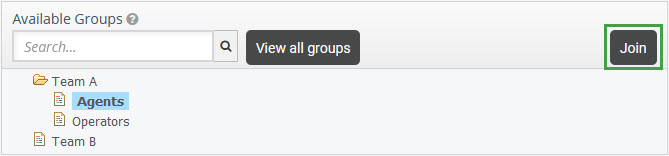
On the Groups tab, the user can be added to any available group(s).

To search for a group in the group database, fill in the name, or a part of it, in the search box and click the Enter key. The query brings up all groups that match the entered criteria. To list all groups that exist in the system, click the View all groups button.
Click on a group name to select it in the Available Groups section, and then click Join.
The added group will be listed in the Groups Membership section. If it is the first group to which the user belongs, it will be set as the main group.
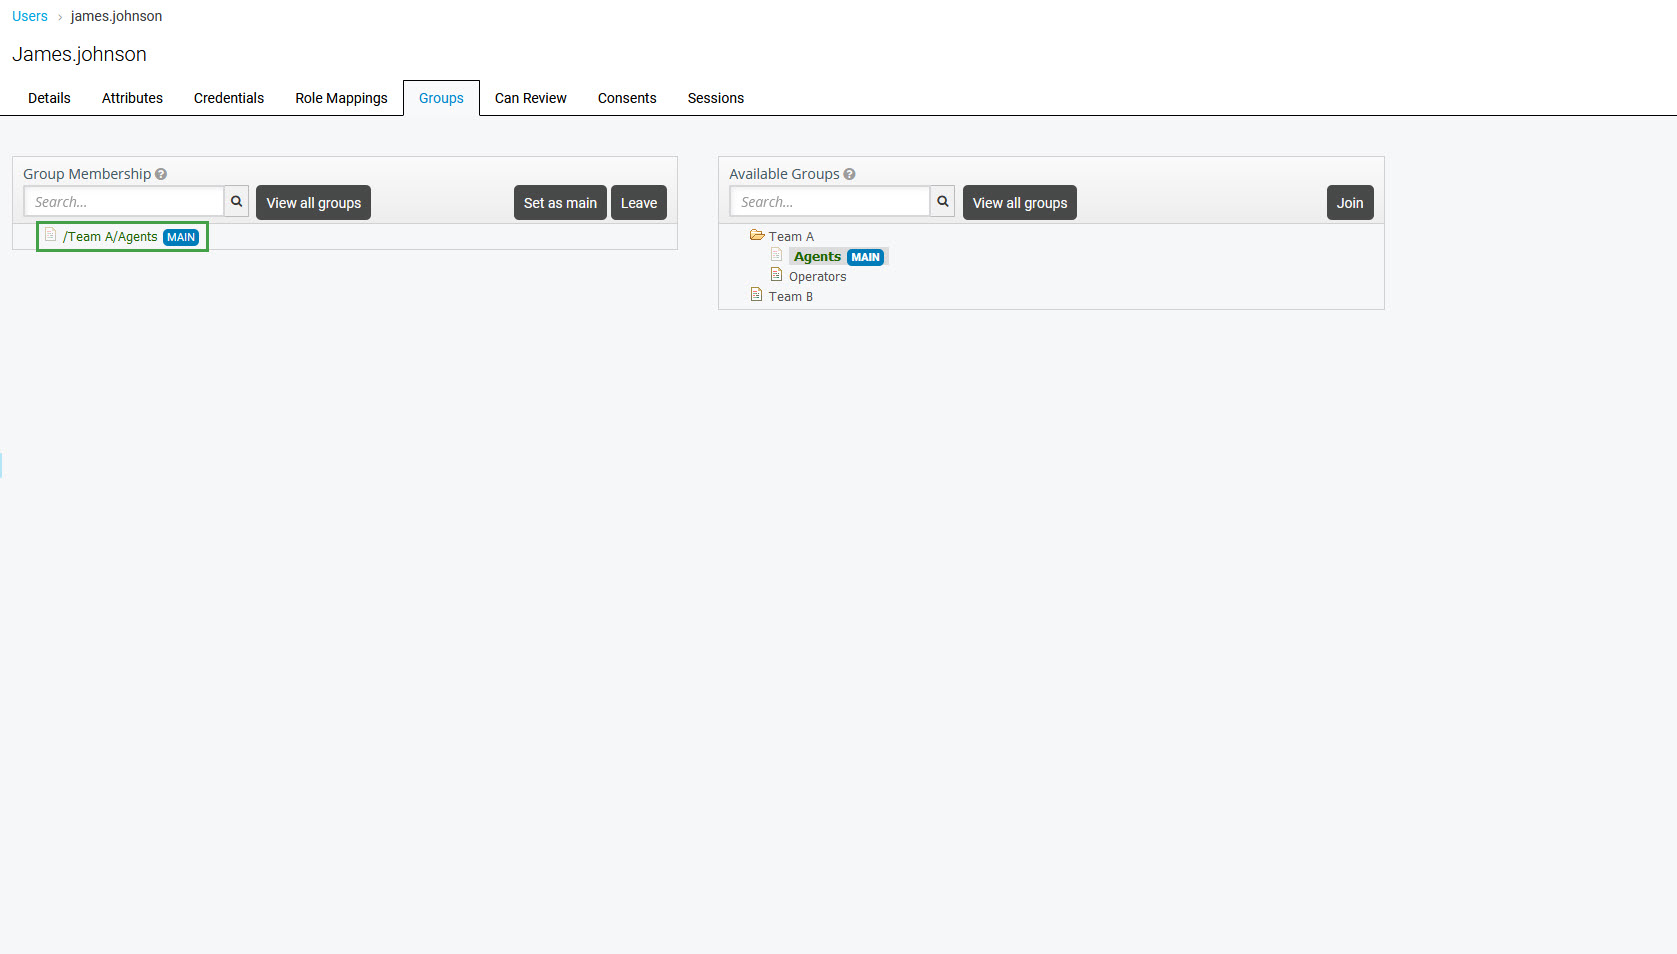
The Quality Management application recognizes membership in one group only. This group should be marked as a 'main' group in User Management. If users were imported from external systems, like UCCX or UCCE, consider carefully if their group membership and/or the main group selection should be manually modified from within User Management.
The following rules apply to setting the main group in User Management:
- If a user is a member of one group only, this group is set as the main.
- In case a user is a member of more than one group, only one group can be set as the main.
- If a user is removed from the main group, the first group from available groups sorted alphabetically will be set as the new main group.
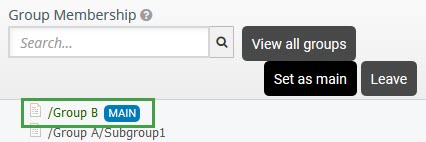
To select a different main group, click on a group name in the Group Membership section and click the Set as main button.
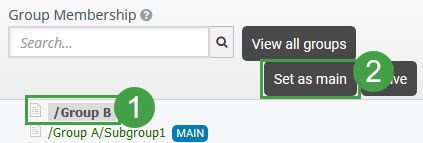
As a result, this group will be set as main.
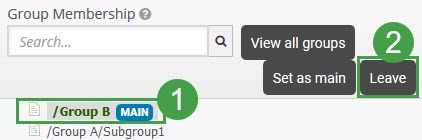
To remove the user from a group, click to select a group name, and then click Leave.
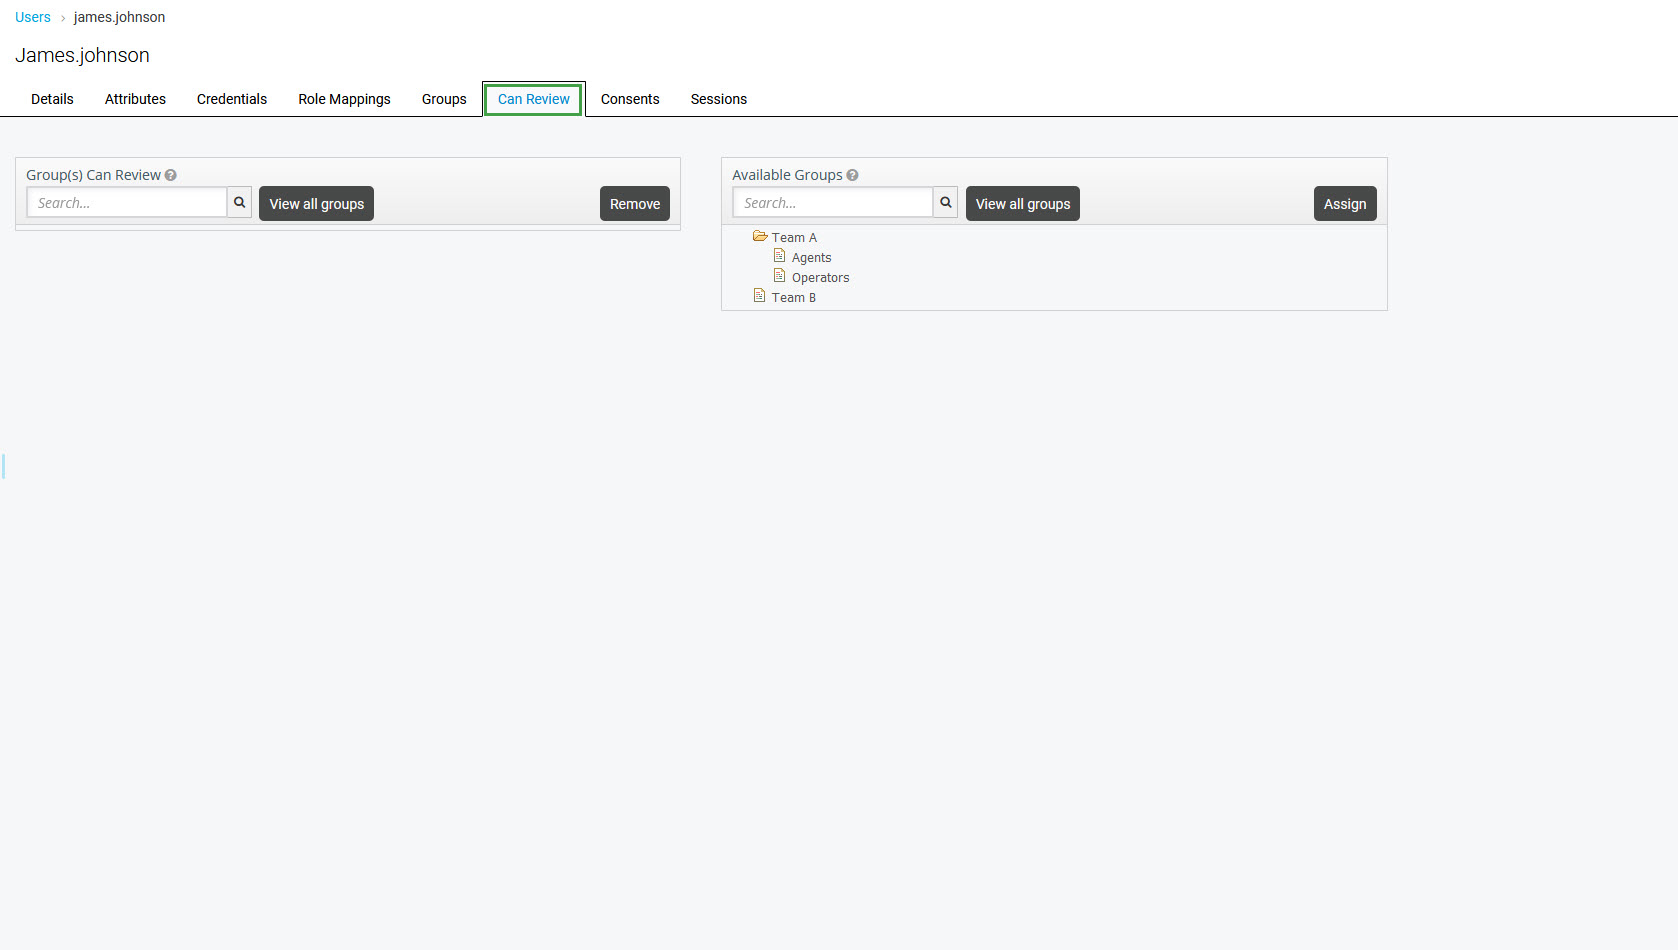
Can Review
To assign the user groups, which she/he can review in Quality Management, go to the Can Review tab.
Note that groups can be assigned to all users, but additionally, certain roles are necessary to be able to perform a review (EVAL_AGENTS and CREATE_EVALS) or to see conversations of assigned groups (INTERACTIONS_GROUP_VIEW).
The following composite roles have these effective roles assigned by default: DEFAULT_CC_MANAGER, DEFAULT_TEAM_LEADER and DEFAULT_SUPERVISOR.
To search for a group in the group database, fill in the name, or a part of it, in the search box and click the Enter key. The query brings up all groups that match the entered criteria. To list all groups existing in the system, click the View all groups button.
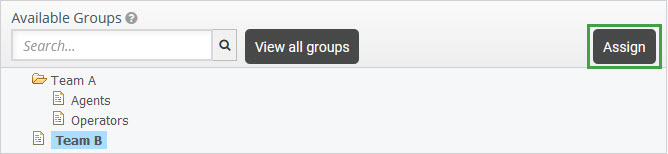
Click on a group name to select it in the Available Groups section, and then click Assign.
The group will be listed in the Group(s) Can Review section.
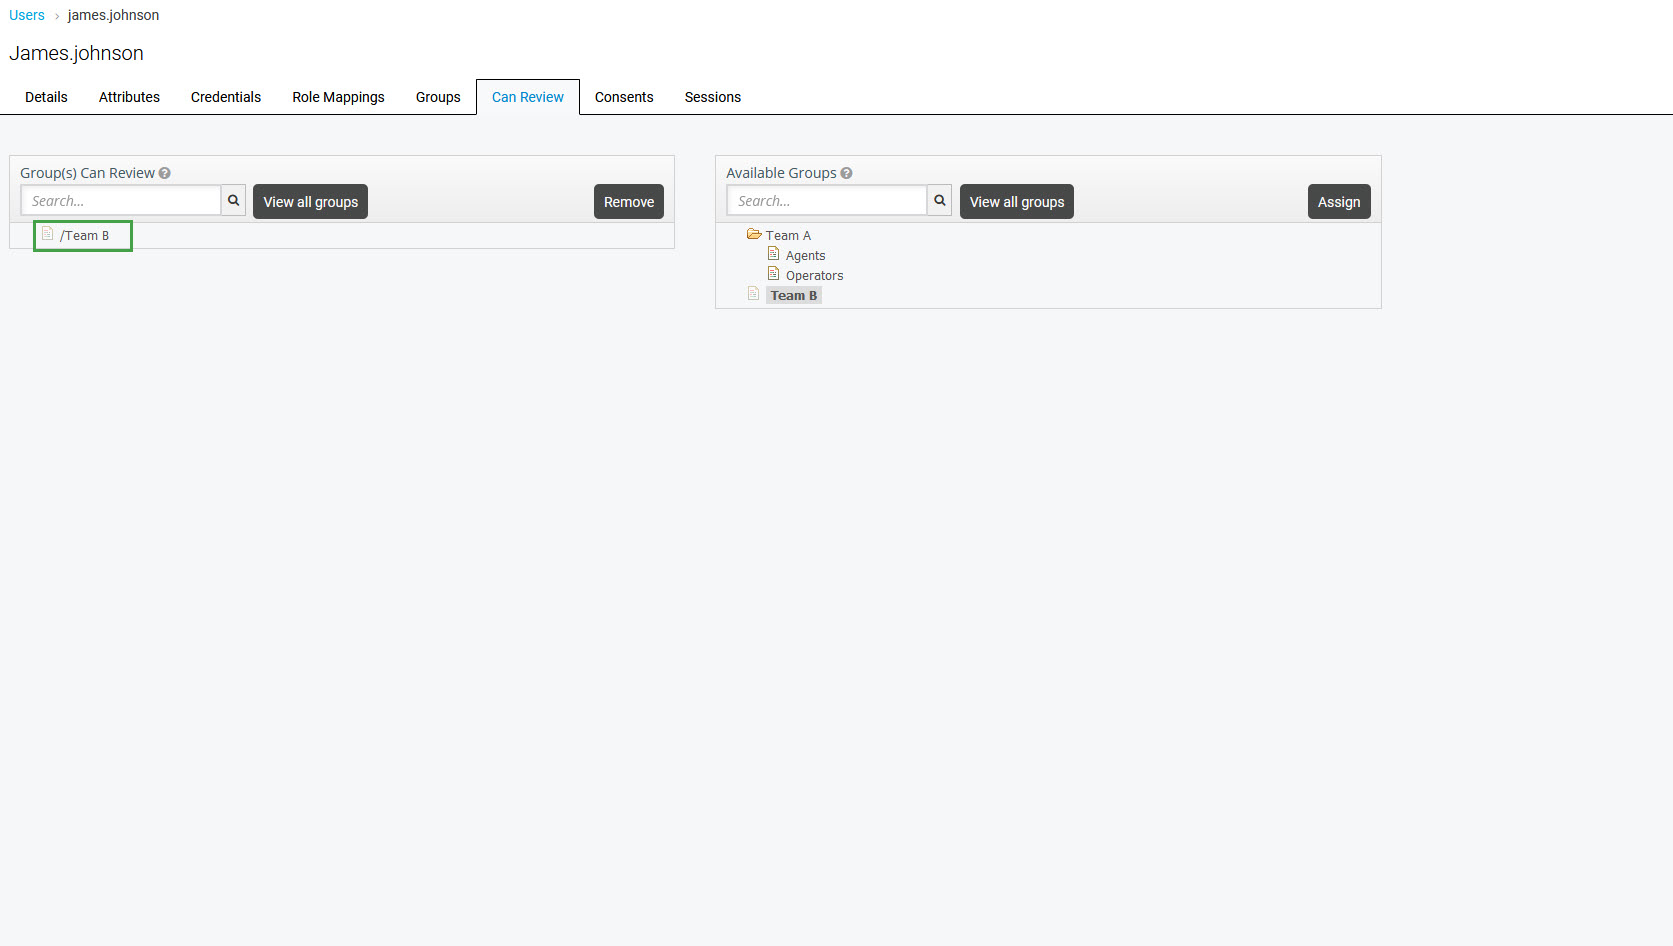
To reassign it, click on a group name to select it, and then click Remove.

As a result of assigning a group, the reviewer is able to review all agents who are members of this group, but not agents being members of its subgroups.
If a group (either imported or manually created) is manually assigned for review to a user who is being synchronized with UCCX or UCCE systems, this change will be lost once the next synchronization is executed.