The Adherence Settings screen displays the configurable mappings between Eleveo Statuses (which are human-readable statuses used to display the person's real work, based on the statuses imported from the ACD) and schedule activities. Based on these mappings, the Schedule Adherence tool can identify out of adherence events.
This screen is empty by default. It is necessary to add statuses in order for the Schedule Adherence functionality to work as intended.
Displaying Existing Statuses
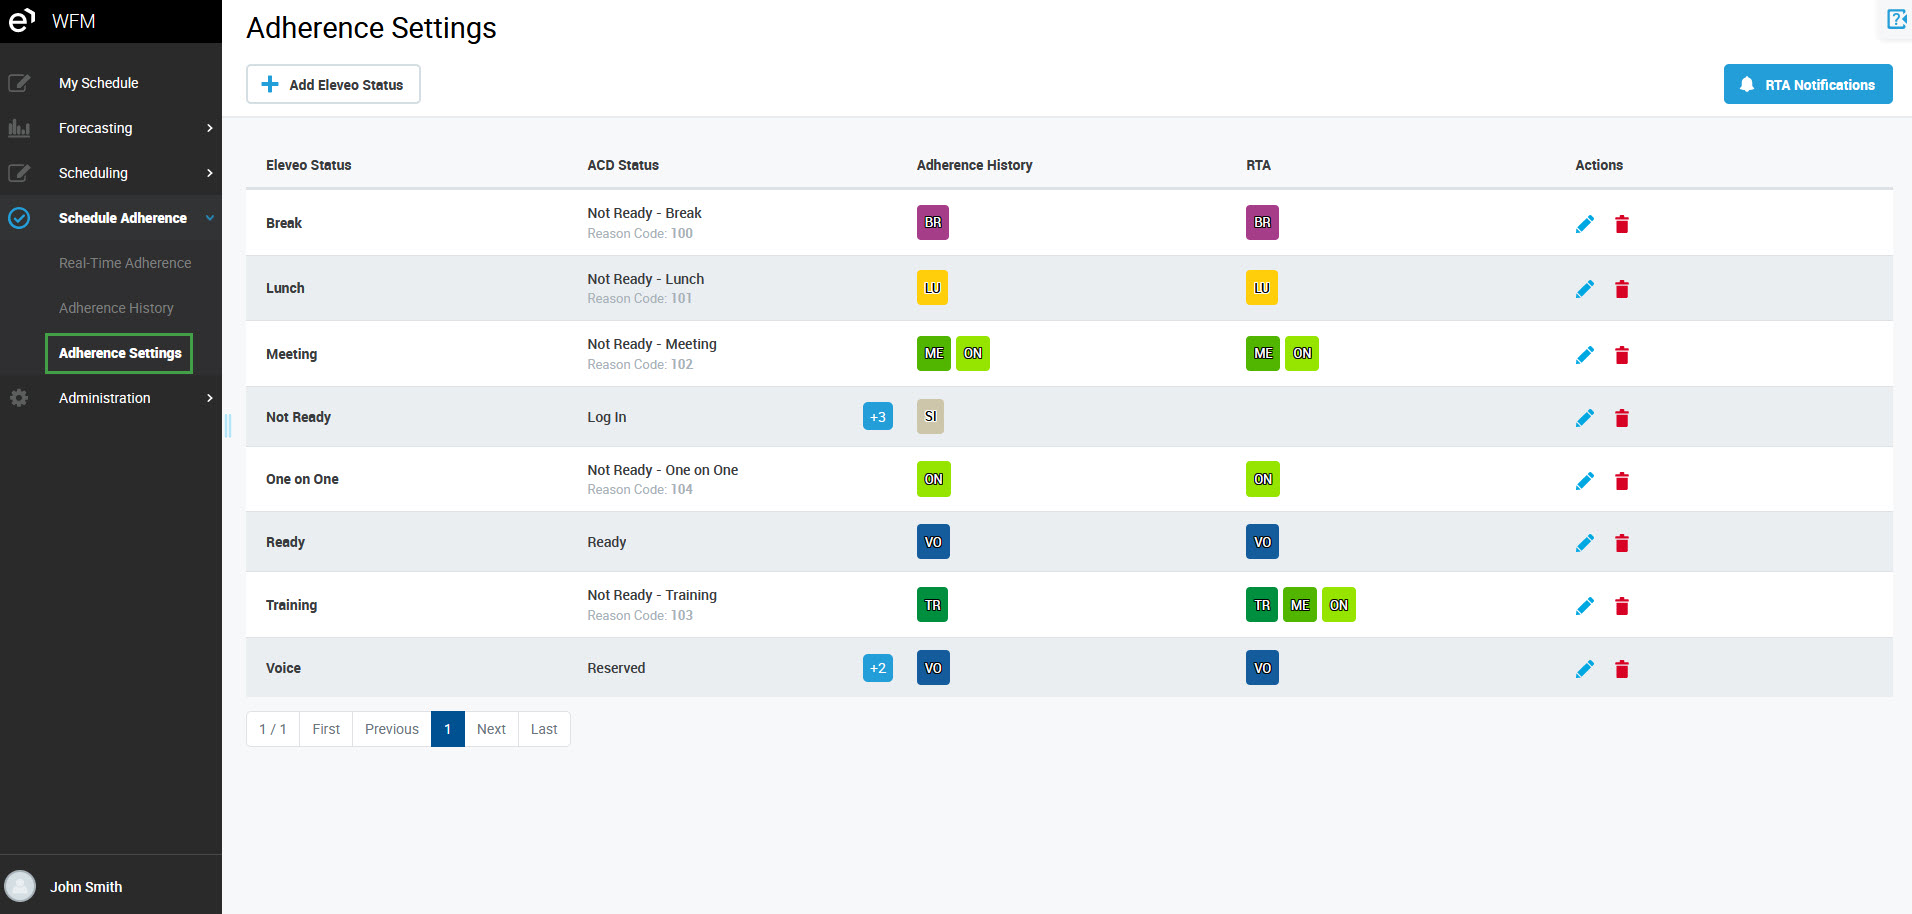
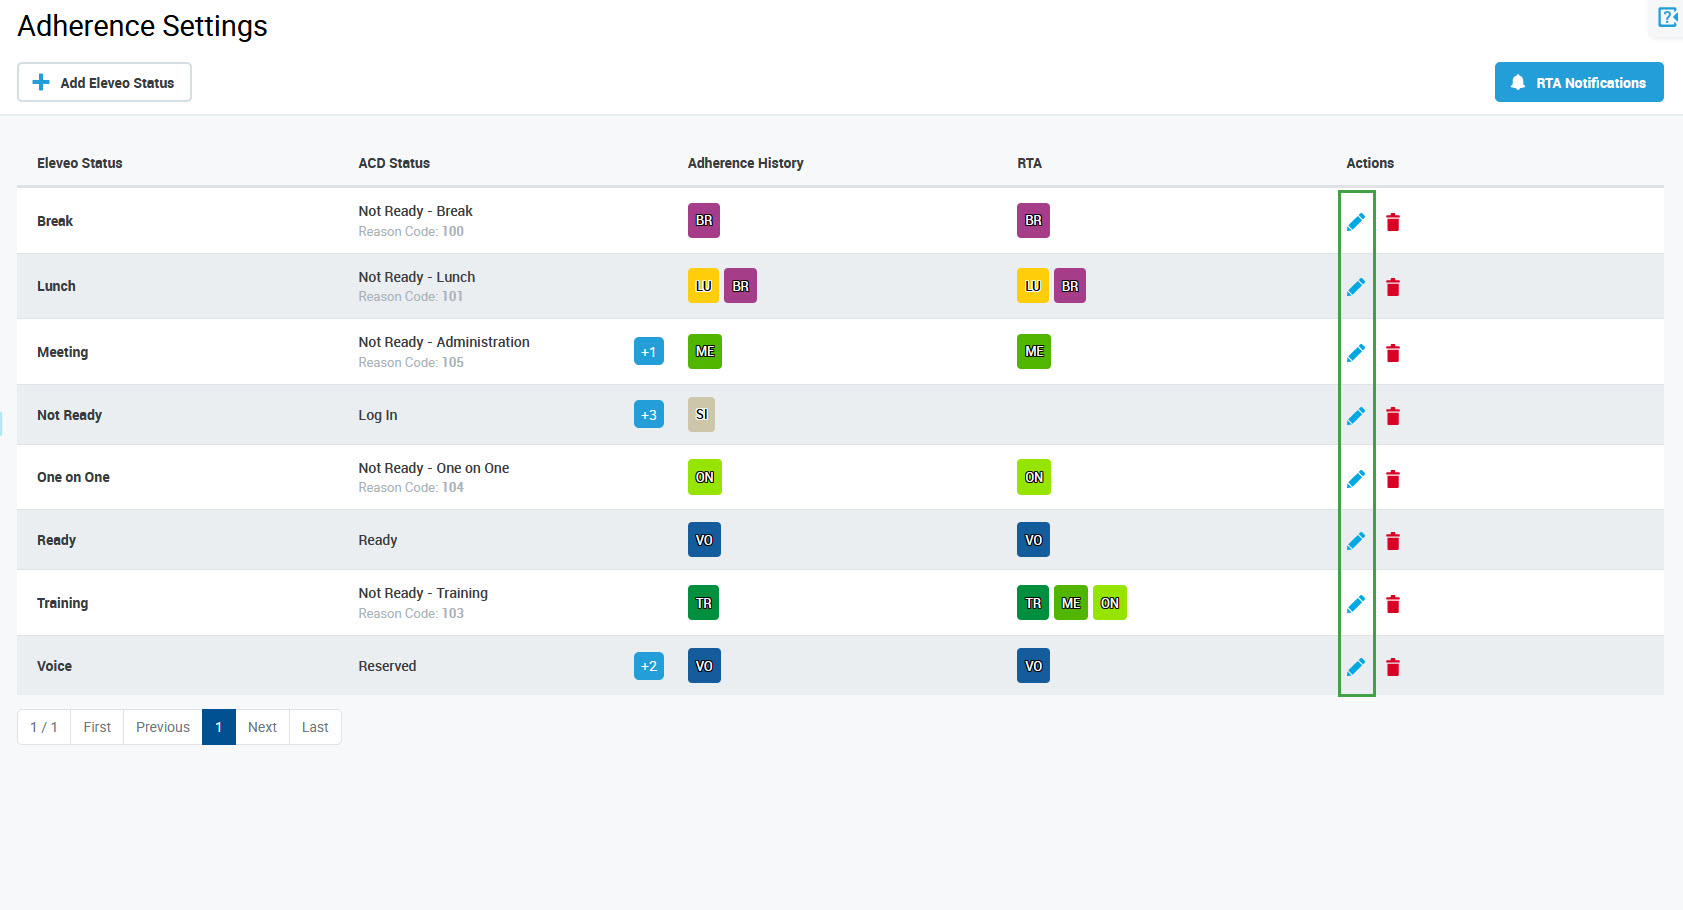
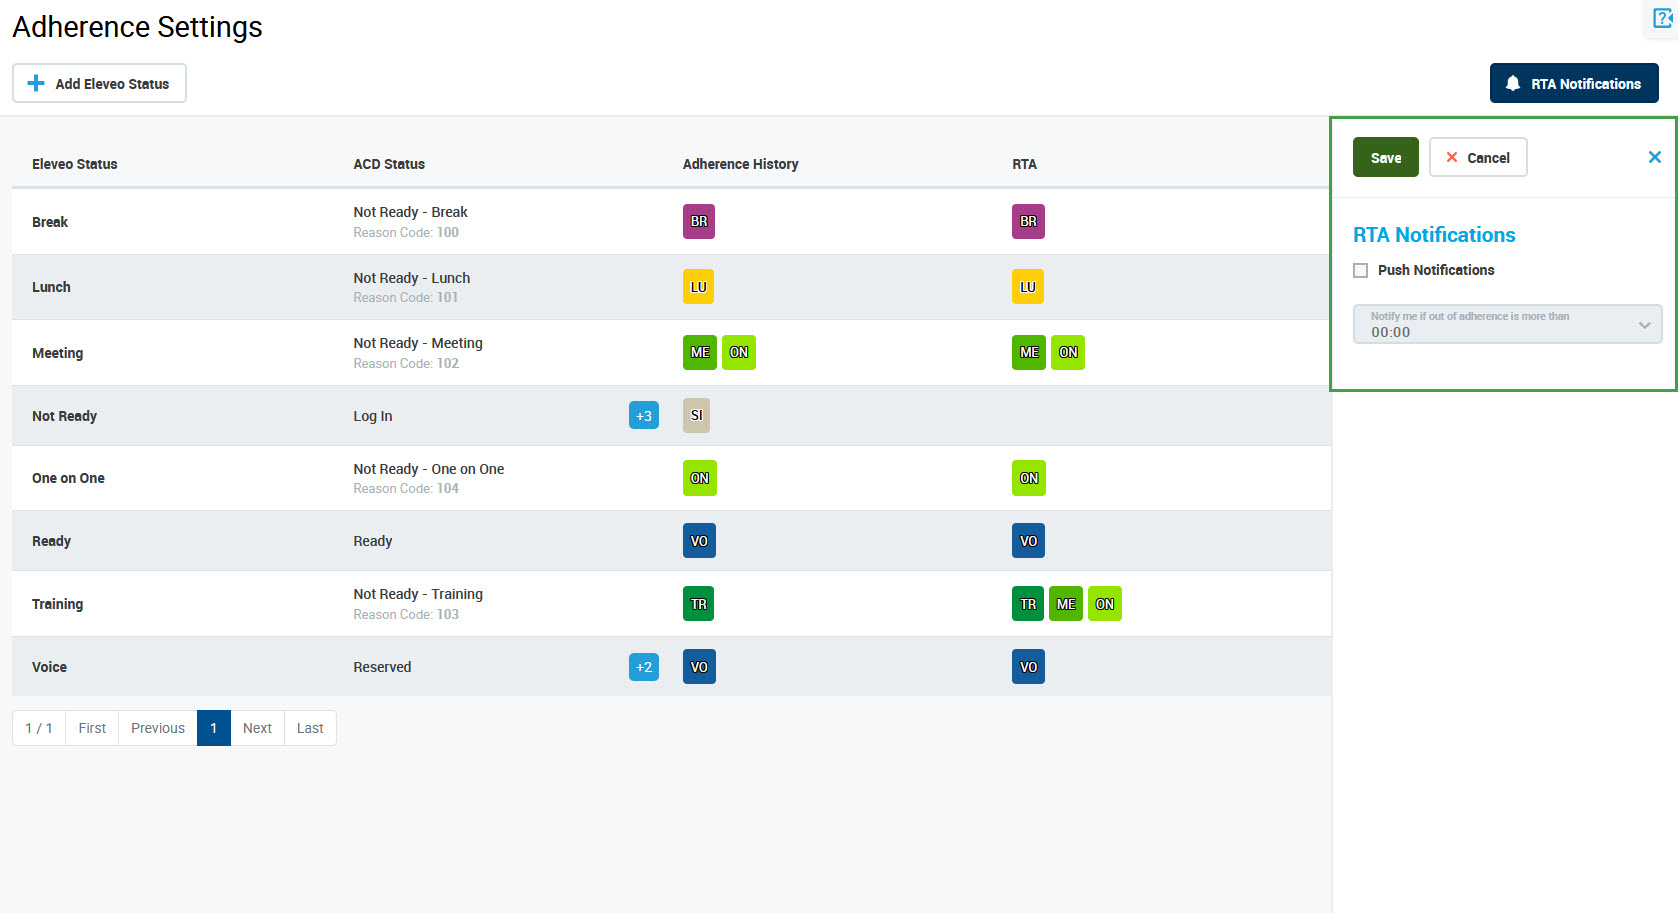
To display Eleveo statuses that already exist in the system, expand the Schedule Adherence module from within the navigation tree and click Adherence Settings. The Adherence Settings screen will display:
Basic information about each status is displayed in the following columns:
Eleveo Status – name of the status in Eleveo WFM
ACD Status – corresponding status in ACD; this is the status imported from UCCX/E, optionally it may contain a reason code (for example: NOT READY - Lunch, LOG OUT - System failure)
Adherence History – schedule activity that is mapped to Eleveo Status on the Adherence History screen (optional, more than one can be selected)
RTA – schedule activity that is mapped to an Eleveo Status on the Real Time Adherence screen (optional, more than one can be selected)
A single (or multiple) ACD Status can be mapped to one Eleveo Status. However, one ACD Status can be mapped to an Eleveo Status only once. If one ACD Status is already in use, it cannot be mapped to another Eleveo Status.
One Eleveo Status can be mapped to multiple Schedule Activities. For example, status 'BREAK' can be mapped to 'Break' and 'Work' activities. In such case, if a customer calls one minute before the agent's break is scheduled to start and an agent needs to handle this call, she will not become out of adherence, however, she will work during the planned break (not according to the schedule).
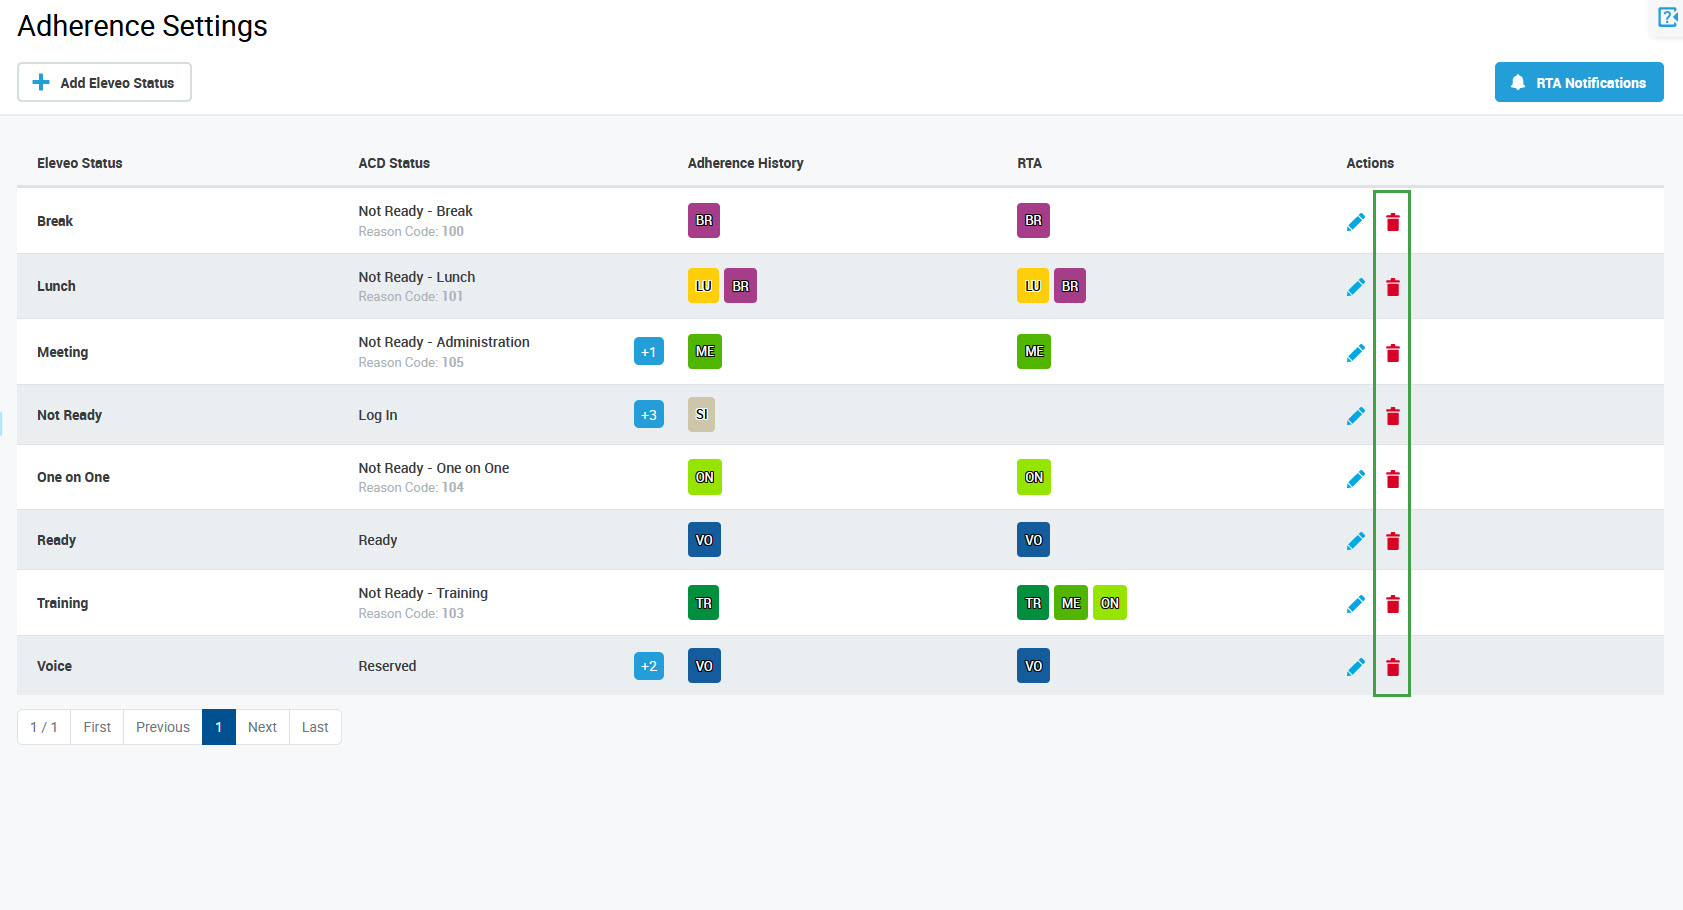
The Actions column enables actions related to the status:
the Edit button ()allows for the modification of the status – this option isavailable only to users with the WFM_ANALYST role assigned
the Remove button () allows for the removal of the status – this option isavailable only to users with the WFM_ANALYST role assigned
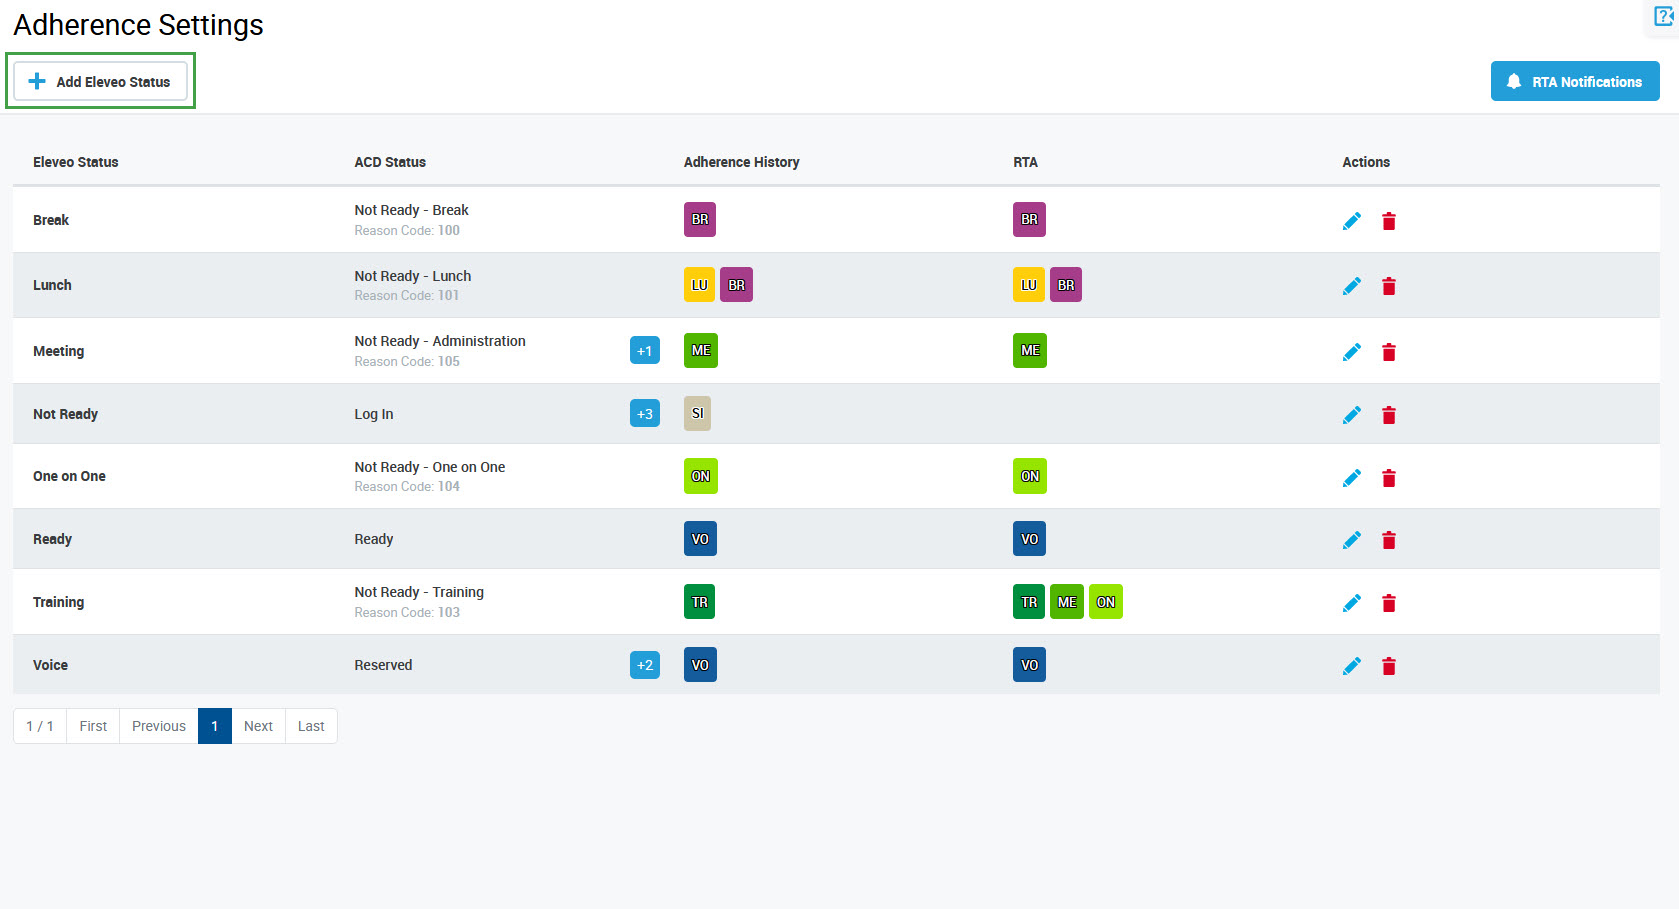
Adding a Status
To add a new status, click the Add Eleveo Status button.
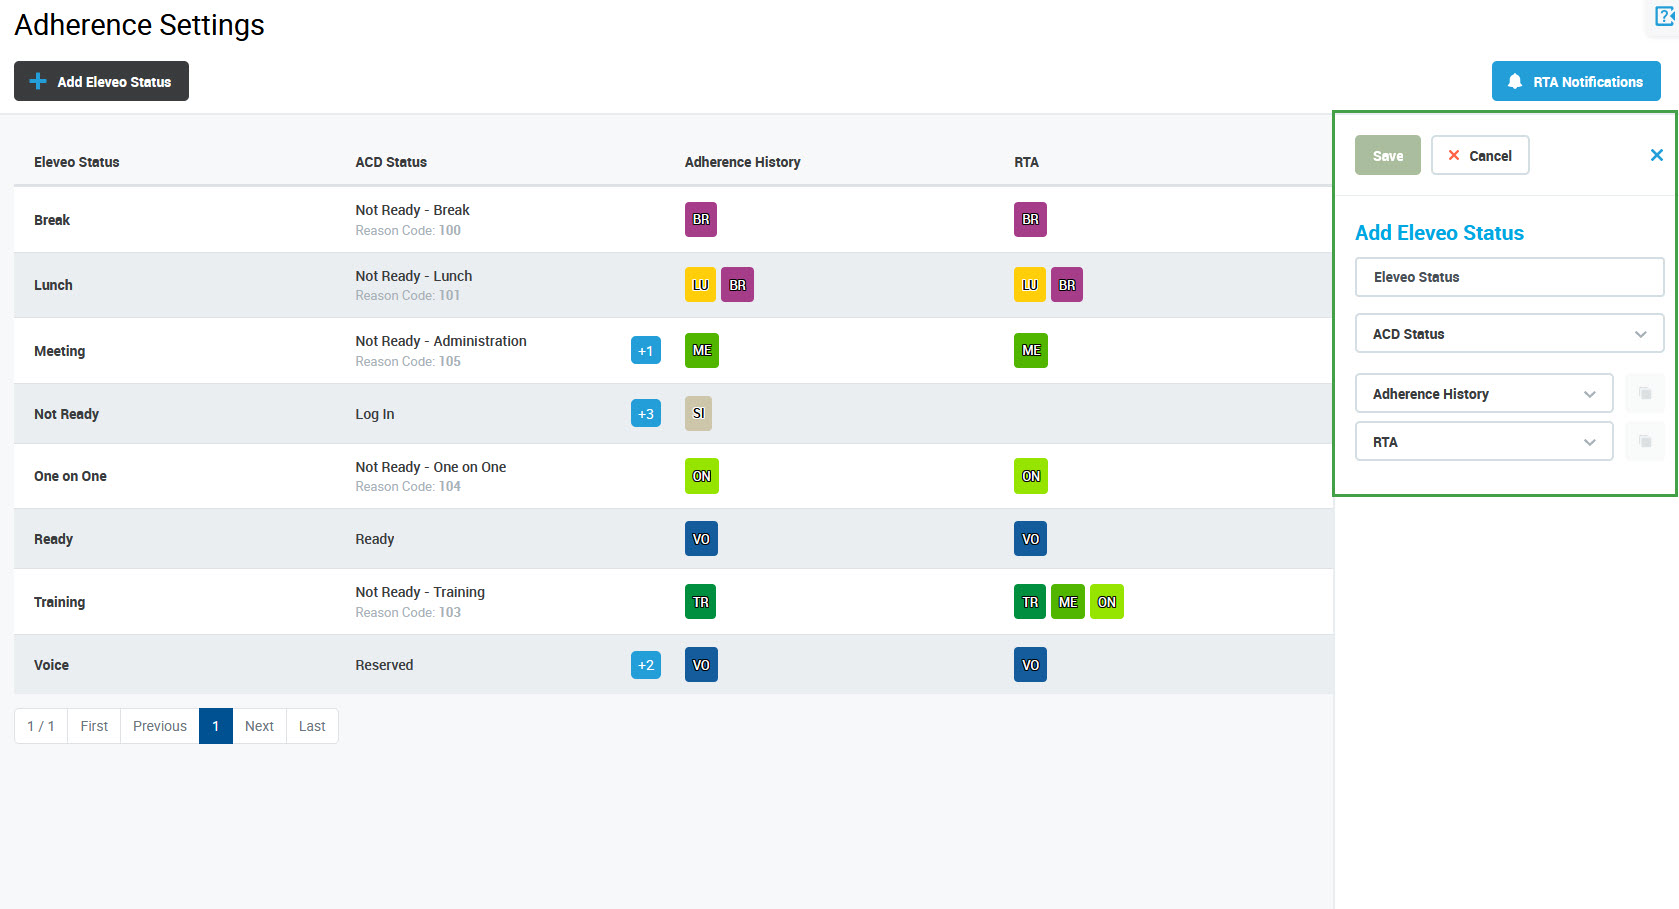
The Add Eleveo Status pane will display.
Fill in the following data:
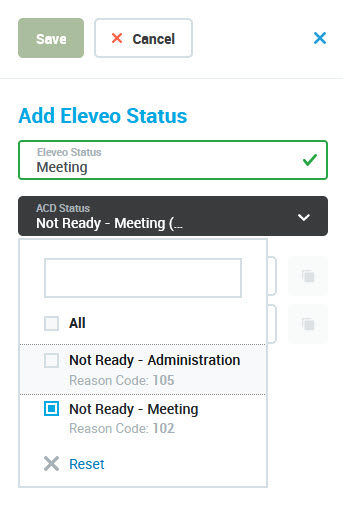
Eleveo Status – name of the status
ACD Status – corresponding status in the ACD (select from the drop-down menu, more than one can be selected)
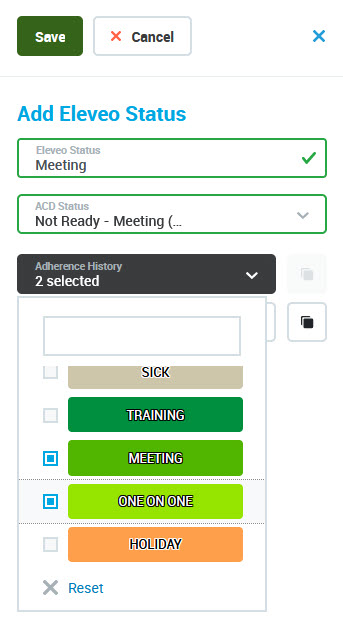
Adherence History – schedule activities that should be mapped to an Eleveo Status on the Adherence History screen (optional value, select from the drop-down menu, more than one can be selected)
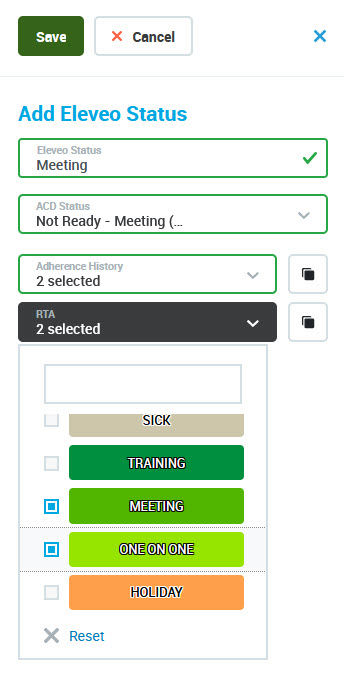
RTA – schedule activities that should be mapped to an Eleveo Status on the Real Time Adherence screen (optional value, select from the drop-down menu, more than one can be selected)
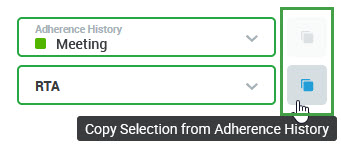
To easily copy selected activities from the Adherence History drop-down to the RTA drop-down (or another way round), use the Copy Selection icons on the right.
Note that ACD Statuses are available in the drop-down menu only when Adherence History data was imported from UCCX.
Note that it is not mandatory to map activities to every Eleveo Status. ACD Statuses that appear in Adherence History/Real Time Adherence during the time when a person had activities scheduled, but have no Schedule Activities mapped, are always evaluated as out of adherence events.
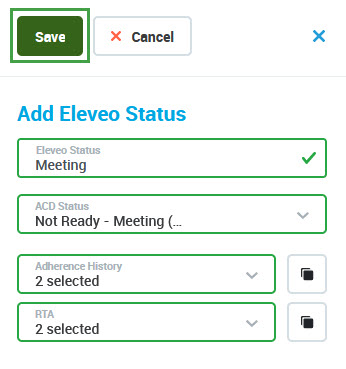
Click the Save button to confirm.
Alternatively, click Cancel or the Close button () to abandon changes.
Editing a Status
To edit a status, click theEditbutton () in the Actions column for the status.
The Edit Eleveo Status pane will display. All values can be modified.
Click Save to save changes. Alternatively, use the Close button () to abandon changes and close the pane.
Deleting a Status
To delete a status, click the Delete button ().
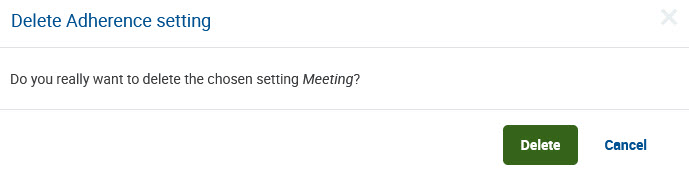
A confirmation dialogue will appear, requesting that you confirm Do you really want to delete the chosen setting <status name>?
Click Delete to confirm the removal of the queue. Alternatively, clickCancelto abandon changes.
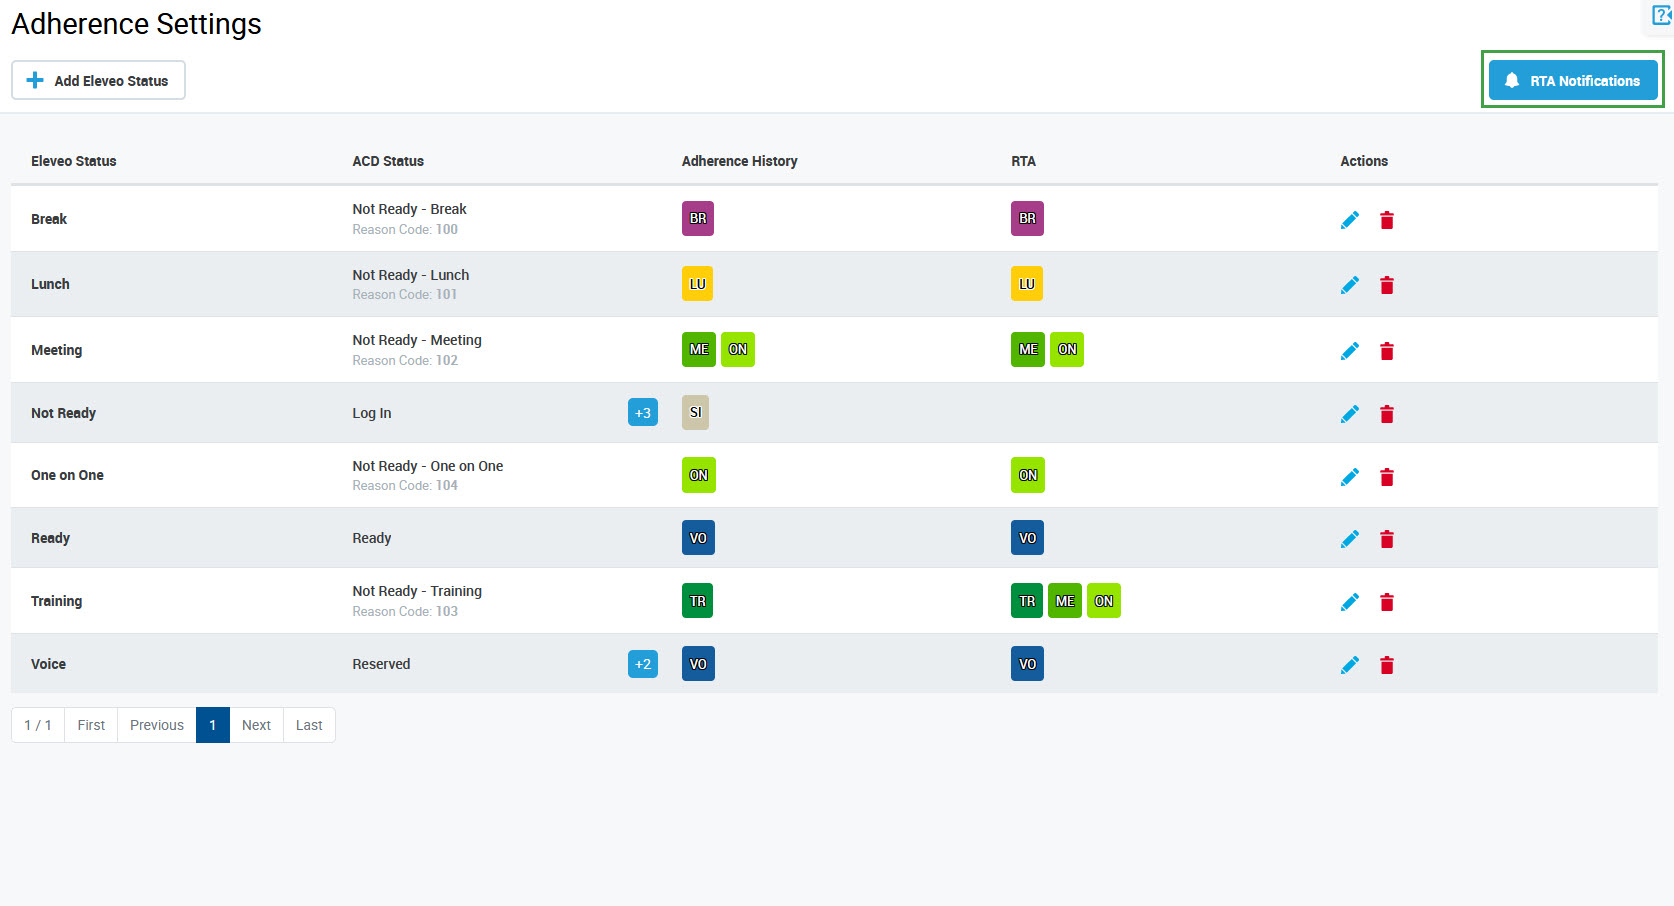
Configuring RTA Notifications
To globally enable real-time notifications related to out of adherence events, click the RTA Notifications button in the top right corner of the screen.
Note that only users with the WFM_ANALYST role assigned are able to display and modify the settings! Read more about Workforce Management Roles.
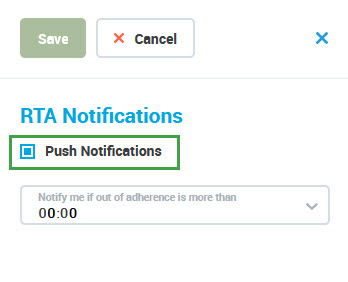
The RTA Notifications will display.
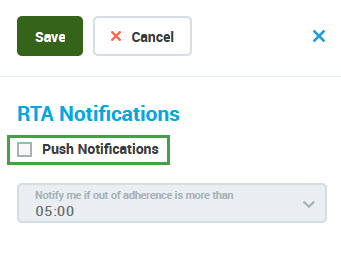
To enable notifications globally, check the Push Notifications box.
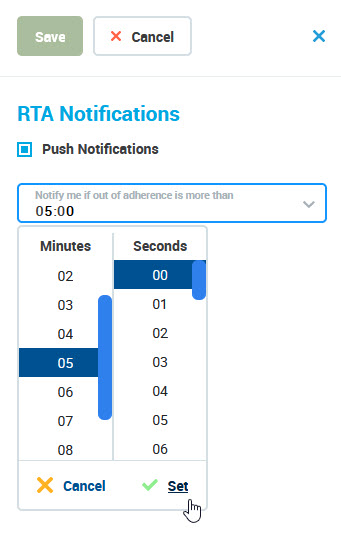
Select the minimal length of an out of adherence event that should trigger a notification, and click Set. The default value is 00:00, which means that users will be notified about all the events.
In the end, click Save. The notifications settings will be updated.
Enabling and Disabling Notifications Locally
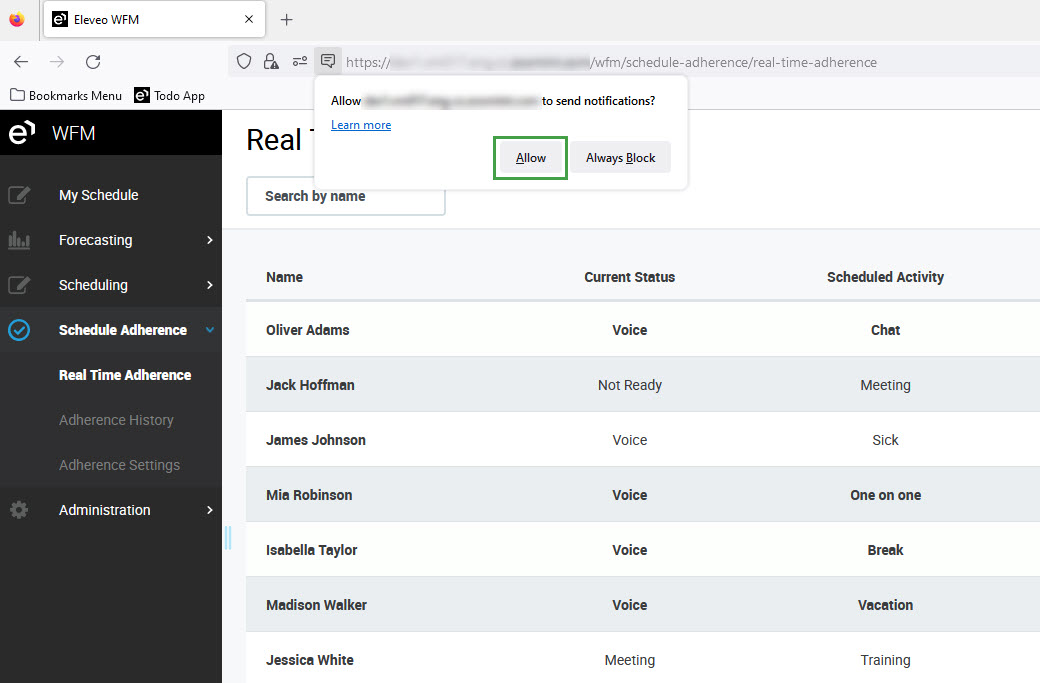
When RTA Notifications are globally enabled, all WFM users with the WFM_VIEW_RTA role assigned will be asked by their web browsers if they wish to receive system notifications from the WFM application. Additionally, the application will ask for permission to enable notification when a user with the WFM_ANALYST role enables push notifications globally in the RTA notification settings side panel or when a user with the WFM_VIEW_RTA role clicks on the Schedule Adherence > Real-Time Adherence navigation menu item.
If allowed, notifications will display on the screen (details may differ depending on an operating system).
Read more about how to enable or disable notifications in particular web browsers:
Mozilla Firefox
Click here to expand details...
Enabling Notifications
When asked, click Allow to permit the application to send notifications.
Disabling Notifications
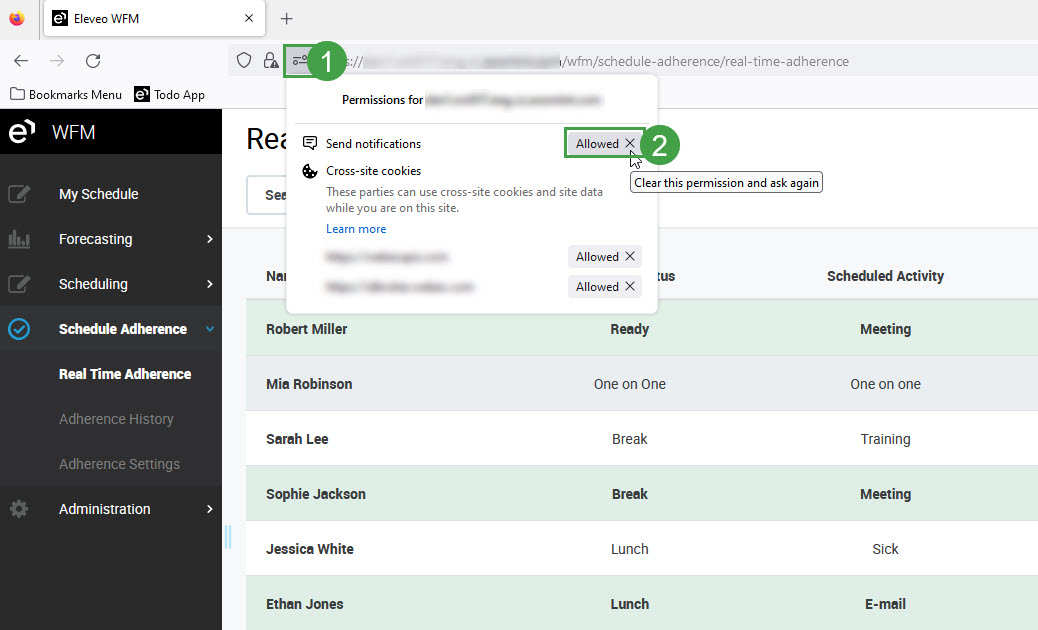
Click the Permissions icon next to the URL, and then clear the permission.
Configuring Notifications
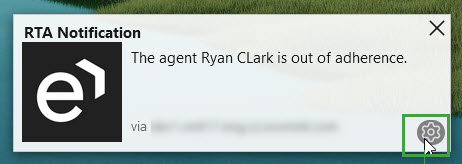
Click the Settings icon to display the notification settings.
Select an option as necessary: pause notifications, disable notifications, or go to Firefox settings.
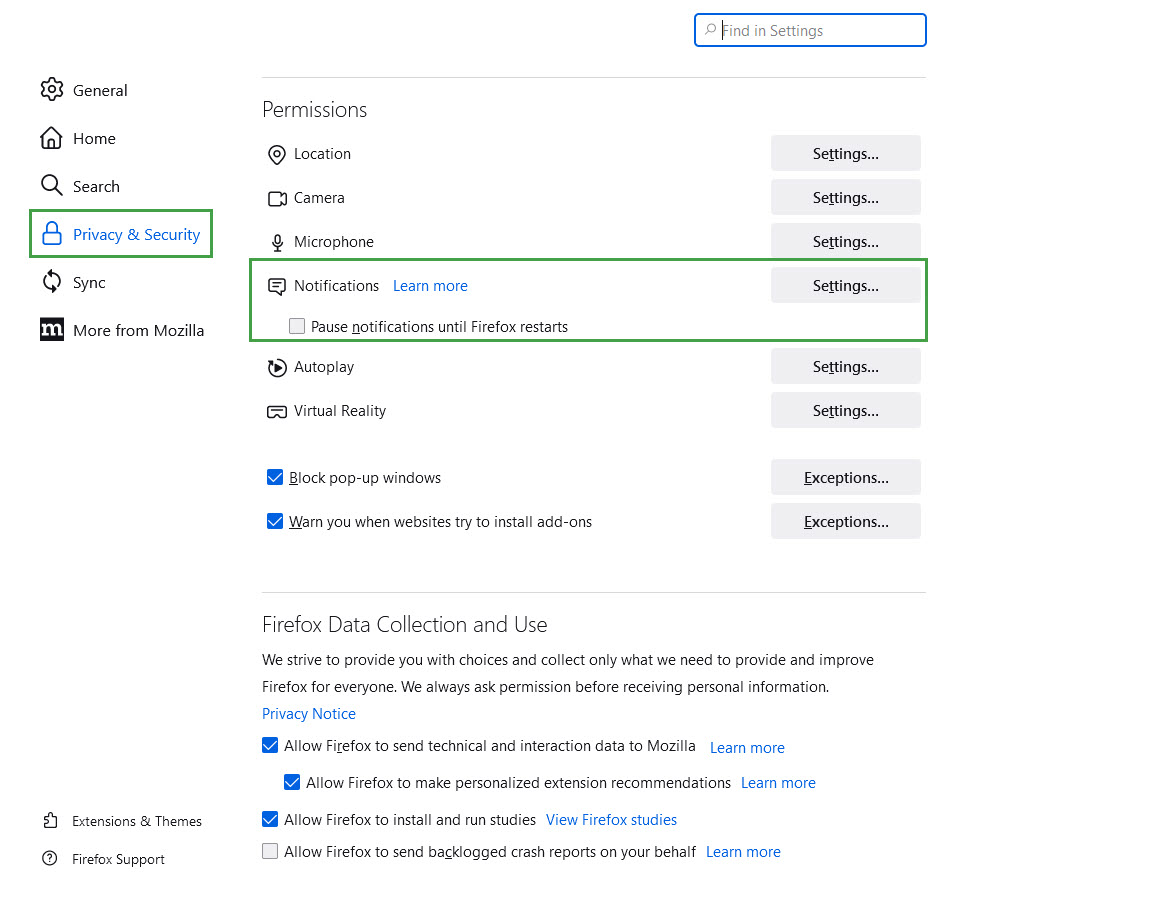
In Firefox, notifications can be configured in the Privacy & Security > Permissions section.
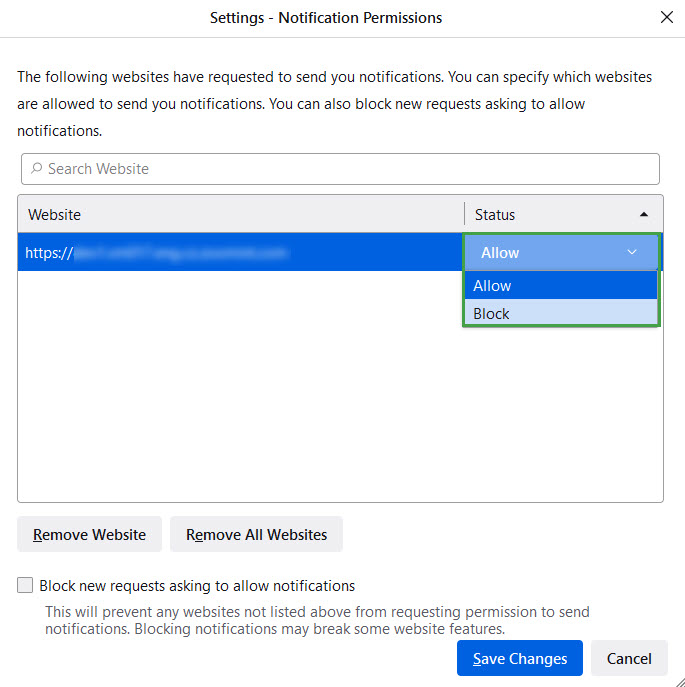
Click the Settings... button. The Settings - Notification Permissions window will display. Select the behavior as necessary: Allow/Block.
Google Chrome
Click here to expand details...
Enabling Notifications
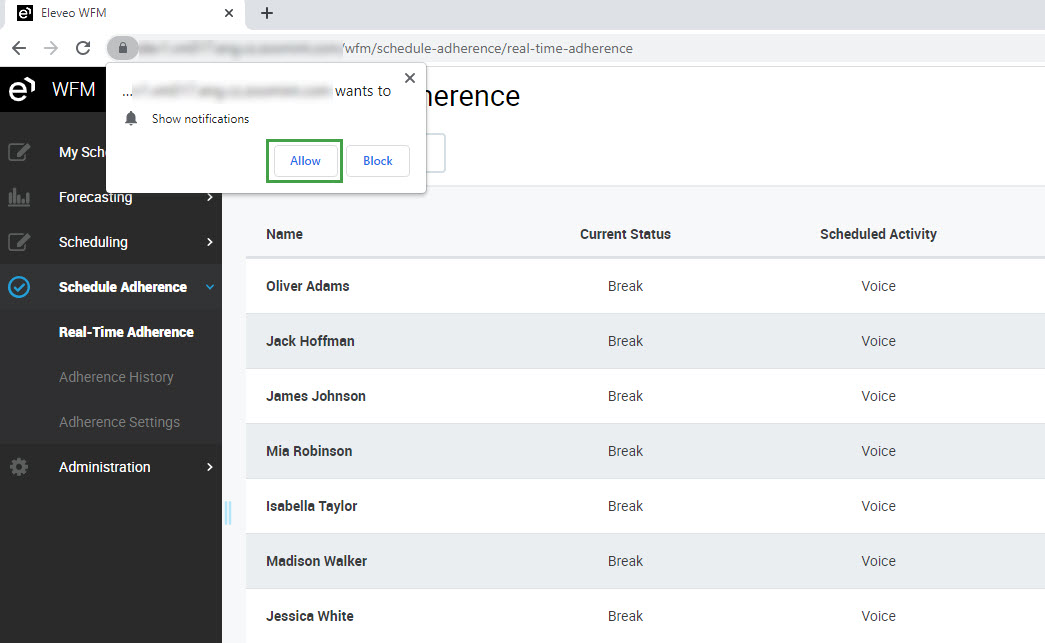
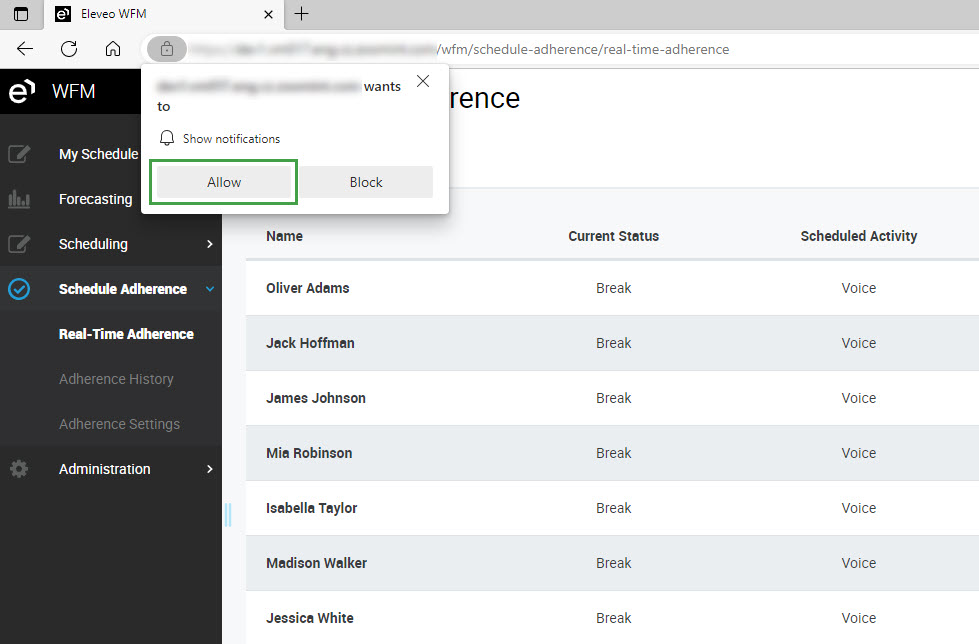
When asked, click Allow to permit the application to send notifications.
Disabling Notifications
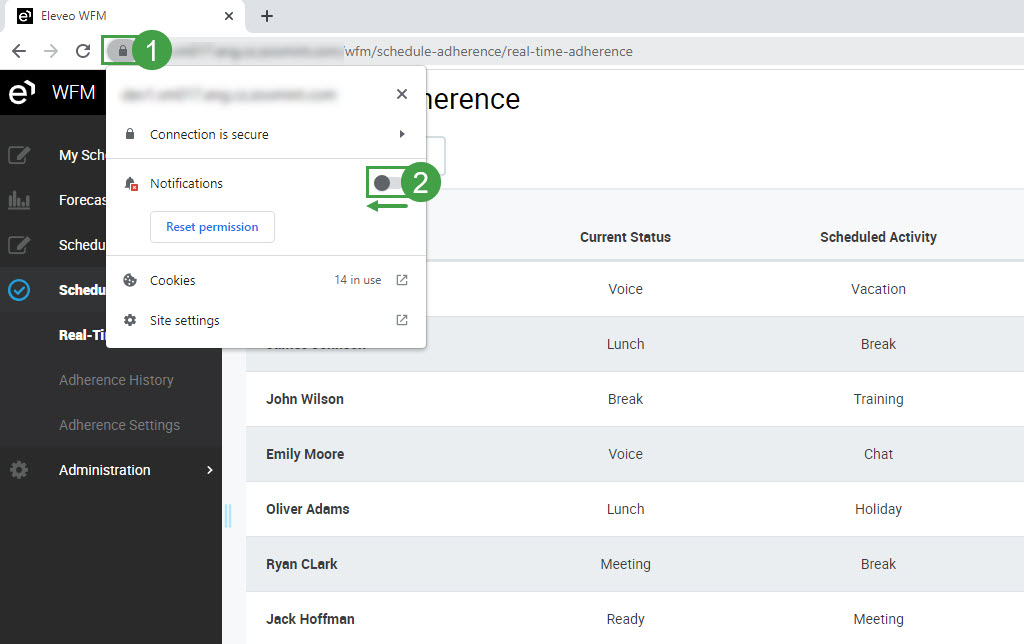
Click the View site information icon next to the URL, and then disable permissions. (Alternatively, click the Reset permission button. As a result, a user will be asked again if notifications should be allowed.)
Configuring Notifications
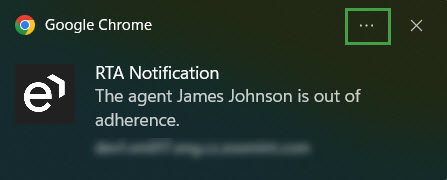
Click the Settings icon to display the notification settings.
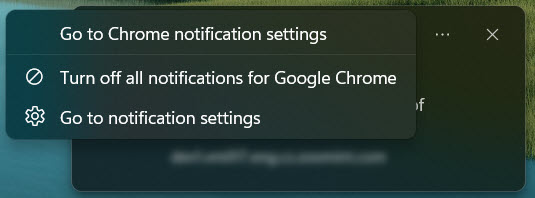
Select an option as necessary: go to Chrome notification settings, turn off notifications, or go to system notification settings.
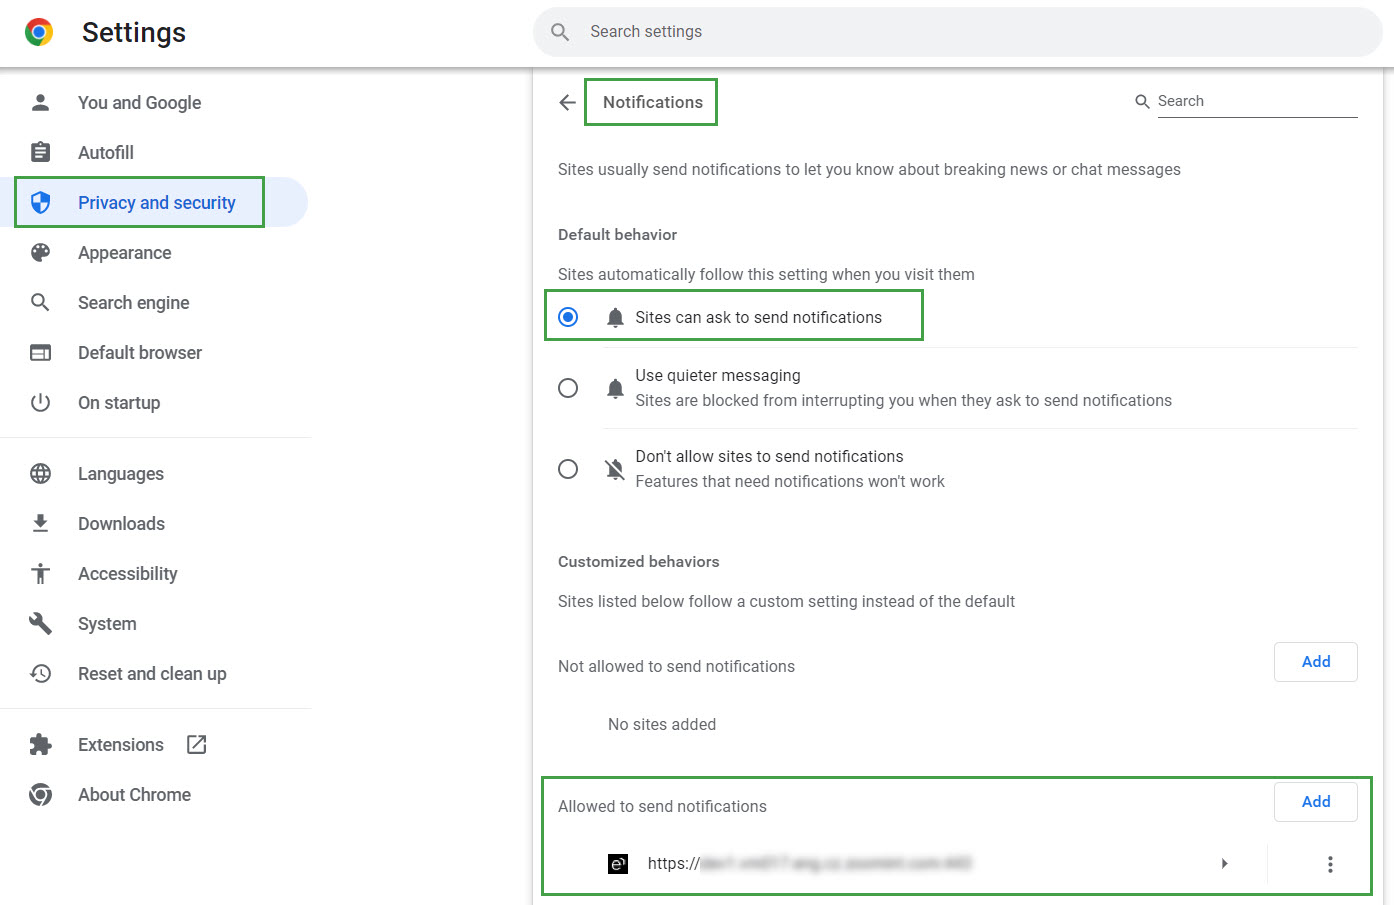
In the Chrome settings, notifications can be configured in the Privacy and security > Notifications section.
Microsoft Edge
Click here to expand details...
Enabling Notifications
When asked, click Allow to permit the application to send notifications.
Disabling Notifications
Click the View site information icon next to the URL, and then disable permissions. (Alternatively, click the Reset permission button. As a result, a user will be asked again if notifications should be allowed.)
Configuring Notifications
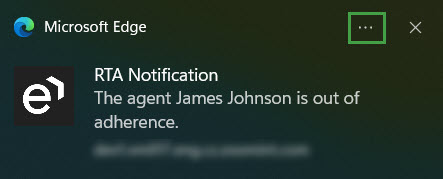
Click the Settings icon to display the notification settings.
Select an option as necessary: turn off notifications, or go to Microsoft Edge settings.
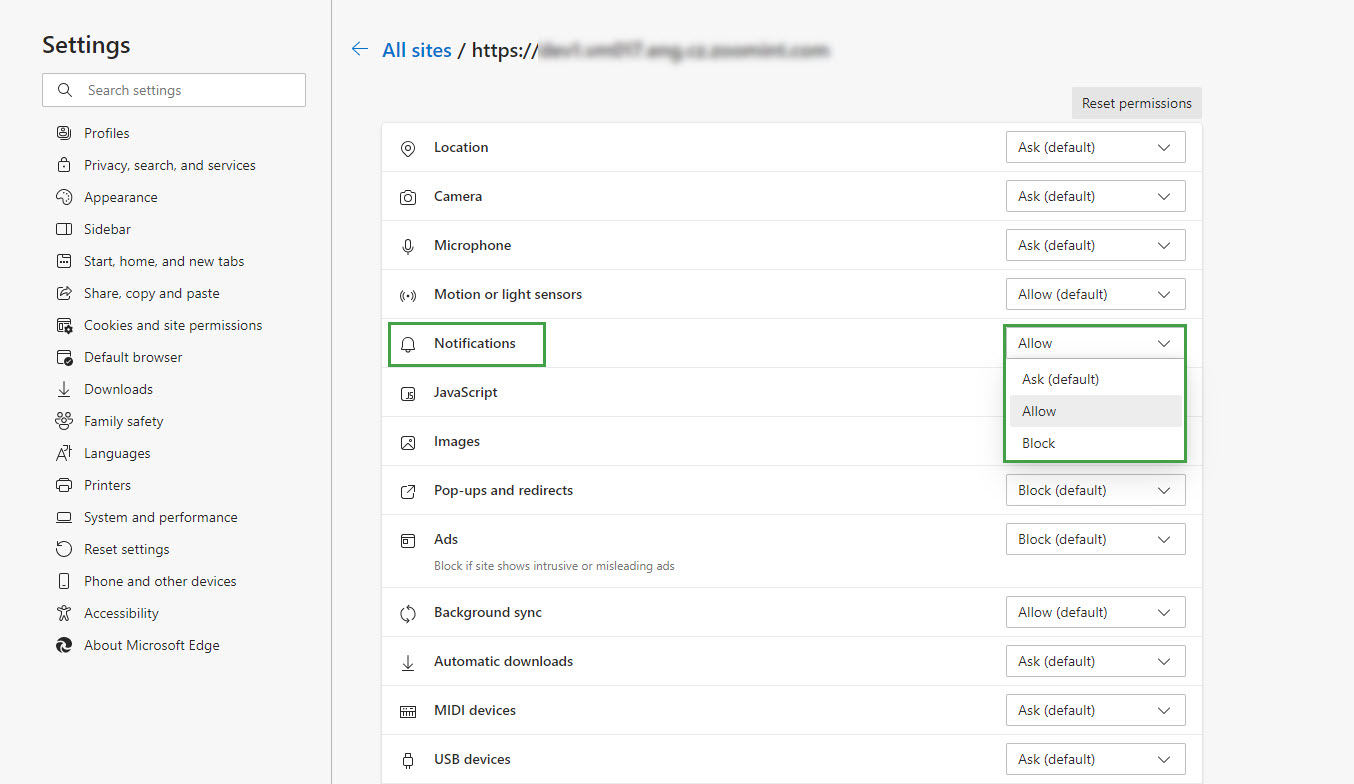
To configure notifications in the Edge settings, click the View site information icon next to the URL and then Permissions for this site.
The Settings screen will display. Select the Notifications behavior as necessary: Ask (default)/Allow/Block.
Viewing Notifications
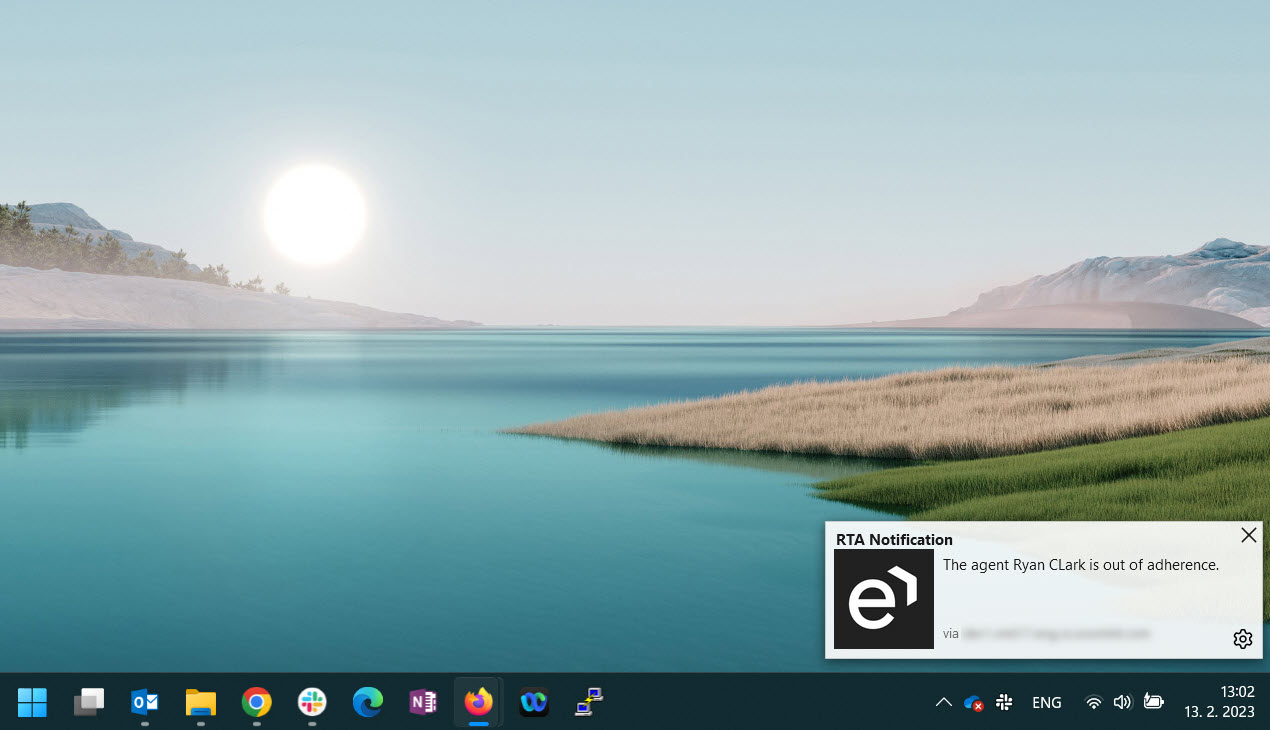
Notifications will display on the screen (details may differ depending on an operating system).
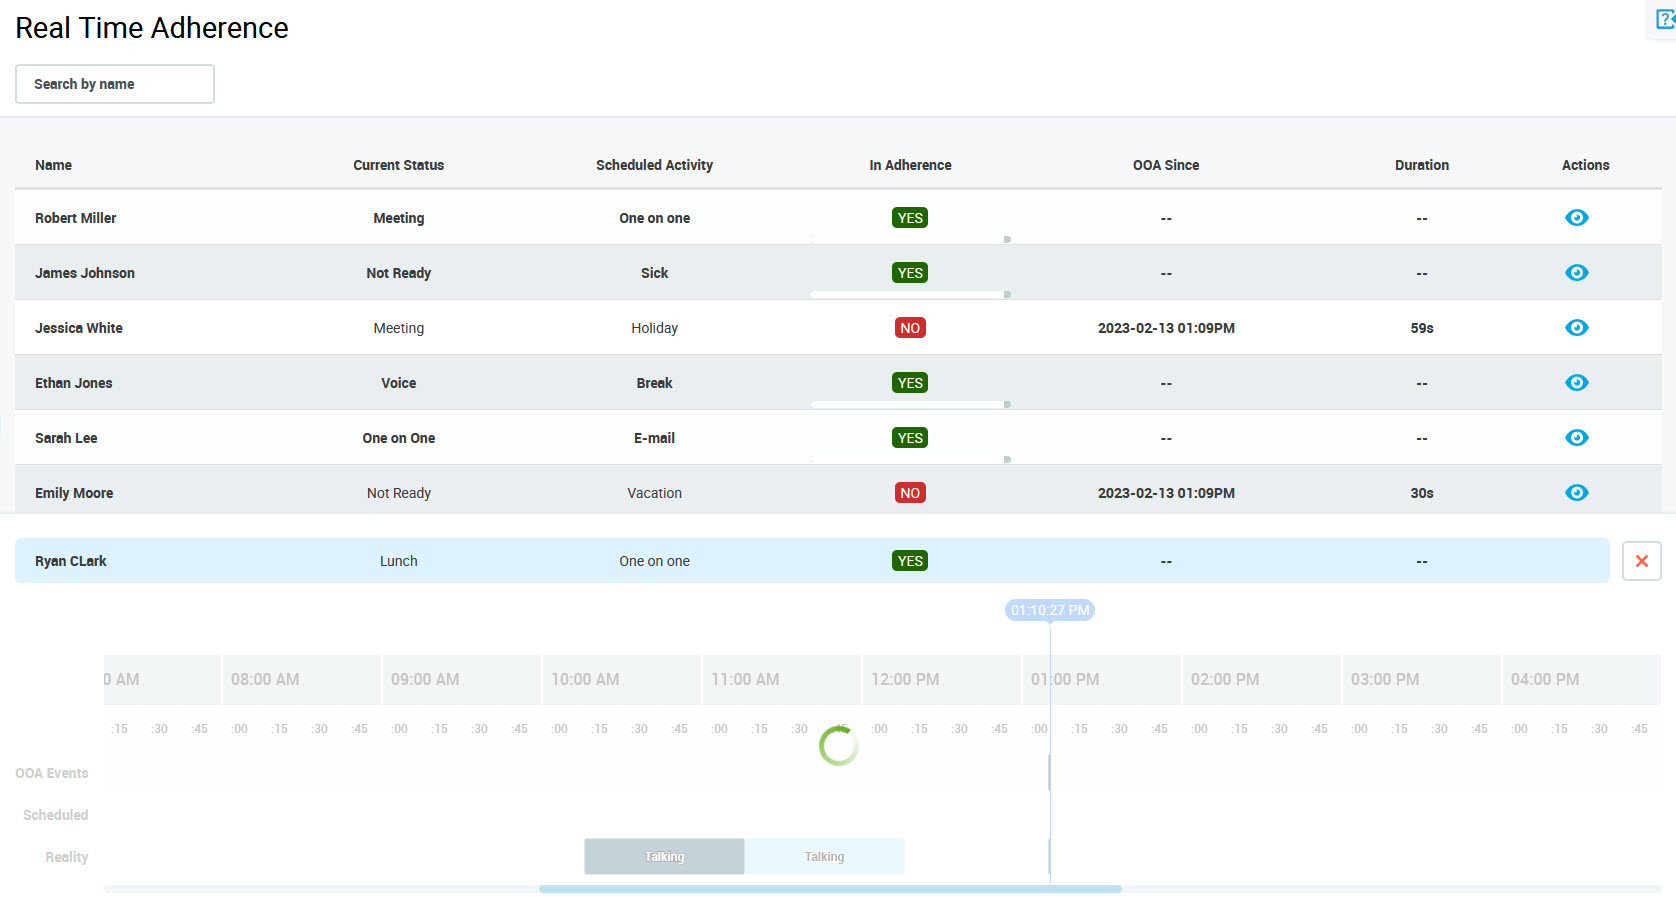
Click the notification to be redirected to the detailed view of the person on the Real Time Adherence screen.
Disabling RTA Notifications
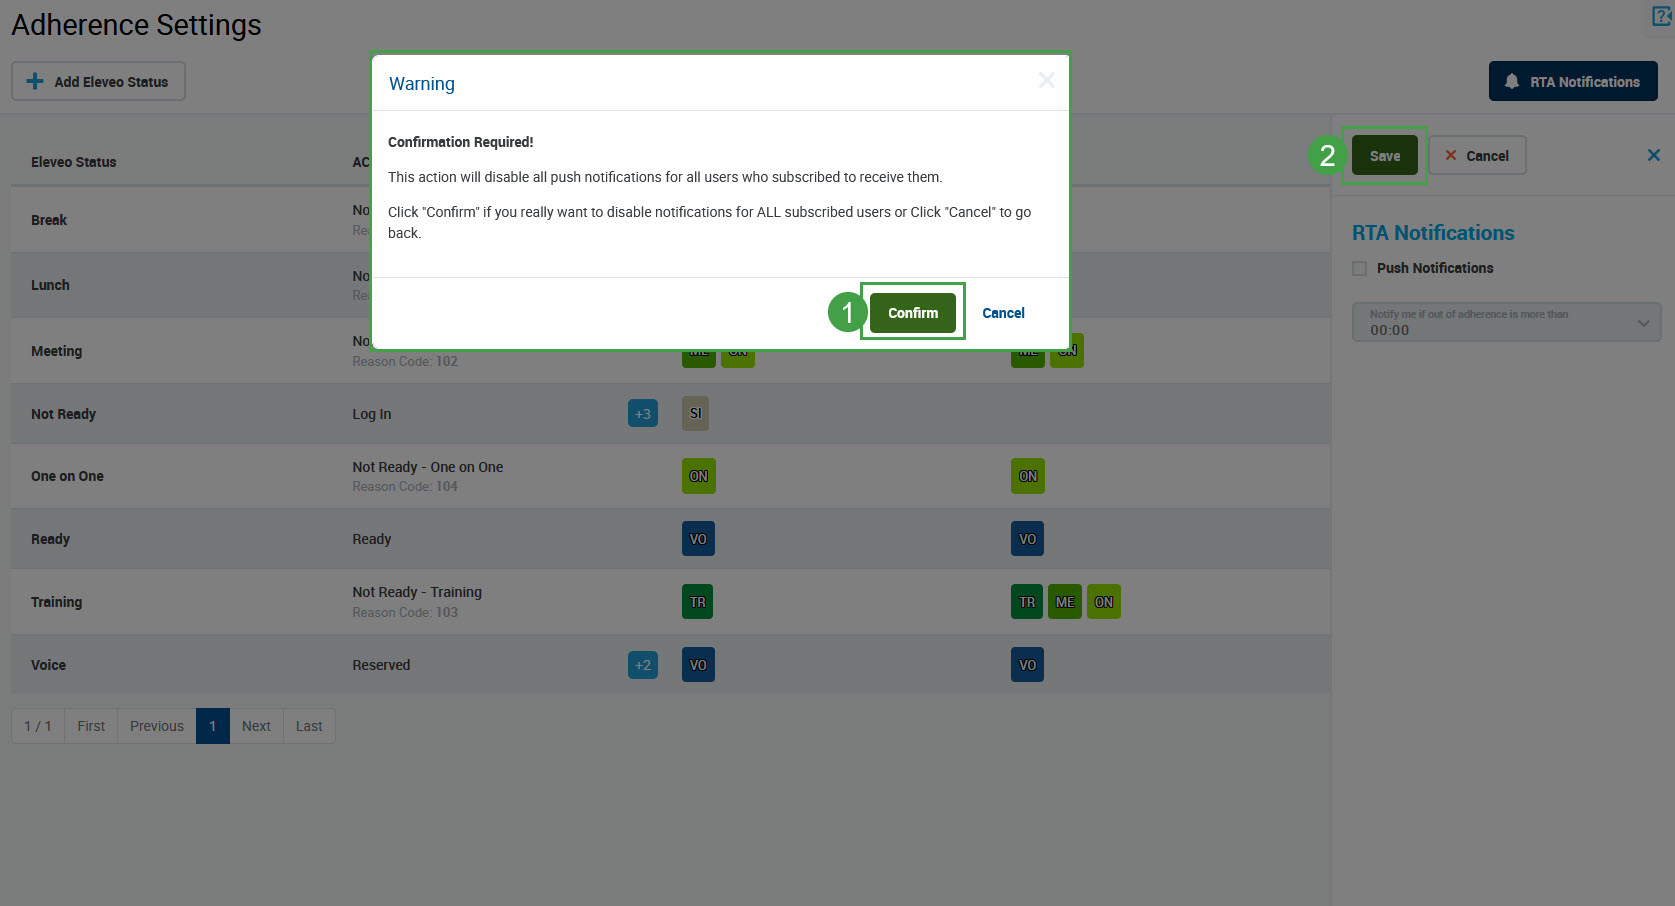
To disable notifications globally, uncheck the Push Notifications box and click Save.
Click Confirm and then Save to disable notifications.
JavaScript errors detected
Please note, these errors can depend on your browser setup.
If this problem persists, please contact our support.