
Managing Shift Templates
Overview
Shift templates are pre-configured shift patterns that the scheduling engine must adhere to while generating a schedule. They simplify the schedule creation process because there is no need to manually configure a shift for each person included in a schedule.
Each person can have only one shift template assigned. As a result, their shifts will be composed based on this template when the schedule is automatically generated.
Displaying Existing Shift Templates
To display shift templates that already exist in the system, expand the Administration module from within the navigation tree and click Shift Templates. The Shift Templates screen will display.
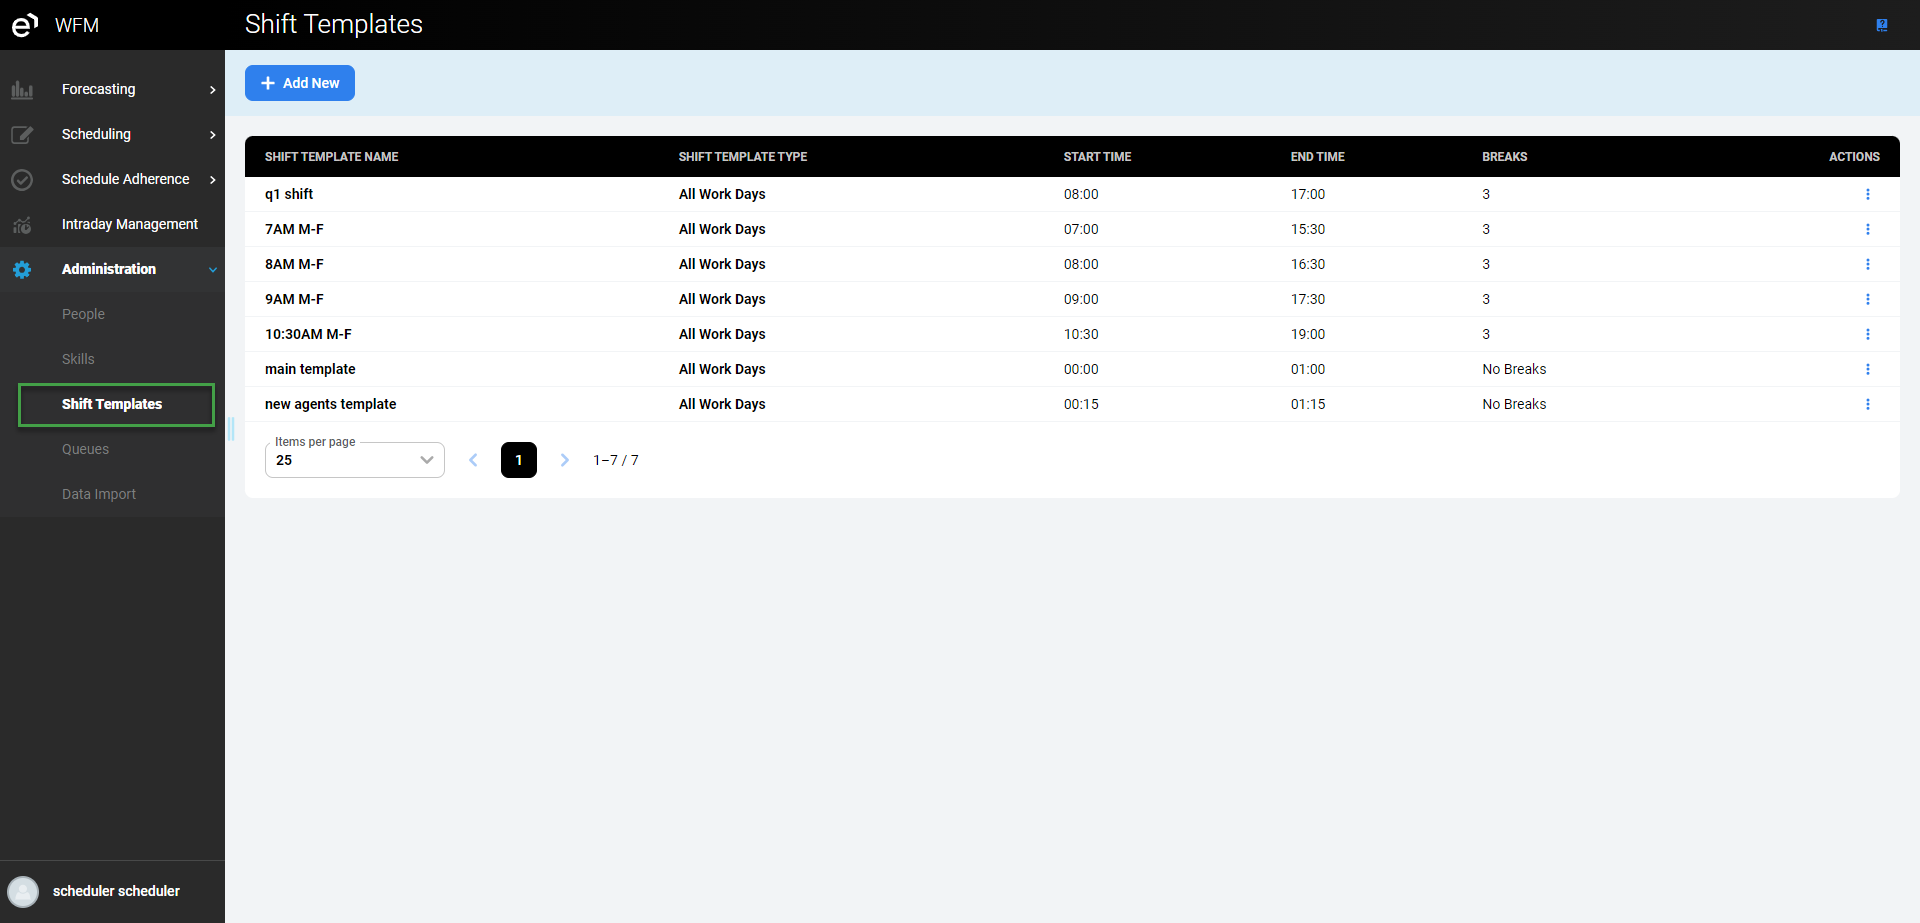
Basic information about each shift is displayed in the following columns:
Shift Template Name – the name of the shift template
Shift Template Type – the type of the shift (All Work Days or Even and Odd Week)
Start Time – the beginning of the shift
End Type – the end of the shift
Breaks – the number of breaks
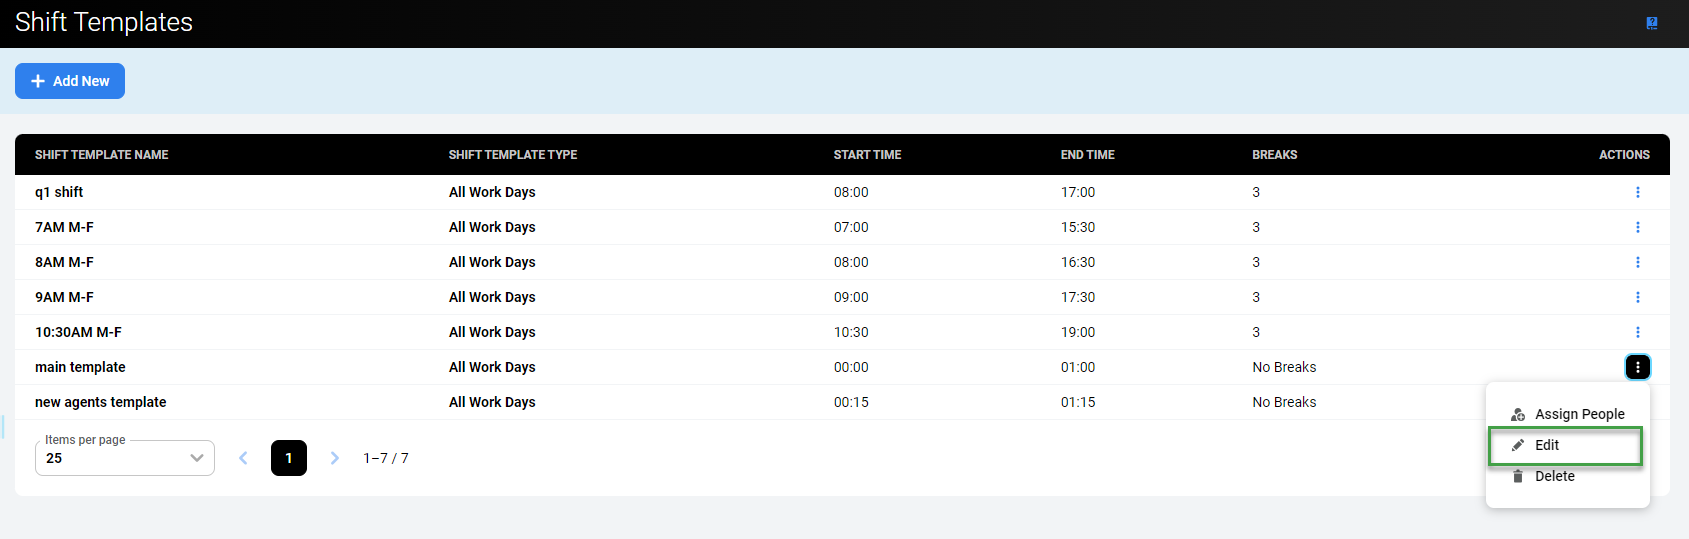
The Actions column enables actions related to the user:
Assign People button allows for the assignment of people to the shift template – this option is available only to users with the
WFM_ANALYSTrole assignedEdit button permits the modification of the shift template – this option is available only to a user with the
WFM_ANALYSTrole assignedDelete button allows for the removal of the shift template – this option is available only to users with the
WFM_ANALYSTrole assigned
Adding a New Shift Template
To add a new shift template, click the Add New button.
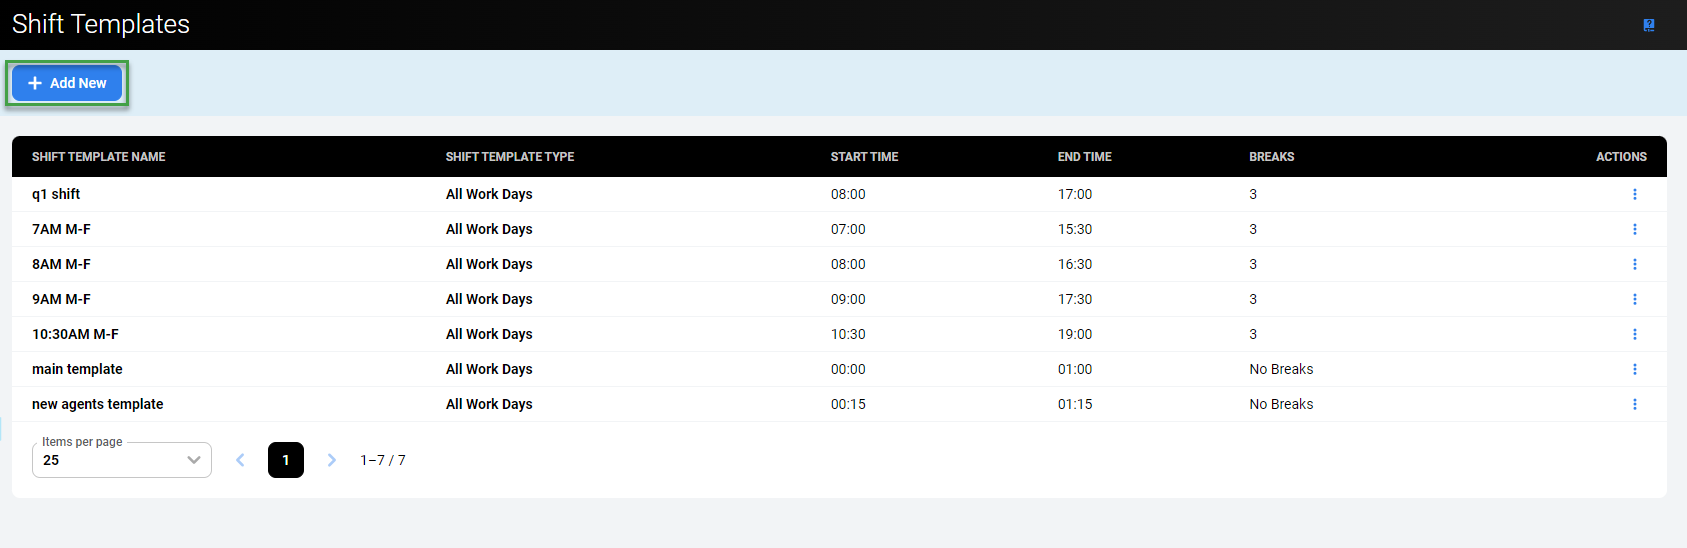
The New Shift Template pane will display.
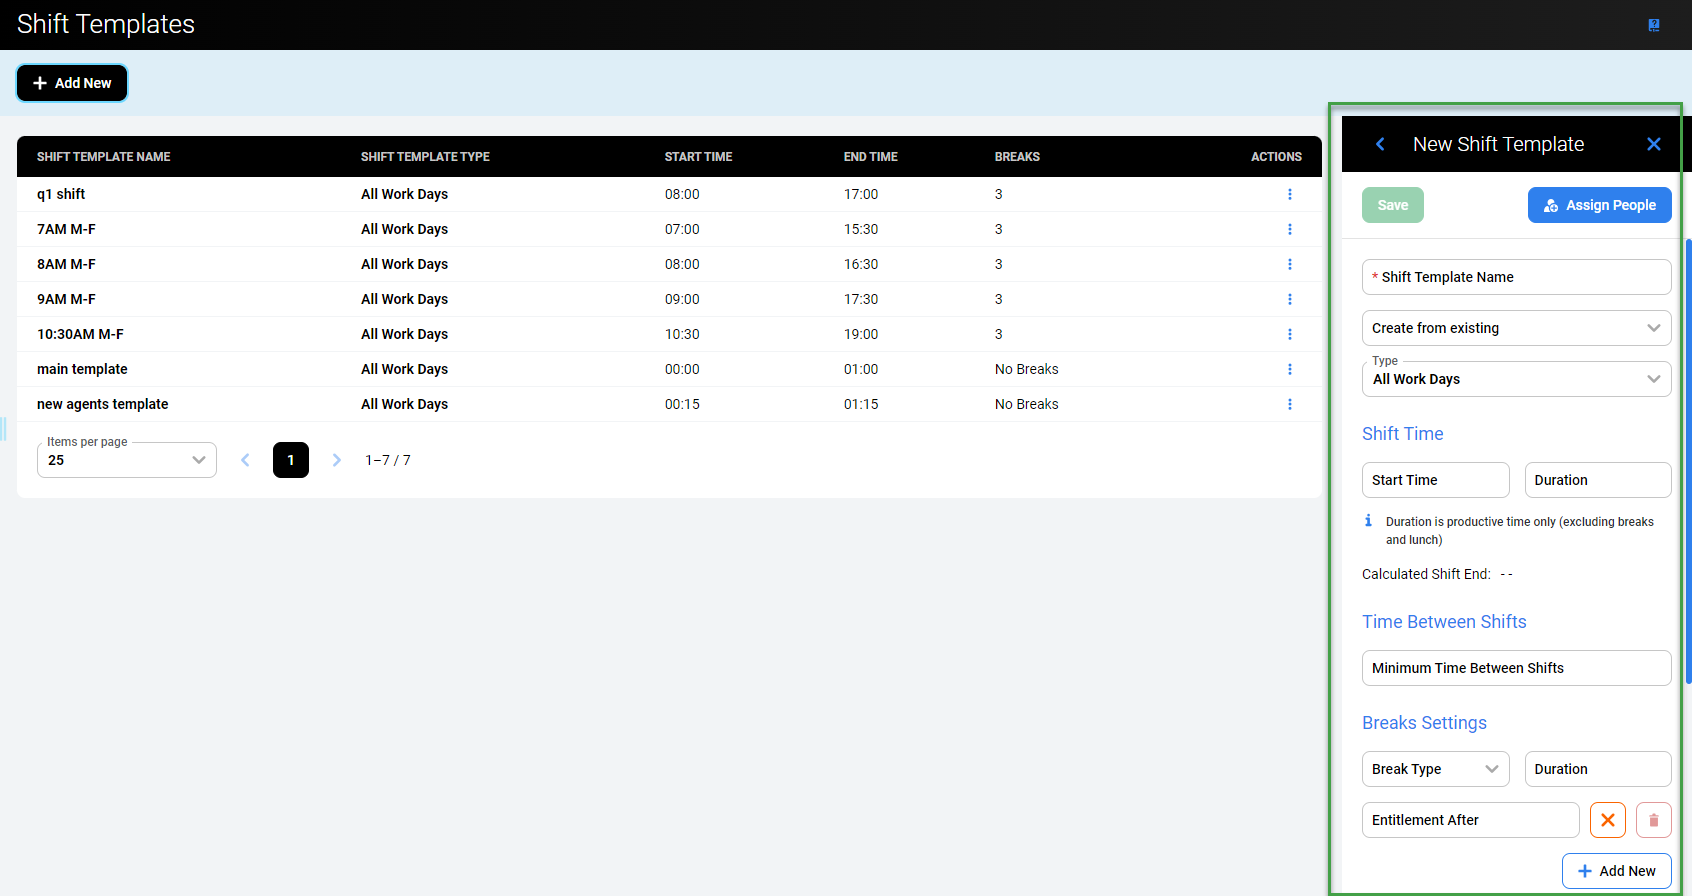
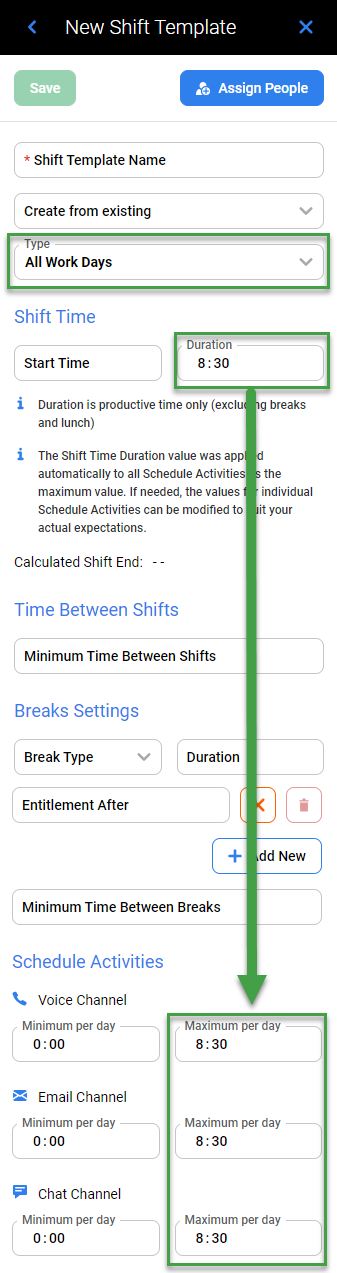
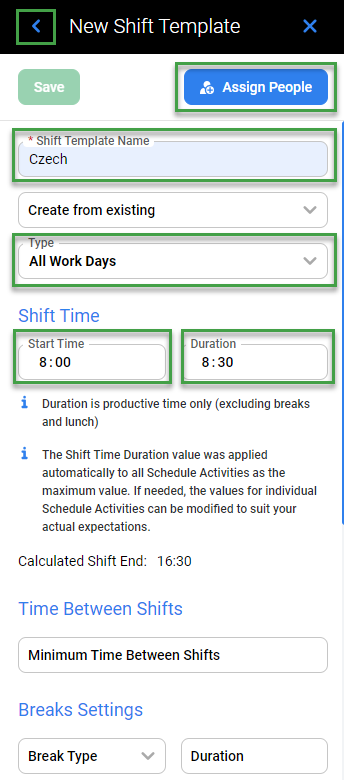
Fill in the following data:
Shift Template Name – the name of the shift template
Create from existing (optional) – select an existing shift template to automatically prefill all the settings except the template's name; all prefilled settings can be modified
Type – type of the shift template (All Work Days or Even and Odd Week)
Shift Time:
Start Time – beginning of the shift
Duration – duration of the shift (productive time only, excluding breaks and lunch; this value will be also applied to Maximum per day values for all Schedule Activities)
Time Between Shifts – minimum time between the end of one shift and the beginning of another
Break Settings (optional; several breaks can be added; click Add New to add a new break):
Break Type – type of the break (Break or Lunch)
Duration – duration of the break
Entitlement After – minimum work time before a person is entitled to have a break, as well as the latest possible start of this break (more details can be found below)
Minimum Time Between Breaks (optional) – minimum time between the start of a shift and the start of the first break, between the end of one break and the beginning of the next one, or between the end of the last break and the end of a shift
Schedule Activities:
Voice Channel:
Minimum per day – minimum time that should be dedicated to this channel during the shift
Maximum per day – maximum time that should be dedicated to this channel during the shift
Email Channel:
Minimum per day – minimum time that should be dedicated to this channel during the shift
Maximum per day – maximum time that should be dedicated to this channel during the shift
Chat Channel:
Minimum per day – minimum time that should be dedicated to this channel during the shift
Maximum per day – maximum time that should be dedicated to this channel during the shift
Note the following parameters:
Type – the following types of shift templates can be selected:
All Work Days – all selected settings will apply to all workdays in the week
Even and Odd Week – two parallel configurations will be created, for an even week and for an odd week
To configure the Even and Odd Week type, follow the steps:
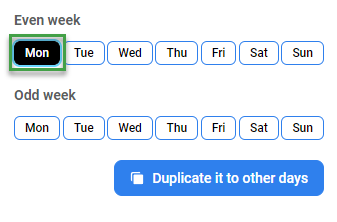
Start with the Even Week tab and select the first day that you will configure. By default, after selecting the Even and Odd Week type of a template, the Even Week is displayed and the first day is set to Sunday.
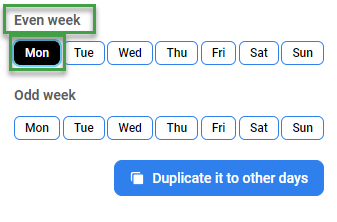
Configure the shift settings as described above. A green check mark indicates that all mandatory values are set for the day.
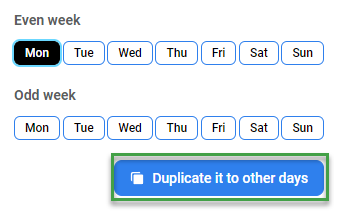
To apply the same settings to other days, click the Duplicate it to other days button.
Select other days and click Confirm selection.
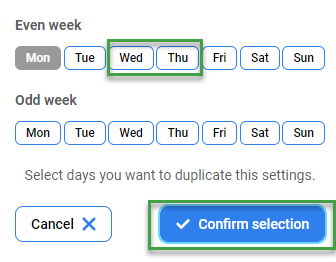
To configure other days of the even week with different values, select an unconfigured day and repeat the steps.
It is not mandatory to duplicate the settings to other days. It is possible to configure each day with different settings, and also to leave some days unconfigured.
Select the Odd Week tab and select the first day. Repeat steps 2-6.
Entitlement After – If this value is set, for example, to four hours, a person is entitled to have a break if the scheduled shift of this person is planned to be equal to or longer than four hours. However, this break can be assigned at any time during the first four hours of the shift (the latest beginning of this break is the beginning of the 5th hour of the shift).
Please note that a person won't be allowed to work without a break longer than half of the shift duration, and at the same time, a break must begin the latest in the hour set as the 'Entitlement After' value. Remember to adjust the values accordingly.
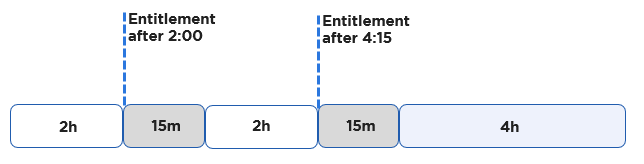
Case 1:
The first break:
- duration: 15 minutes
- entitlement after: 2 hours
The second break:
- duration: 15 minutes
- entitlement after: 4 hours
As a result, the last work element has a duration of 4 hours and 15 minutes, which is longer than half of the shift duration (8 hours). With such settings, a schedule won't be generated and an error will occur.

Case 2:
The first break:
- duration: 15 minutes
- entitlement after: 2 hours
The second break:
- duration: 15 minutes
- entitlement after: 4 hours 15 minutes
As a result, the last work element has a duration of 4 hours, which is half of the shift duration (8 hours).
Schedule activities – These values define how much time should be dedicated during the shift for the specific channels (Voice, Email and Chat). The default values for each channel are set to Minimum per day: 00:00 and Maximum per day: 00:00 which means that the activities using this channel should not be included in the shift. However, after filling in the Shift Time - Duration value (or modifying it later), this value is automatically applied to maximum values for all activities. It means that the shift duration can be fully dedicated to any of the schedule activities. If needed, the values for individual schedule activities can be modified to suit your actual needs.
Click the Assign People button or the arrow to expand the Available People pane.
The Available People pane allows for the assignment of people to the shift template. Only people who have no shift template assigned are displayed.
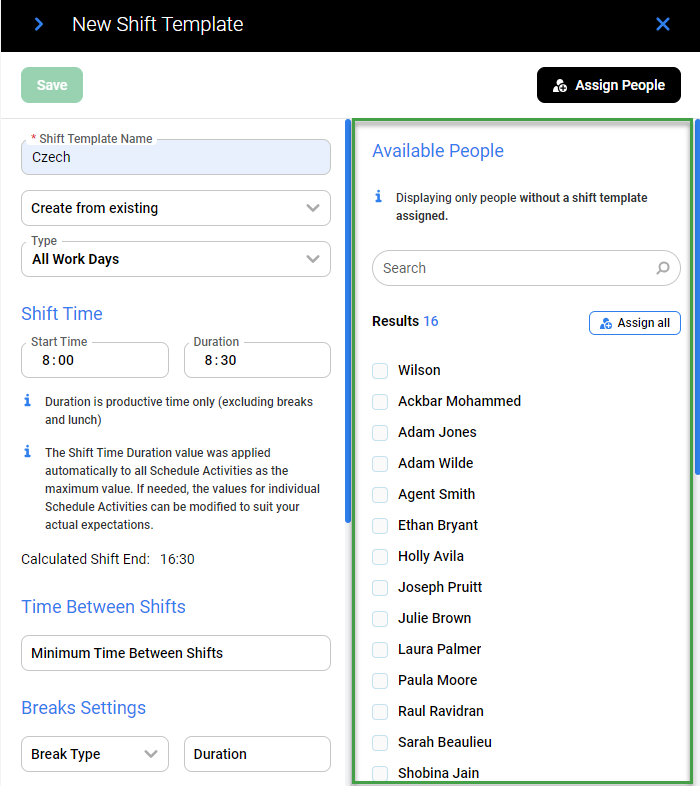
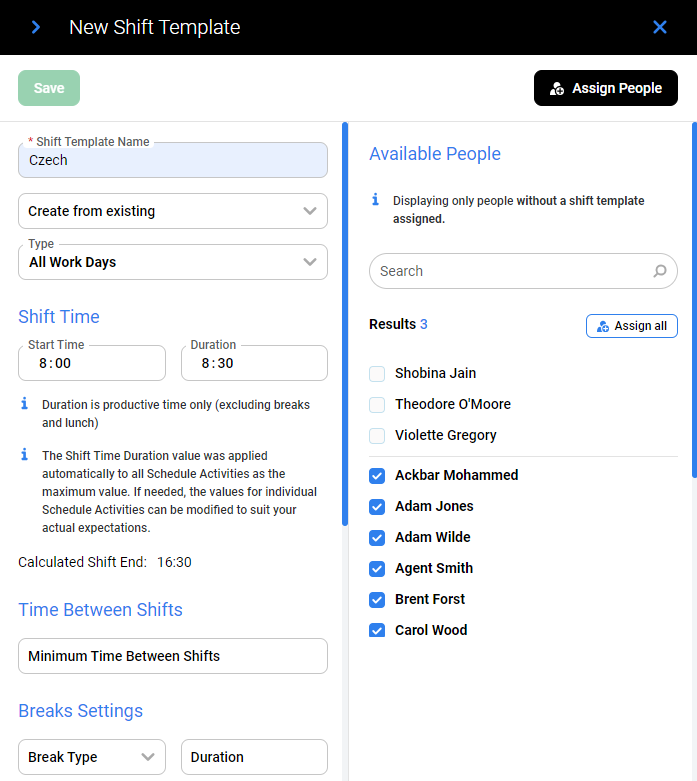
Use checkboxes to select people and assign them to the shift template. To assign all available people at once, select the Assign all box. To remove the selection, use the Unassign all button.
Note the following details:
It is not mandatory to assign people at this step. It is also possible to assign people to a shift template when adding or editing a person's details from within the People screen. However, if a person is assigned to a shift template from within the Shift Templates screen, this configuration change is reflected immediately on the People screen in the Shift column.
A person can have only one shift template assigned.
Click the Assign People button or the arrow to hide the Available People pane.

When all mandatory fields are filled in, the Save button becomes active. Click it to add a new shift template. Alternatively, click Cancel or the Close button to abandon changes.
Editing a Shift Template
To edit a shift template, click the Edit button in the Actions column for the template.
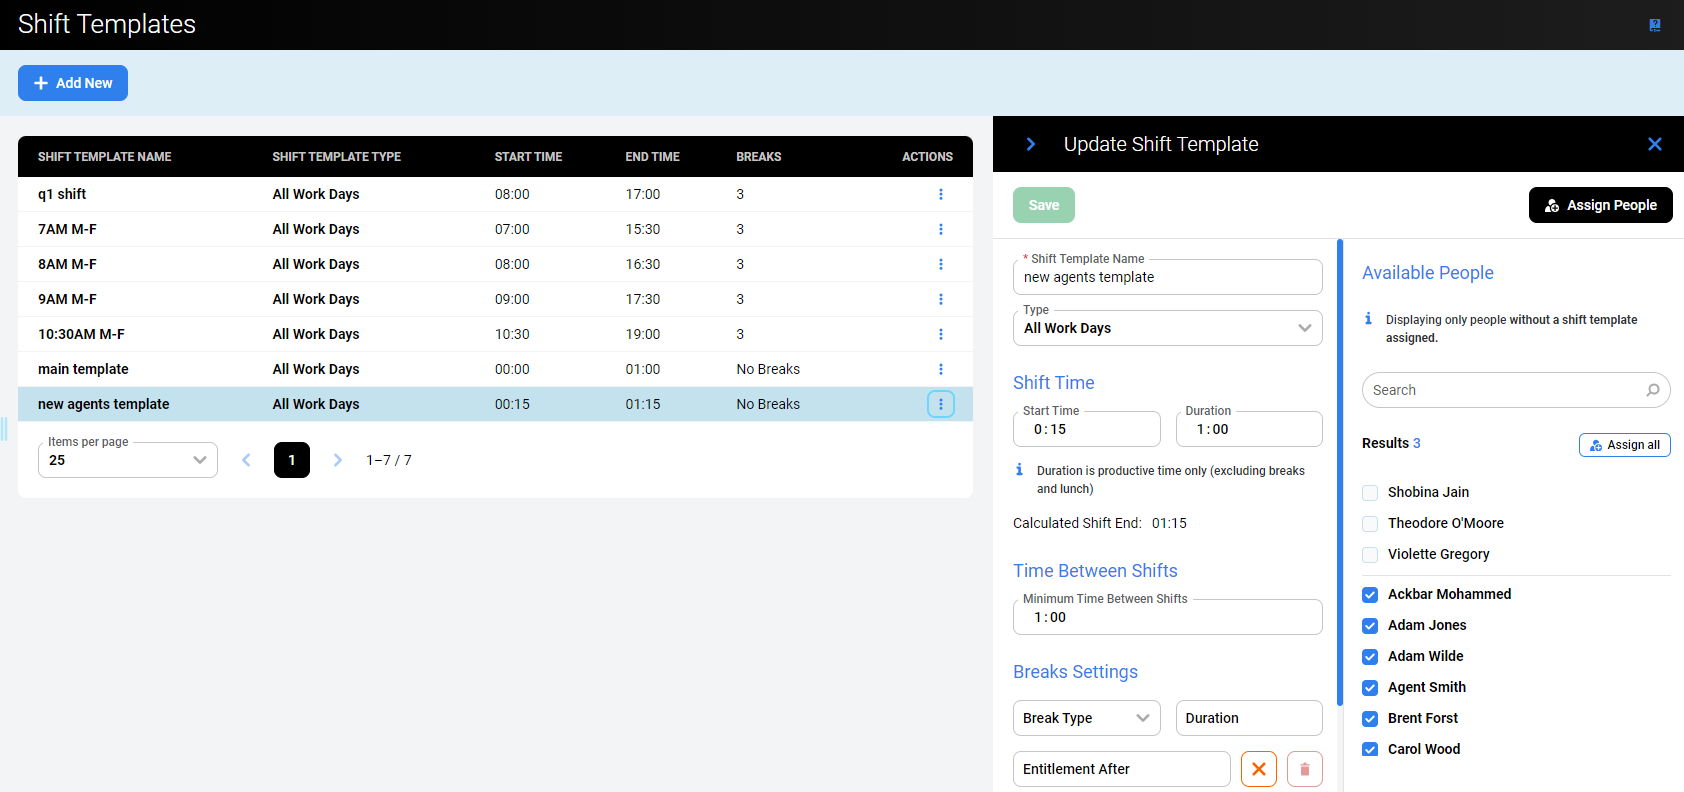
The Update Shift Template pane will display.
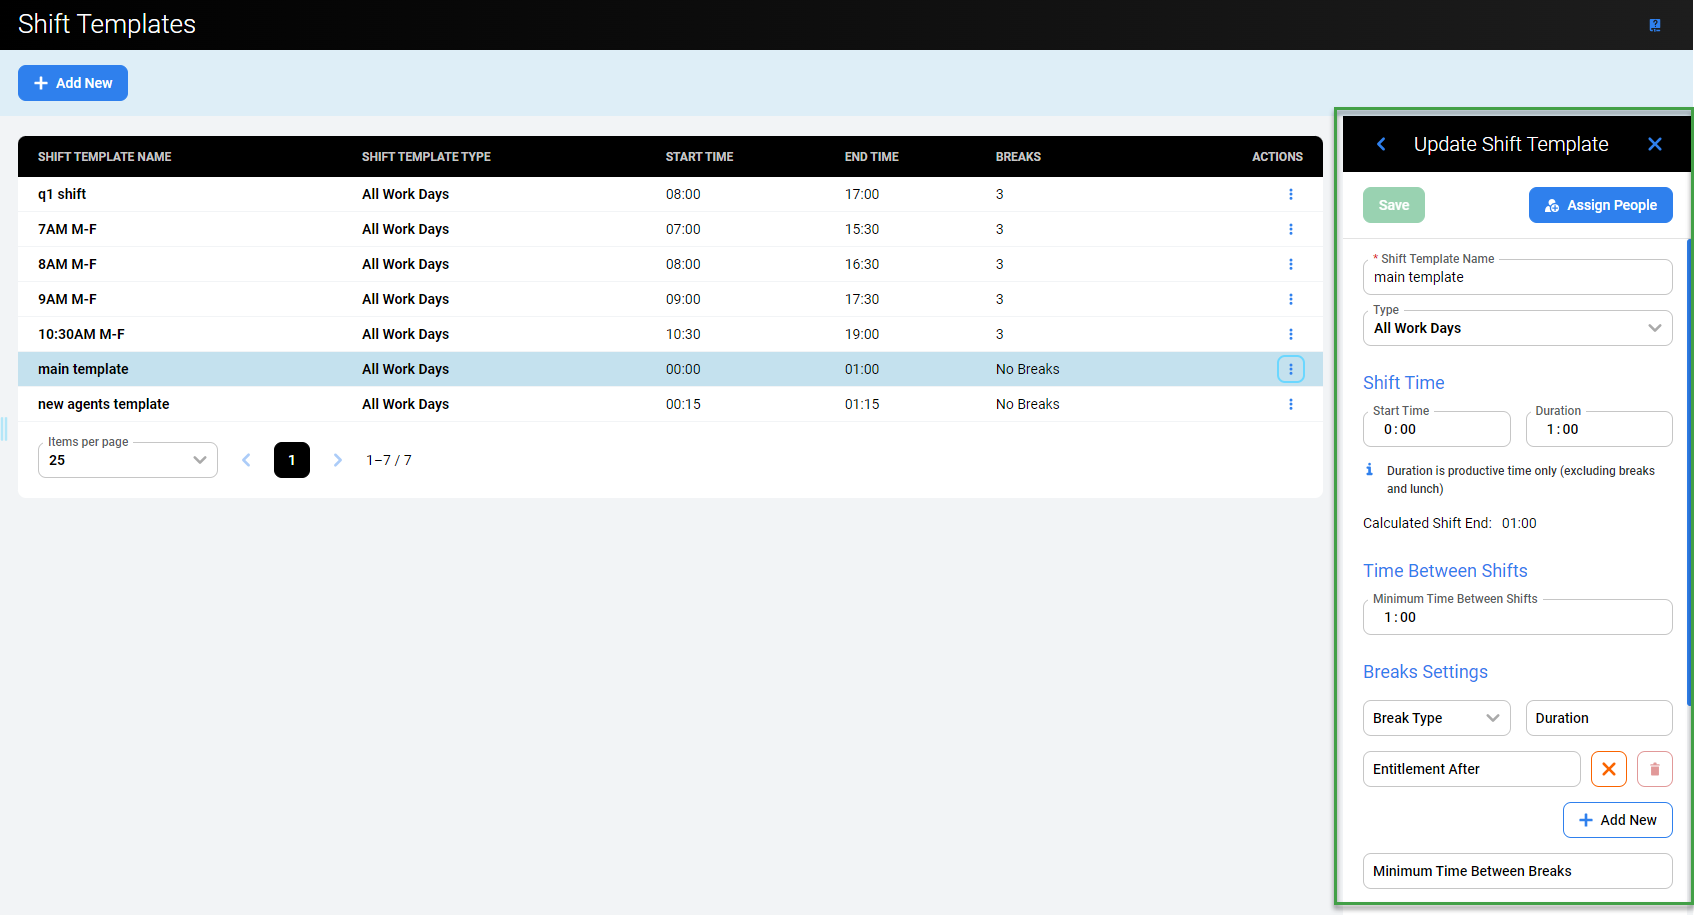
All parameters can be modified. Read more about the settings in the Adding a New Shift Template section above.
Click the Assign People button or the arrow to expand the Available People pane. It allows for the modification of people's assignments to a shift template.
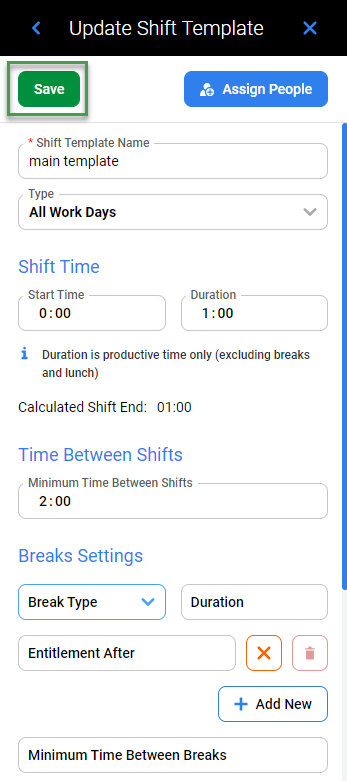
Click Save to save changes.
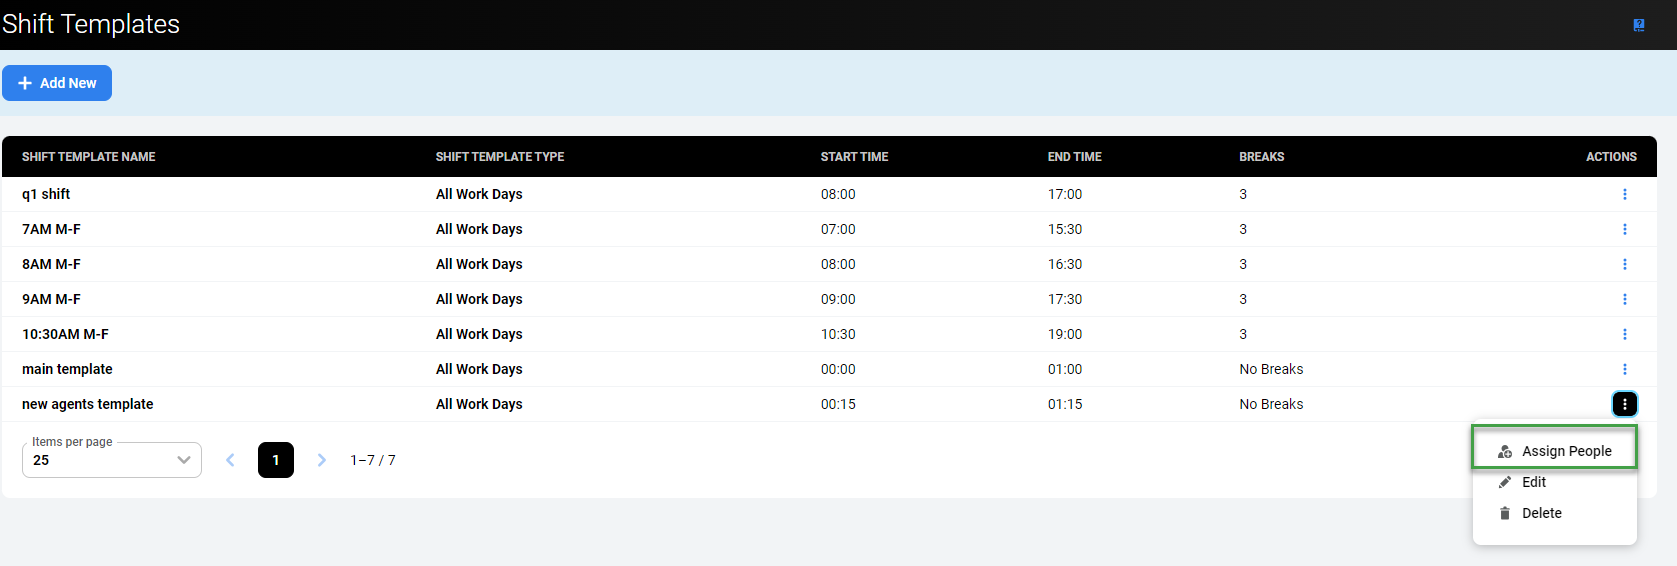
Assigning and Removing People
To assign people to a shift template (or remove them from a shift template), click the Assign People button.
The Update Shift Template and the Available People panes will display.
It is possible to add/remove people or modify the details of the shift template from within this pane. Jump to Adding a New Shift Template section above for more information.
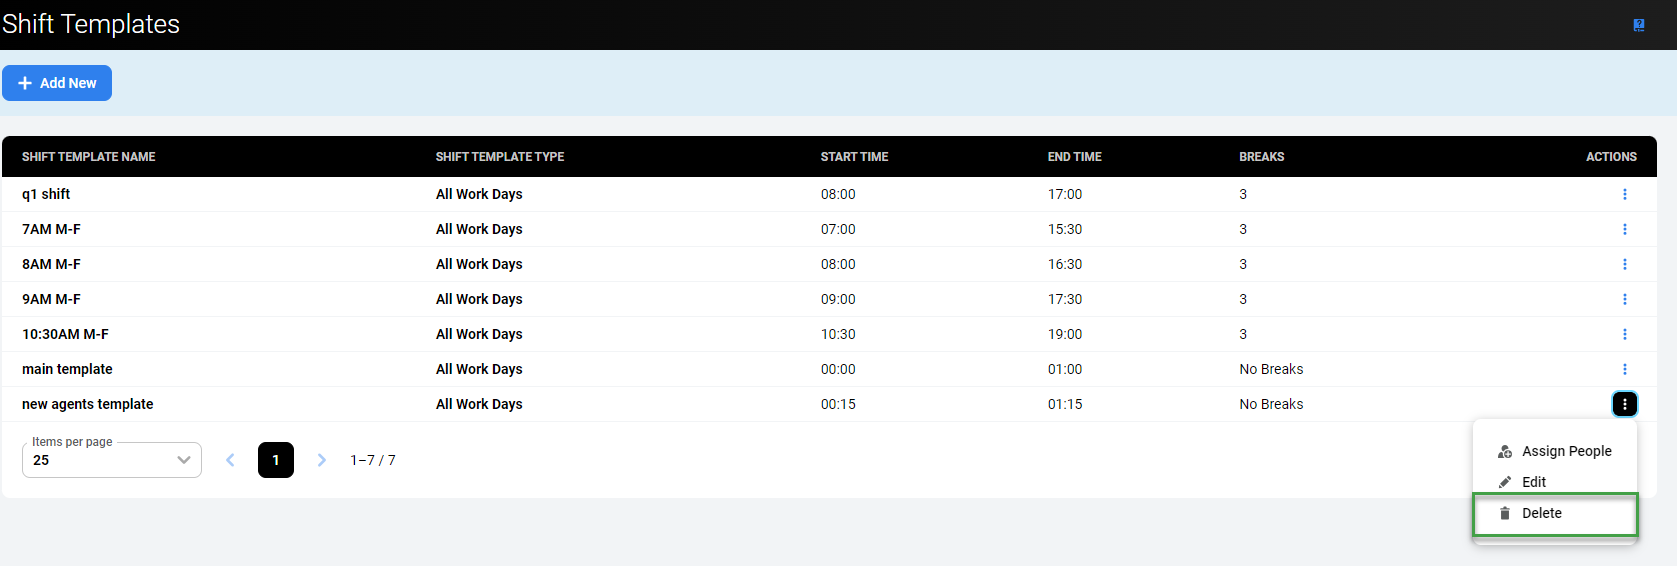
Deleting a Shift Template
To delete a shift template, click the Delete button.
A confirmation dialogue will appear, requesting that you confirm Do you really want to delete the chosen shift <shift template name>?
Click Delete to confirm the removal of the shift template.
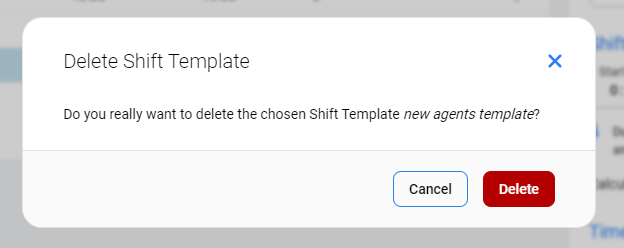
Alternatively, click Cancel to abandon changes.
Only shift templates that are not assigned to any person can be deleted.